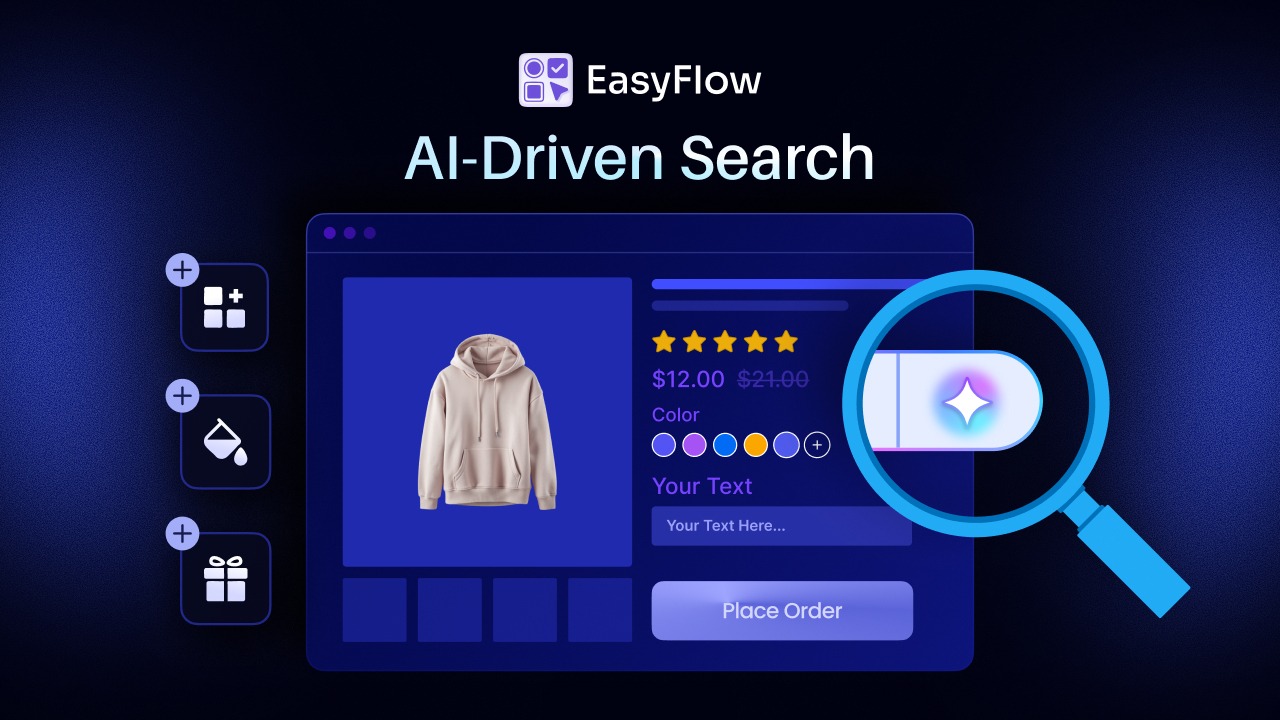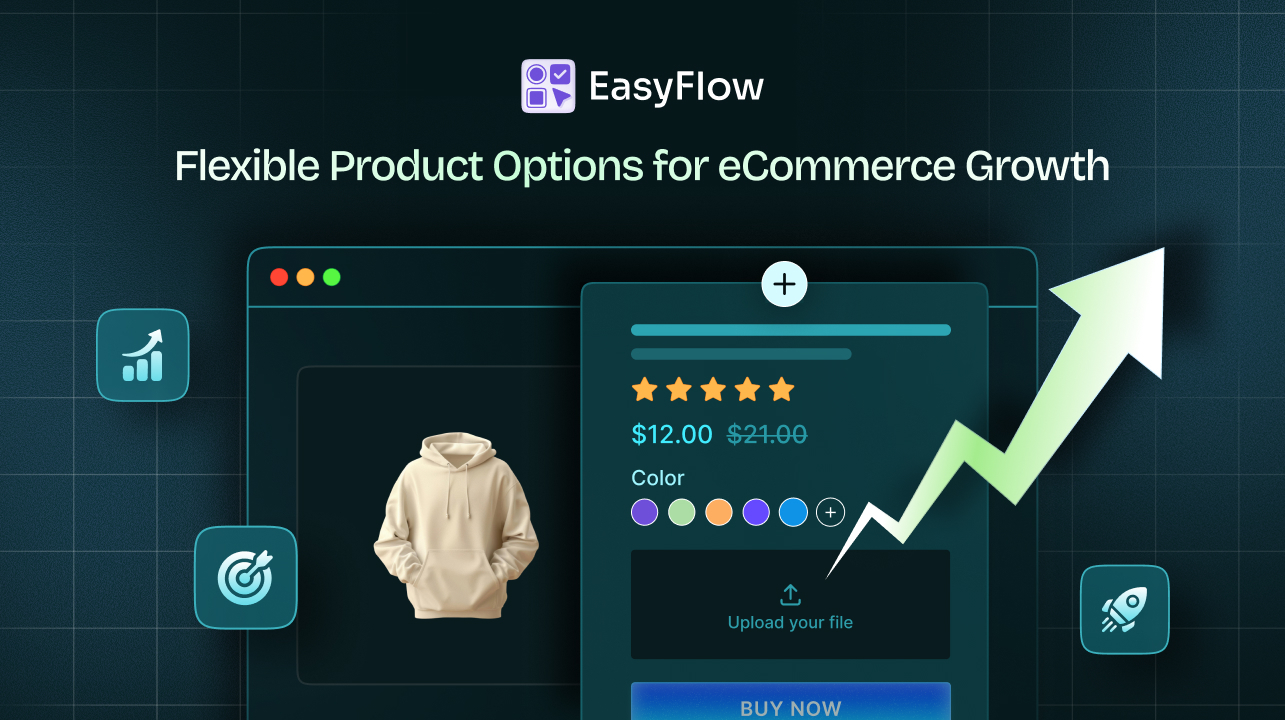
Ever landed on a product page with endless choices, most of which are not suitable for you? A single product page displaying only the options your customer truly needs makes them feel valued. This can multiply the order value while boosting user satisfaction. This is the power of conditional logic in Shopify, powered by the EasyFlow app, our go-to feature for providing your Shopify store customers a dynamic, personalized shopping experience.
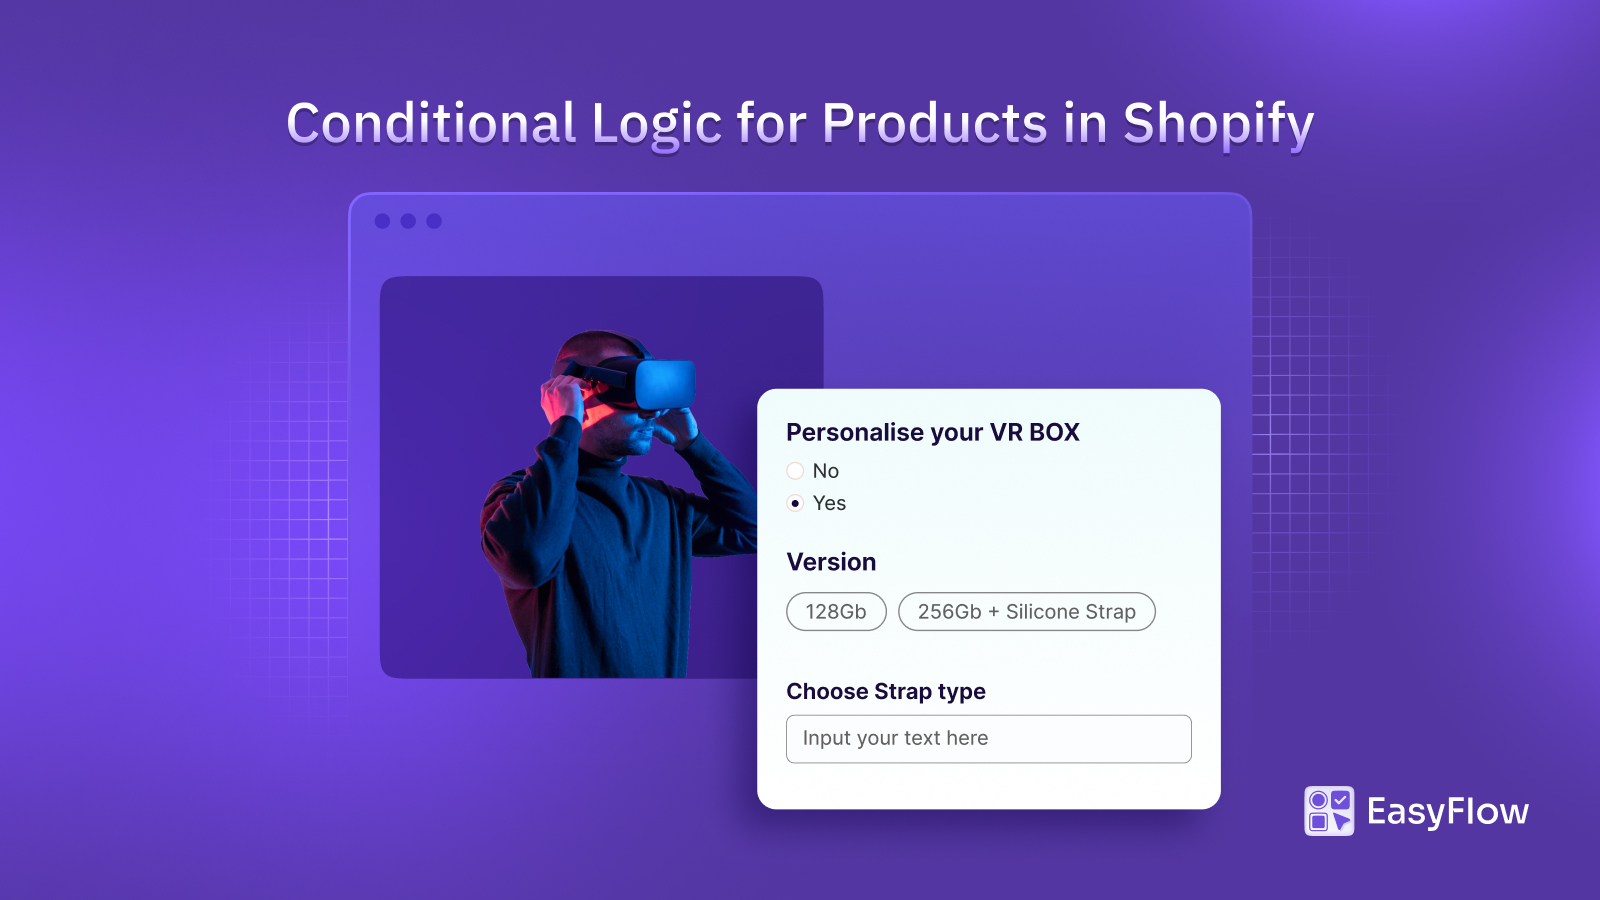
With conditional logic in Shopify, you can set up rules to show and hide options based on prior selections, guide shoppers along a personalized way, and eliminate confusing option clutter. So, if you want to unlock dynamic product options in Shopify that resonate with each buyer, follow our guide and learn how to configure conditional logic in Shopify using the EasyFlow app.
💡 Why Go for Conditional Logic in Shopify?
Before getting started with the how‑to, let us start with a why! As a merchant, why customize separate product options for customers? And, how is conditional logic in Shopify a game‑changer for modern merchants?
By default, Shopify displays all product options at once, even when certain combinations do not make sense. This leads to decision fatigue and abandoned carts. EasyFlow Rules features let you apply conditional logic to Shopify stores so that only relevant choices appear, simplifying the way to make a purchase. This reduces cognitive load, builds trust by guiding each customer to valid configurations. Thus, alongside boosting user experience, you will see a rise in sales and profit in your Shopify store.
Shopify Conditional Logics with EasyFlow: Advantages
Implementing dynamic product options with conditional logic in Shopify results in multiple advantages:
- Enhanced user experience: Clean interfaces where customers only see relevant choices lead to faster decisions and fewer errors.
- Reduced returns: By hiding incompatible selections upfront, merchants cut down on post‑purchase hassles and returned items.
- Increased average order value: Tailored upsells like showing premium add‑ons only when specific base options are selected boost revenue in each cart.
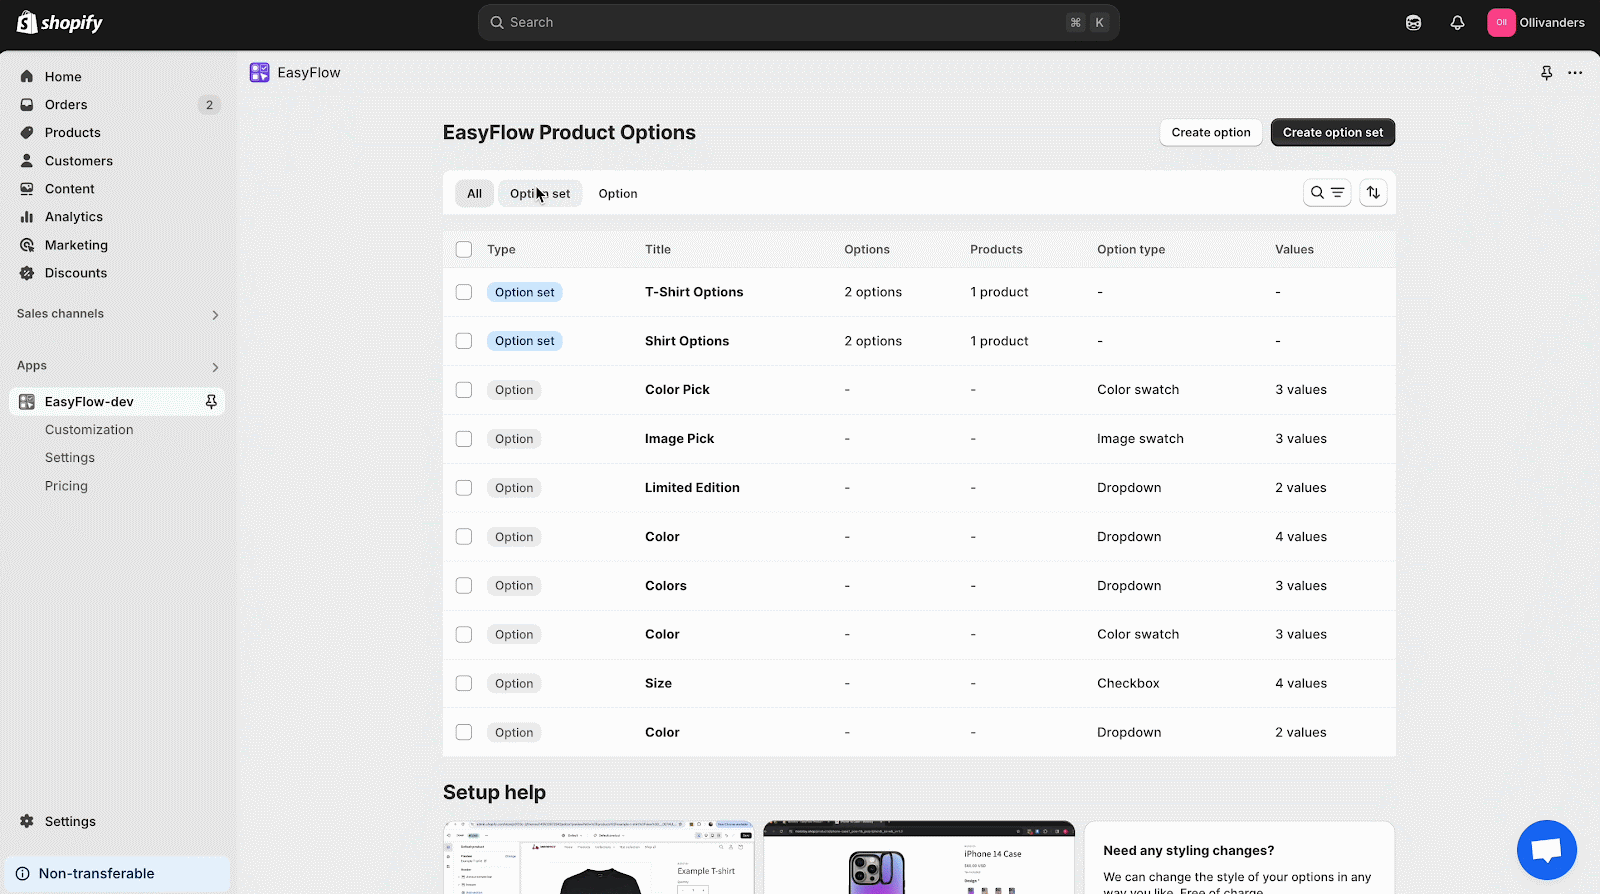
- Streamlined management: With option sets in EasyFlow, you manage logic in one central place rather than editing each product individually.
These benefits show why adopting conditional logic for your Shopify store is no longer optional – it is essential for merchants serious about scalable product options.
📑 How Conditional Logic Works in Shopify with EasyFlow
Now, let us clarify the mechanics behind conditional logic in Shopify and how EasyFlow Rules features bring it to life.
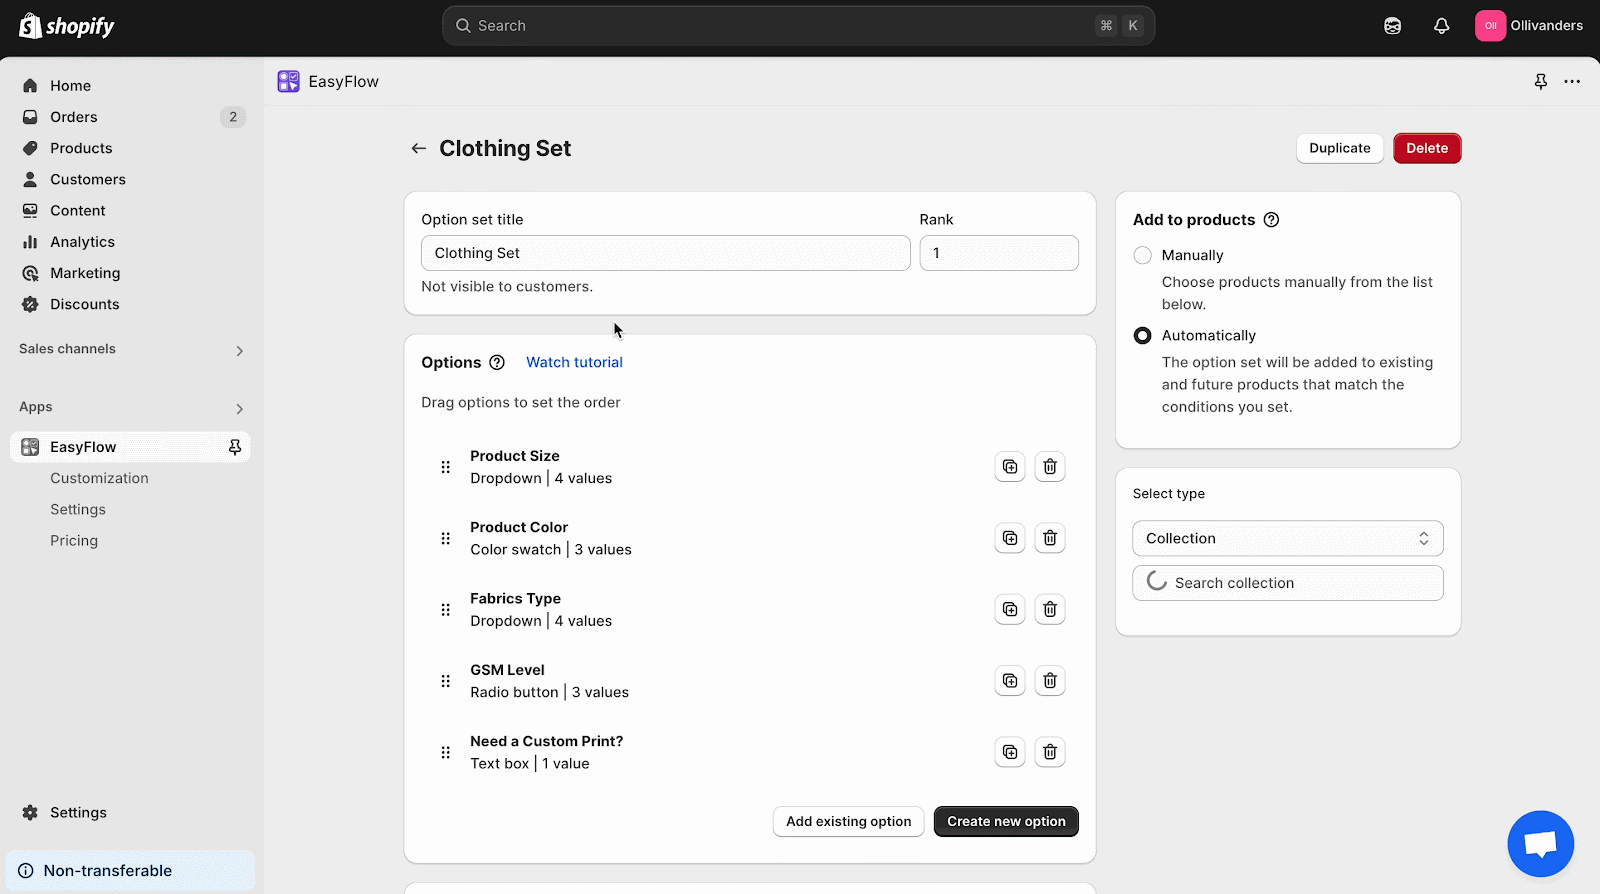
1. Rules at the option set level: Rules are live within an option set in EasyFlow, grouping together related options and conditions.
2. Three parts of a rule: There are three parts of a rule set. The Rule name is for your internal reference, so you can identify which rule applies to which option set and manage it better.
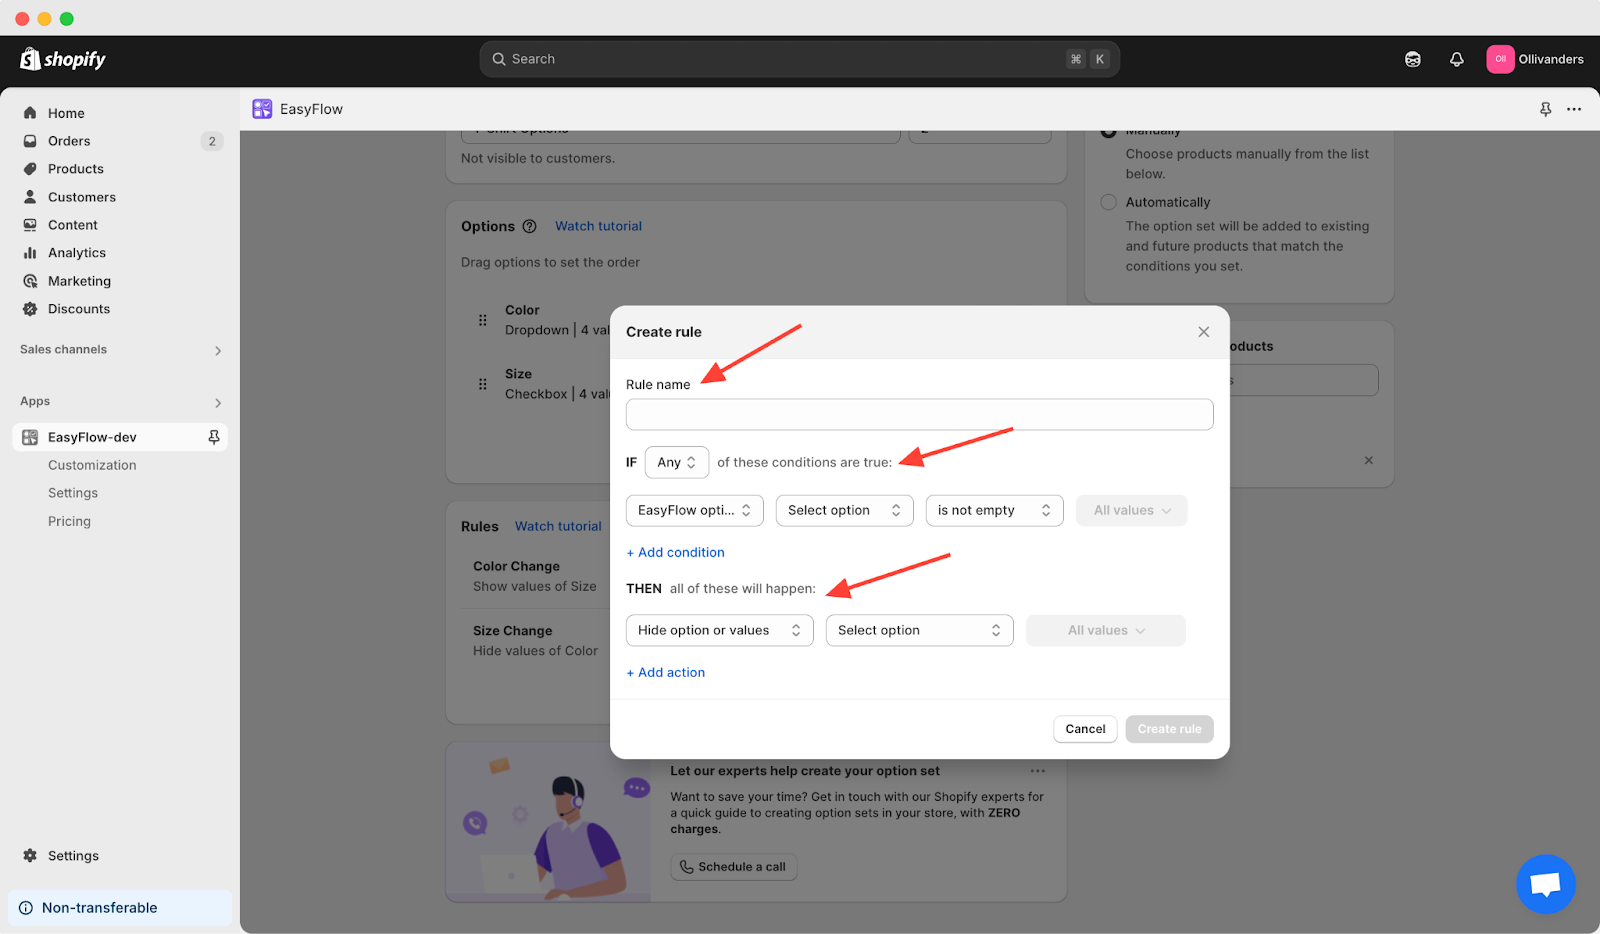
Then comes the rule conditions at the second. It specifies the customer selection(s) that trigger the rule. Once the second rule is configured, then comes the rule actions come at the third step. Rule action defines which options or values to show or hide as options when conditions are met.
3. Types of conditions & actions: Based on your needs, you can see multiple selection-based conditions (dropdowns, checkboxes, etc.) usage as “is one of / is not one of.” For input-based conditions (text box, number field), the check field is “is empty / is not empty.” For these conditions, you can choose to show or hide entire options or select individual values as actions.
📋 Step‑by‑Step Tutorial: Creating Your First Shopify Conditional Logic Rule
Before creating rules, make sure you have created an option set containing all the product options in Shopify that you want to apply it to. Once it is ready, follow these steps with the EasyFlow app:
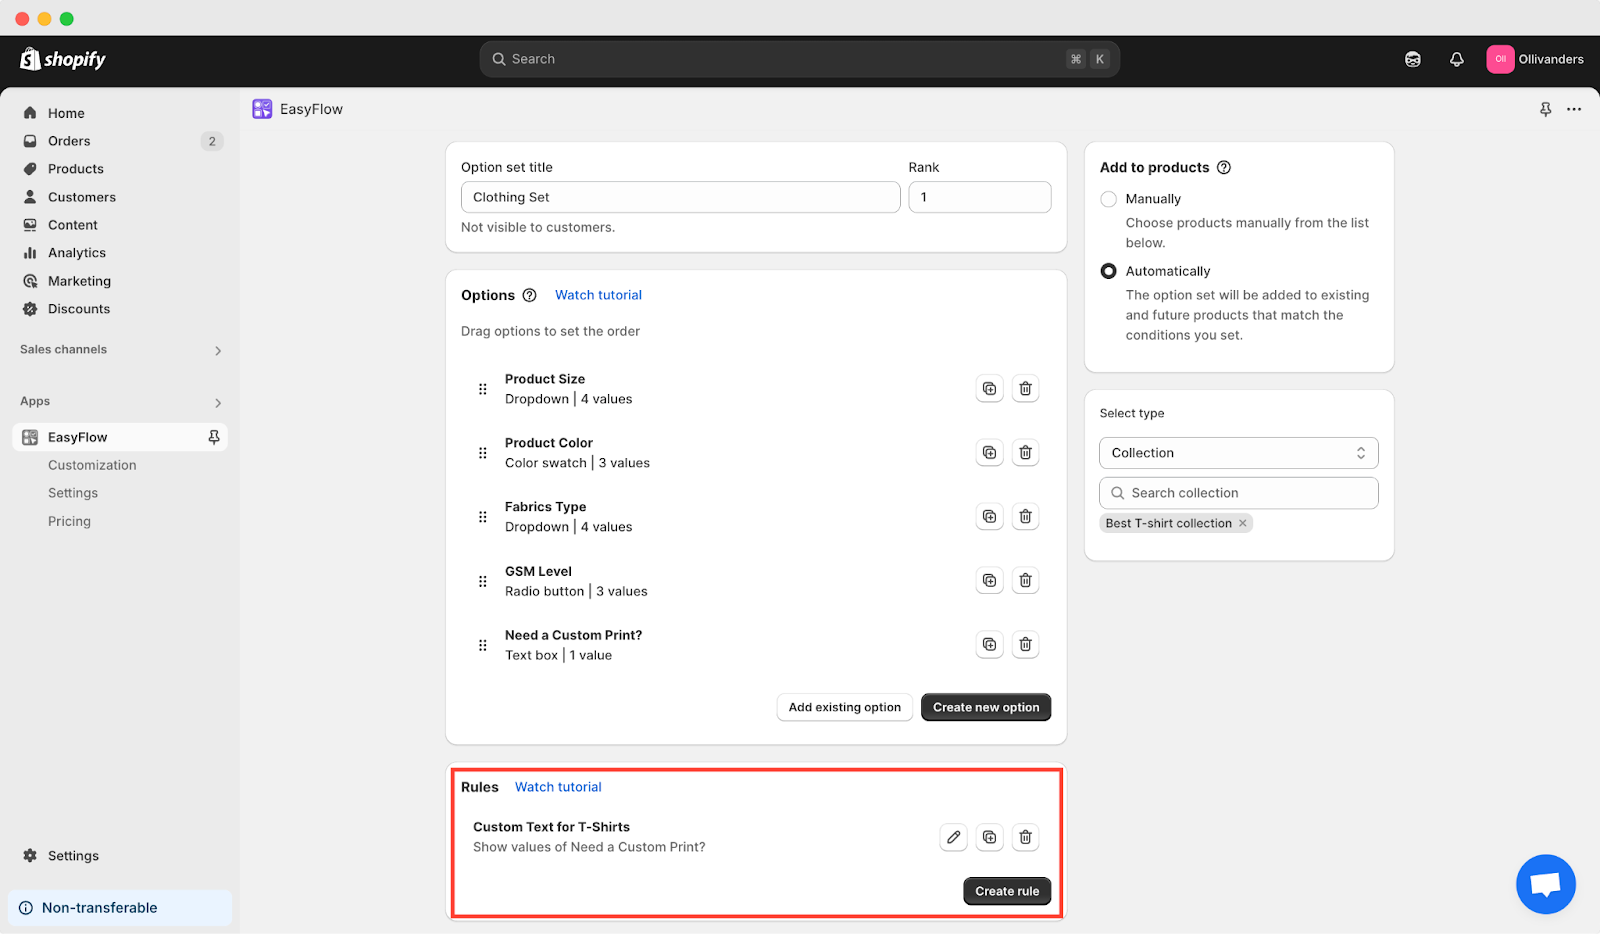
Step 1. Open the Option Set & Access Rules
Log in to Shopify and navigate to option sets in the EasyFlow app dashboard. Select your target set, scroll to the Rules section and click ‘Create rule’. This step centralizes your logic. By placing rules at the set level, you avoid repetitive configurations across individual products.
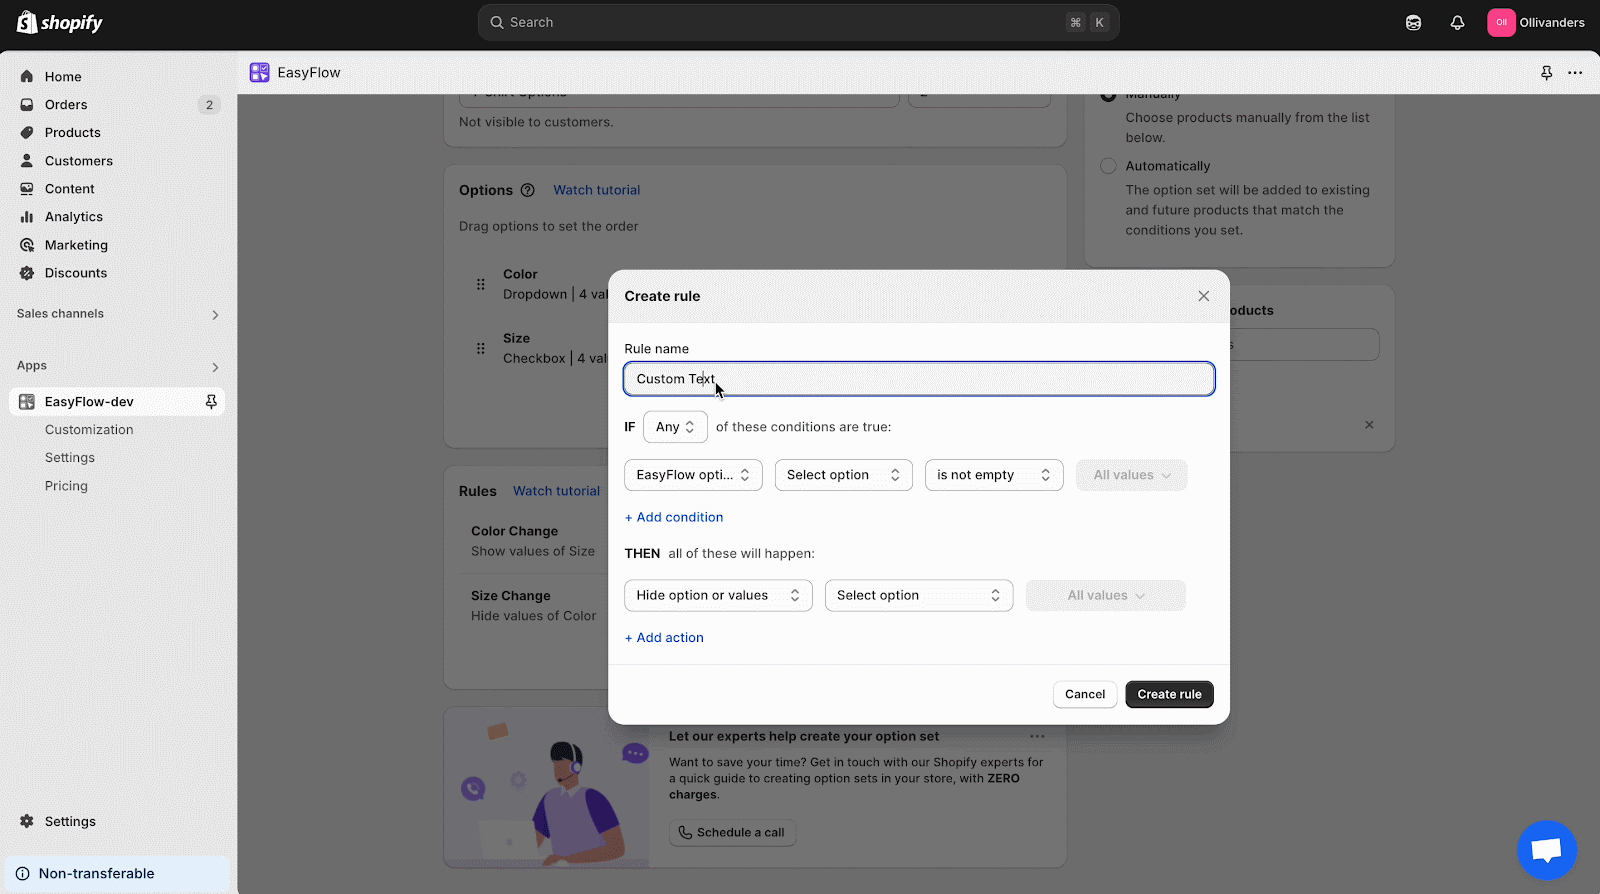
Step 2. Define Your Rule Name
Give it a concise, descriptive name depending on your product type, like “Color Change.” This helps you later when you duplicate or troubleshoot rules.
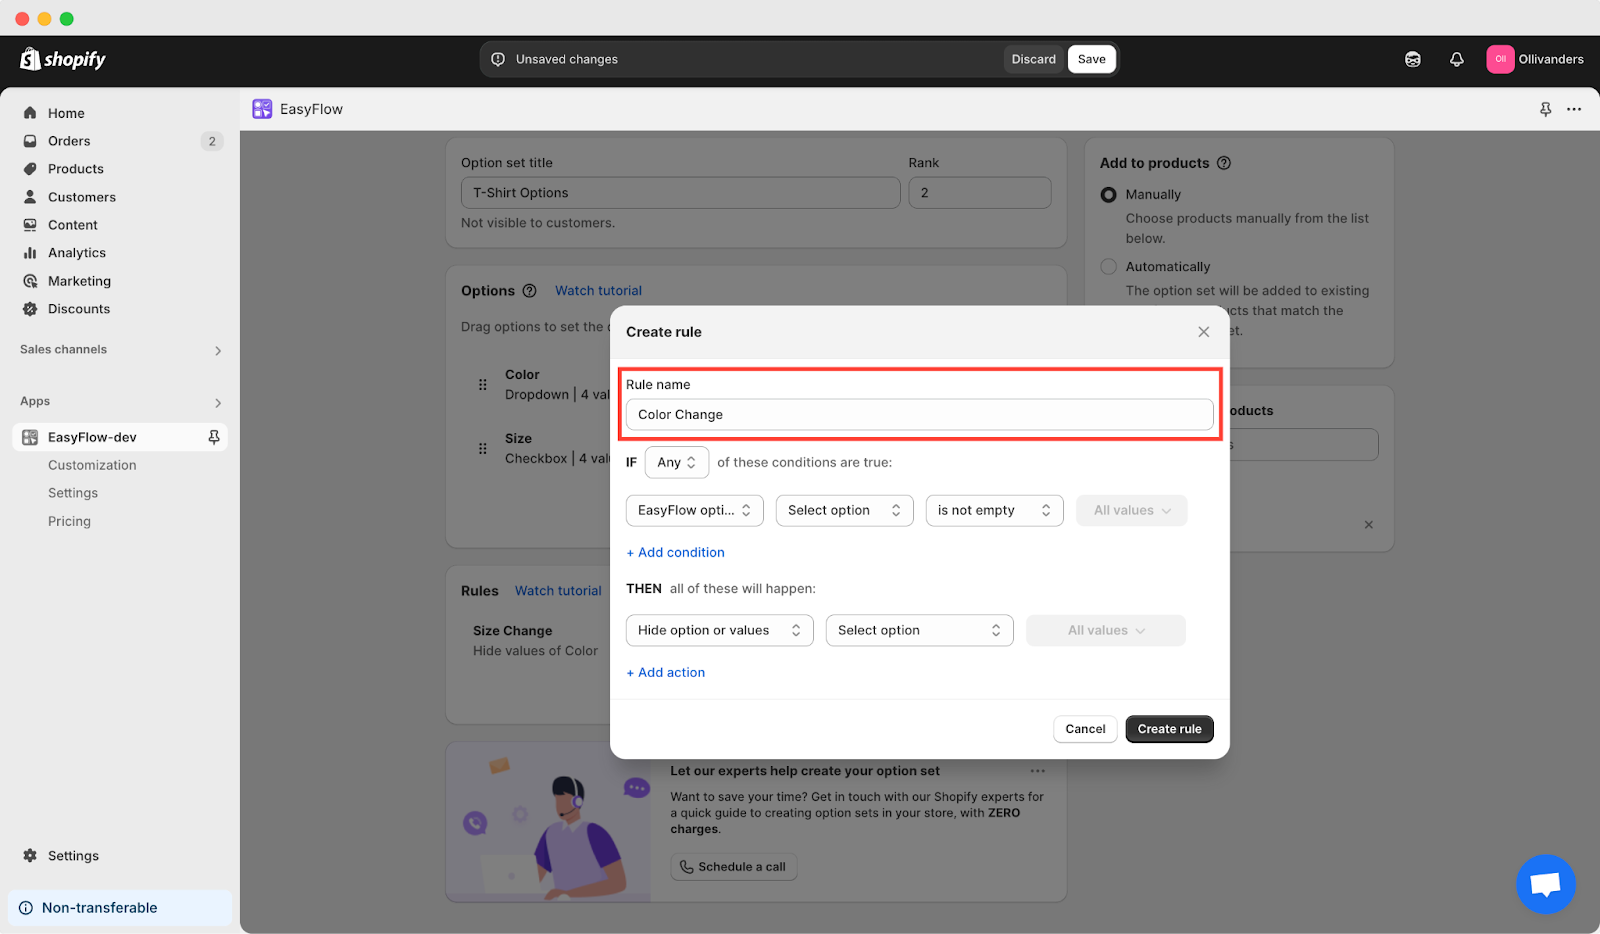
3. Add Conditions
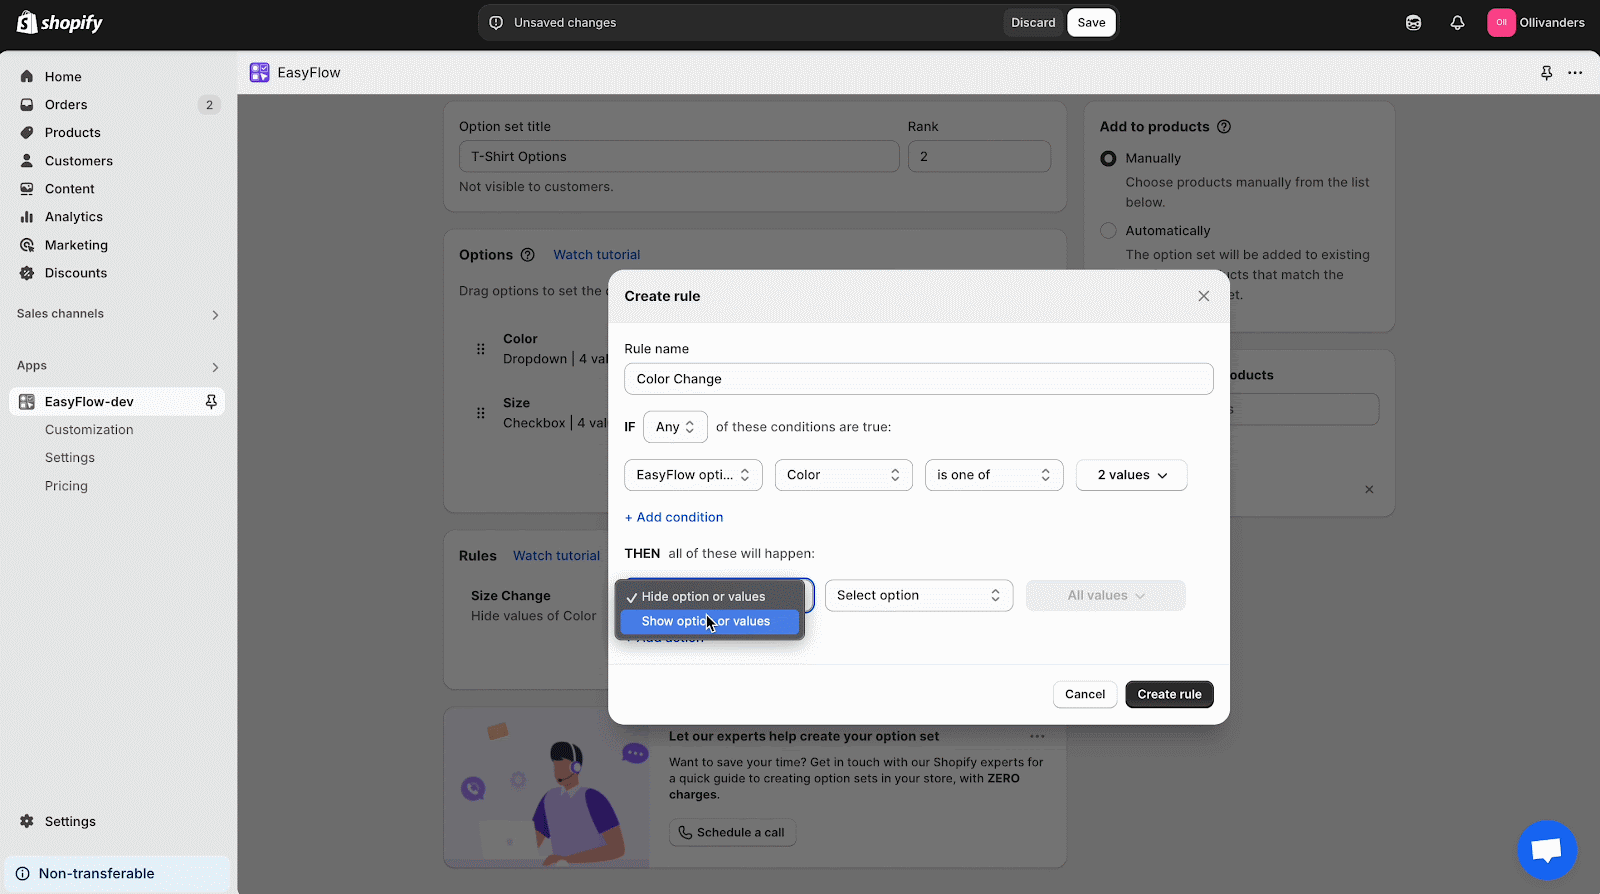
Click Add Condition to specify the trigger. Choose the option whose selection drives the rule. For example, the “Color” checkbox. Set conditions using conditional logic in Shopify principles—for example, select product color → is one of → specific values (colors).
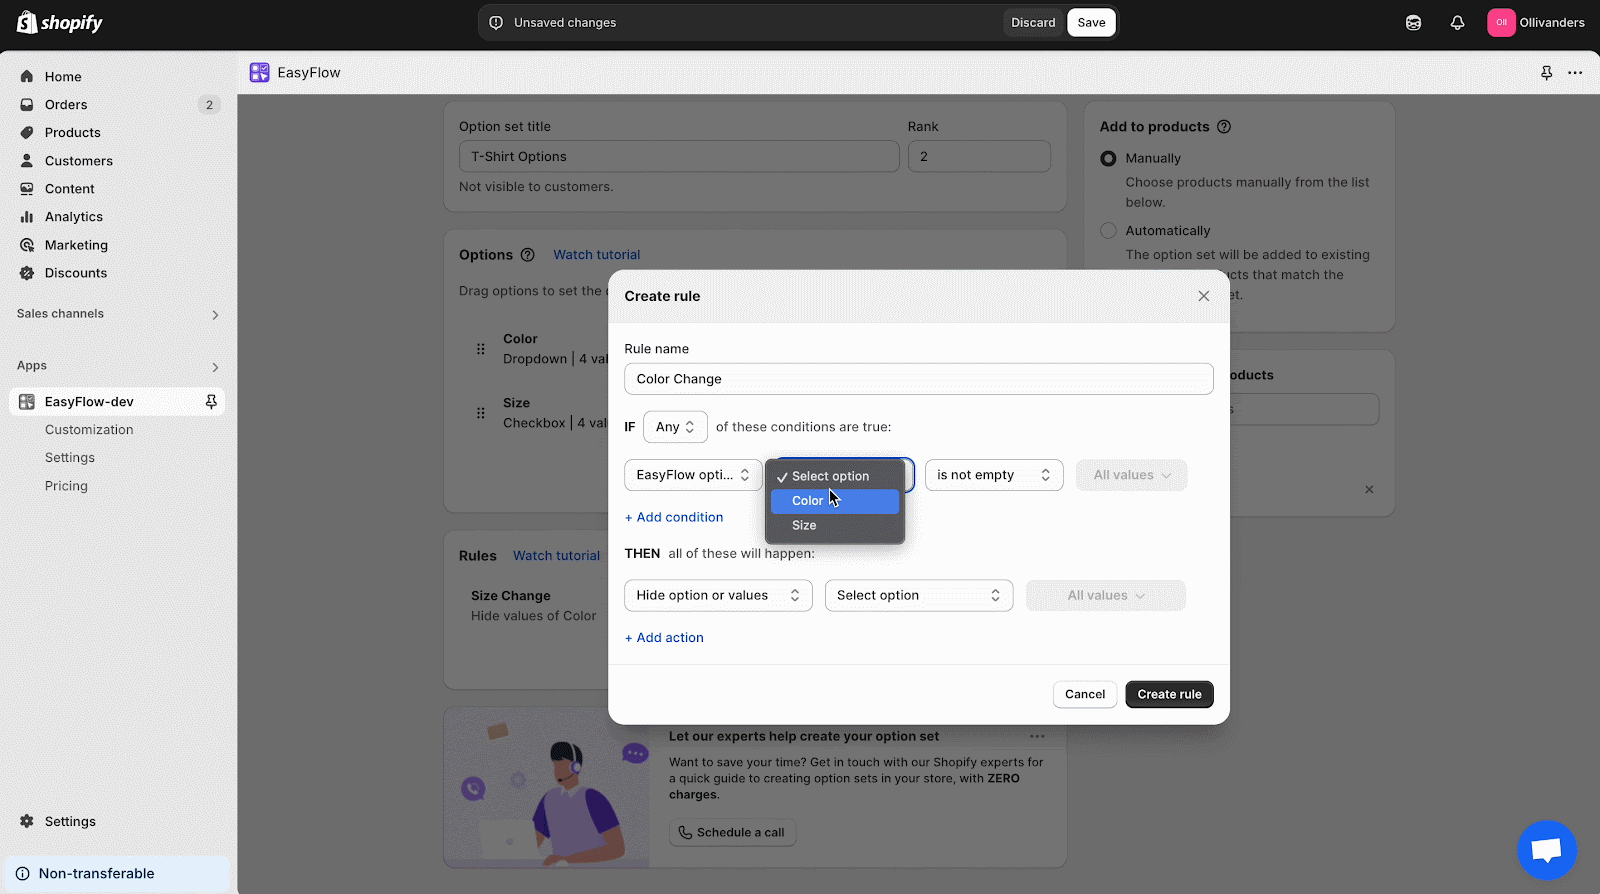
You can add multiple conditions and choose whether All or Any must be true, flexibility that supports nuanced flows, from simple dependencies to multi‑step selections.
4. Configure Actions
Click Add Action to show or hide. For selection options, pick specific values or hide the entire field. For input options, hiding any part collapses the entire input. Actions apply only when conditions are true; hide actions revert when false, ensuring options reappear as intended.
5. Save Your Rule
Once your rule condition and rule action are configured, hit Save. Your logic goes live immediately – no coding required. You can see your new conditional logic in the Shopify rule under the specific option set in EasyFlow.
Repeat the process to layer on multiple rules, but avoid conflicting show/hide rules on the same values to maintain predictability.
💡 Advanced Rule Management & Best Practices for Shopify
After you start an eCommerce business and your store starts growing, managing the number of products in your inventory becomes complex. Consequently, your product configurations become complicated too. Below, we have shared some tips to keep your rules for product options more organized and effective:
Edit Rules if Necessary
Use the edit or plus icon to edit the existing rules for different product options in new conditions. For example, you might have hidden a product’s color or size previously, because your stock ran out. But recently, you have restocked the product again. In those kinds of situations, you have to edit the rules. This speeds up rule creation and ensures consistency.
Check for Conflicts
Conflicting rules (like two show rules or two hide rules) for the same values can override each other. This will result in your rules not working properly. So, audit your rules regularly, edit as necessary and reconfirm conditions and actions.
Group Related Options
Always keep relevant and connected options closely in the same option set in EasyFlow. It will reduce cross-set dependencies and simplify the logic sequence. Customers will clearly know what to do and can speed up the checkout.
Utilize Conditional Upsells
It is better to show premium add‑ons only when regular products are clicked. For example, you can show “Leather Cover Upgrade” only if the shopper selects the “Hardcover” checkbox. It will not create any confusion. Plus, generate incremental revenue.
🧑💻 Testing Your Shopify Conditional Logic
No conditional logic in Shopify should go live without rigorous testing. A well‑tested rule set minimizes errors and builds trust – customers never wrestle with irrelevant fields or broken configurations. Follow these steps before deployment:
- Preview in Staging: Use a staging environment to test all rule combinations without impacting live customers.
- Walk through buyer journeys: Click every possible path, ensure unwanted fields never appear and required inputs are always visible.
- Check mobile: Some conditional flows hide fields; confirm responsive layouts do not accidentally hide essential inputs.
- Review analytics: Track conversion lift and cart abandonment changes after deploying logic to measure ROI.
🎉 Boost Sales & User Experience with Conditional Logic in Shopify
Mastering conditional logic in Shopify with EasyFlow lets you craft personalized shopping experiences without writing a single line of code. By utilizing rules within option sets in EasyFlow, you can dynamically show and hide options, driving targeted upsells and eliminating option overload.
Start setting up conditional logic for your Shopify store today by creating your first rule, testing extensively, and measuring conversions. Your customers will appreciate the seamless interface, and your bottom line will thank you.
If you found this blog helpful, please subscribe for more expert guides, tutorials, and tips on unlocking the full potential of your Shopify store.