EasyFlow lets you add rules with conditional logic in option sets. So, you can show or hide options based on customer selection with rules. In this documentation, we will show you how to do it by configuring the ‘Rules’ feature in the EasyFlow app.
How to Show or Hide Options Based on Customer Selection Using Rules in EasyFlow? #
In order to show or hide options based on customer selection with rules in EasyFlow, you need to follow a few easy steps. Open the EasyFlow app and follow these steps:
Step 1: Open the Option Set where You Want to Set Rules #
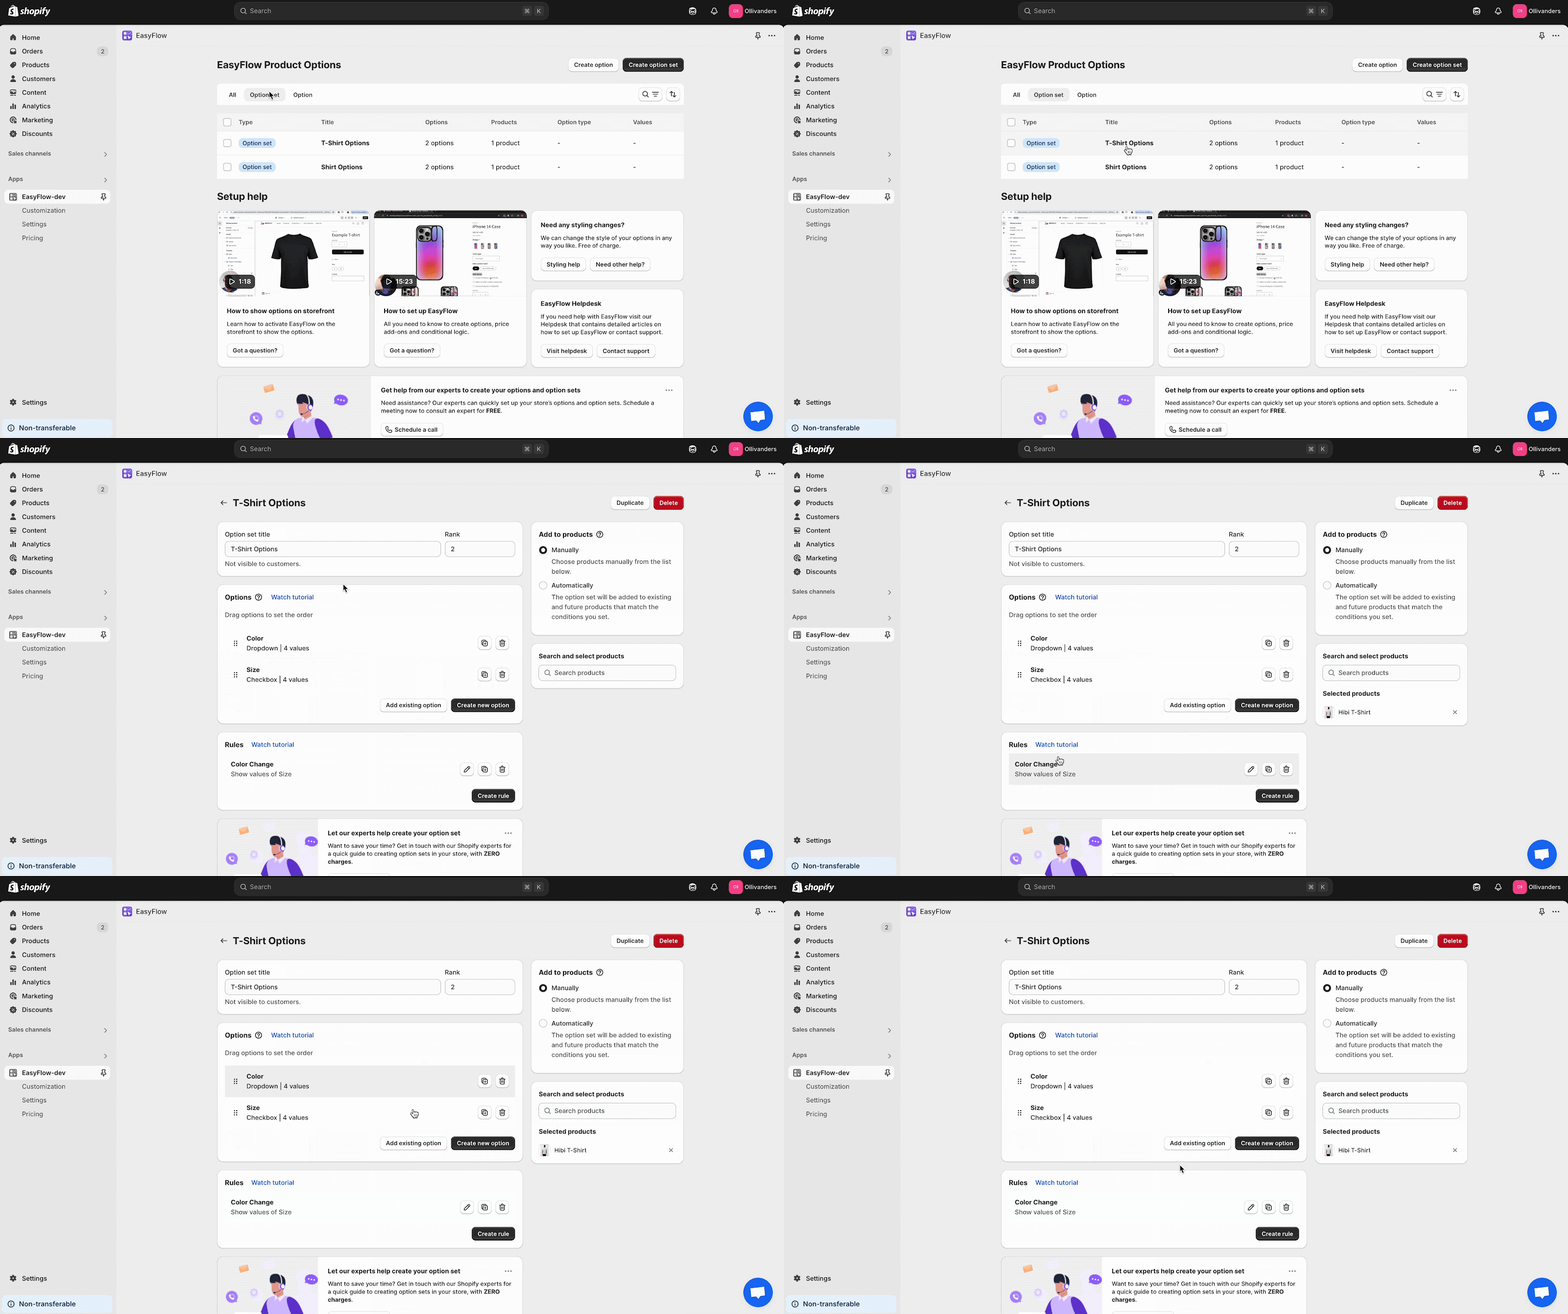
From the EasyFlow app’s dashboard, find the option set where you want to set rules. Then, click on the option set to open it.

Step 2: Proceed to Create a Rule #
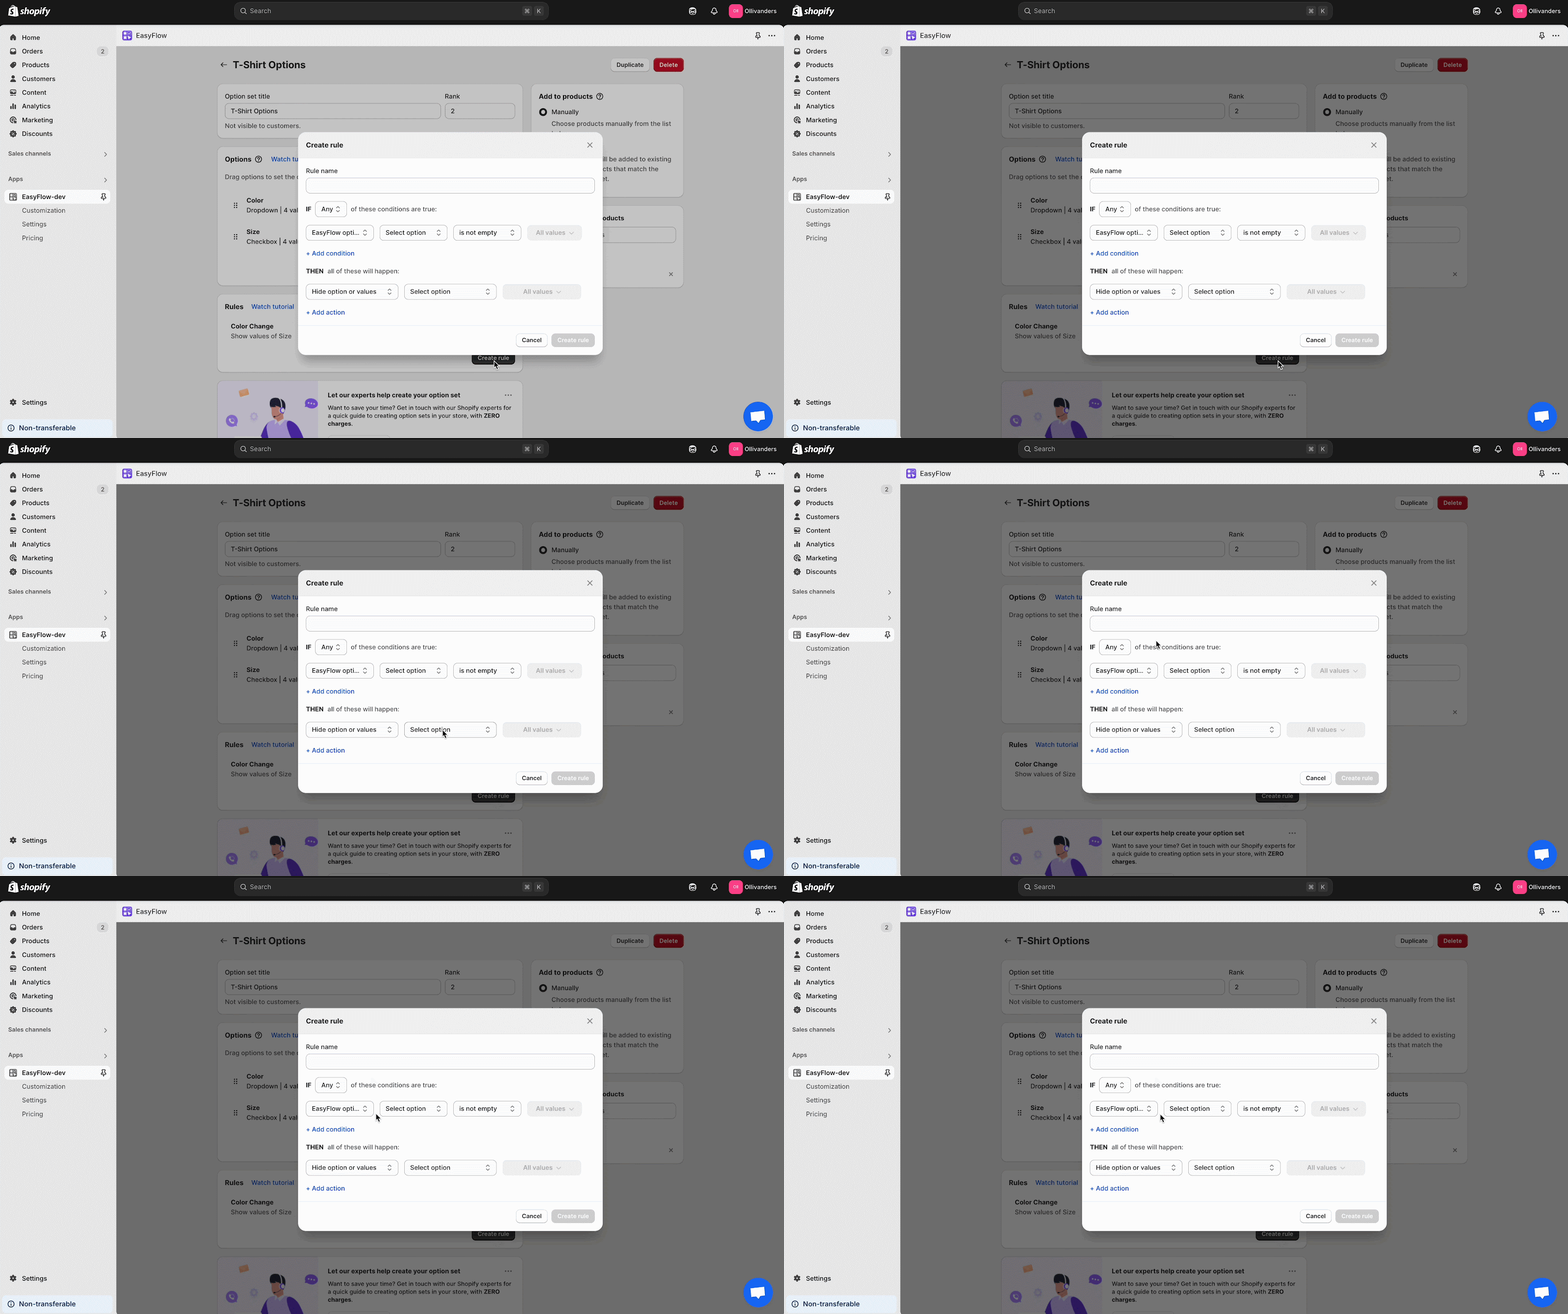
Navigate to the ‘Rules’ section in the option set. Next, hit the ‘Create rule’ button to create a new rule within the option set.

Step 3: Create Conditions and Actions within Rule #
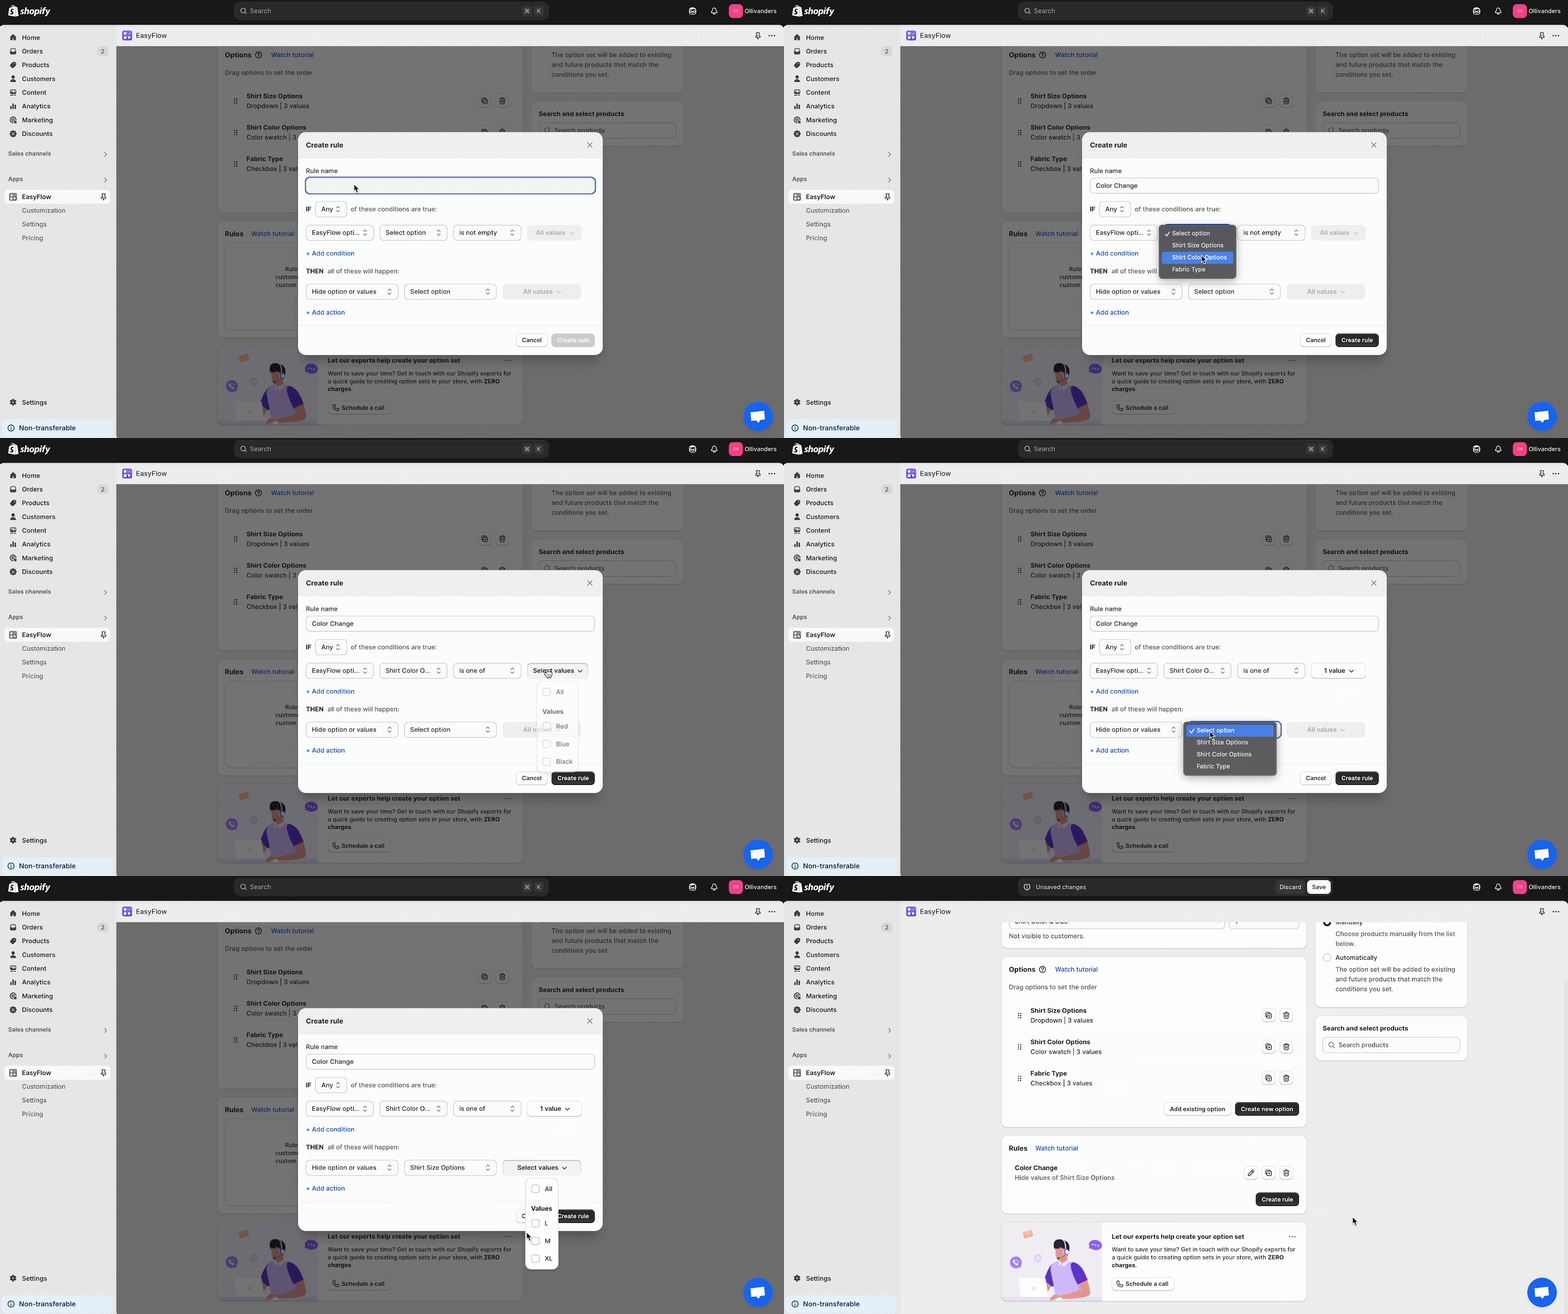
Now, enter a Rule name in the designated field. Then, create a condition for the rule. Set the source, option, logic and values for the condition as shown in the image below. Click on the ‘Add condition’ button to create additional conditions if needed.

After setting the conditions for the rule, you have to specify the actions. This basically refers to what will happen when the conditions in the rule are met. So, set the action and its option & values as you need. Click on the ‘Add action’ button to add more actions within the rule. Hit the ‘Create rule’ button and then the ‘Save’ button at the top.
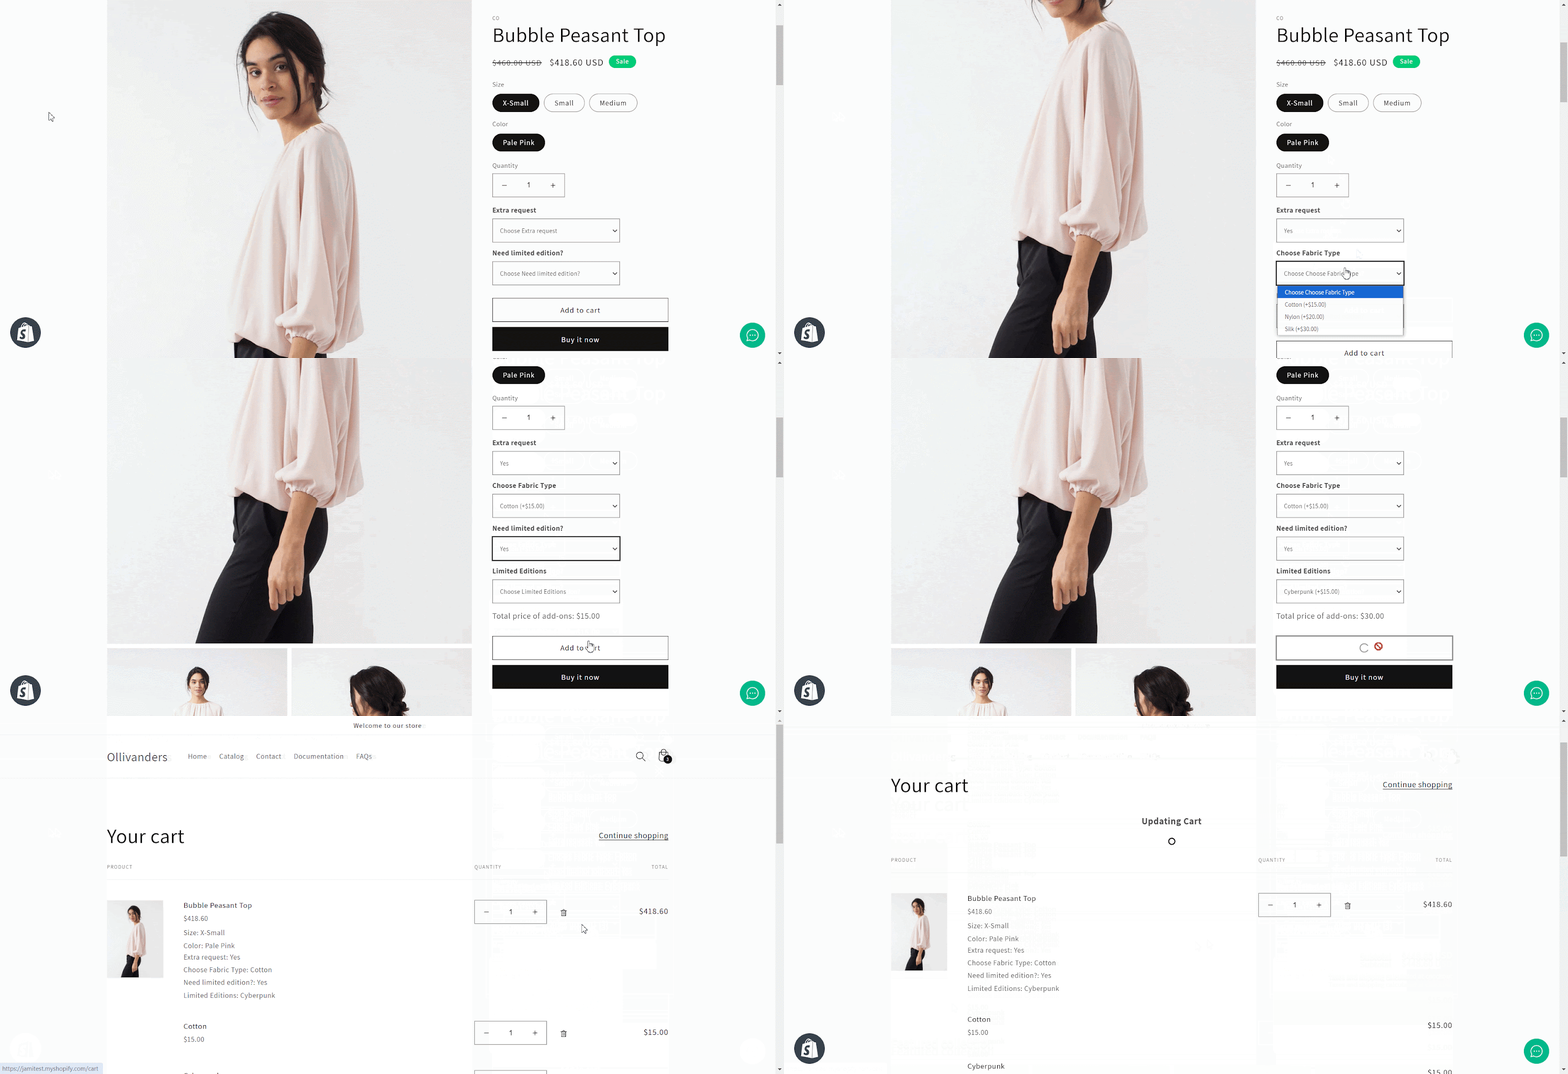
Now, your customers will be able to interact with the options you add according to the rules specified by you in the option set. As you can see in the image below, these kinds of options with added rules are visible.

This is how easily you can show or hide options based on customer selection with rules using the EasyFlow app. If you need any assistance, do not hesitate to contact our support team.


