

The Quantity Selector in EasyFlow allows your customers to choose a specific quantity for each option value they select on a product page. Instead of buying a single unit at a time, shoppers can build bundles, mix and match variants and stay within the limits you define. This is especially useful for stores selling packs, kits, gift sets or any product where the buyer needs to distribute a total quantity across multiple choices.
Follow this guide to learn how the EasyFlow Quantity Selector works, how to enable it for your option values and how to set minimum, maximum and combined quantity rules that match your business needs.
How to Configure the Quantity Selector on a Product? #
To configure the Quantity Selector for your Shopify product page, start by opening the EasyFlow app from your Shopify admin dashboard.
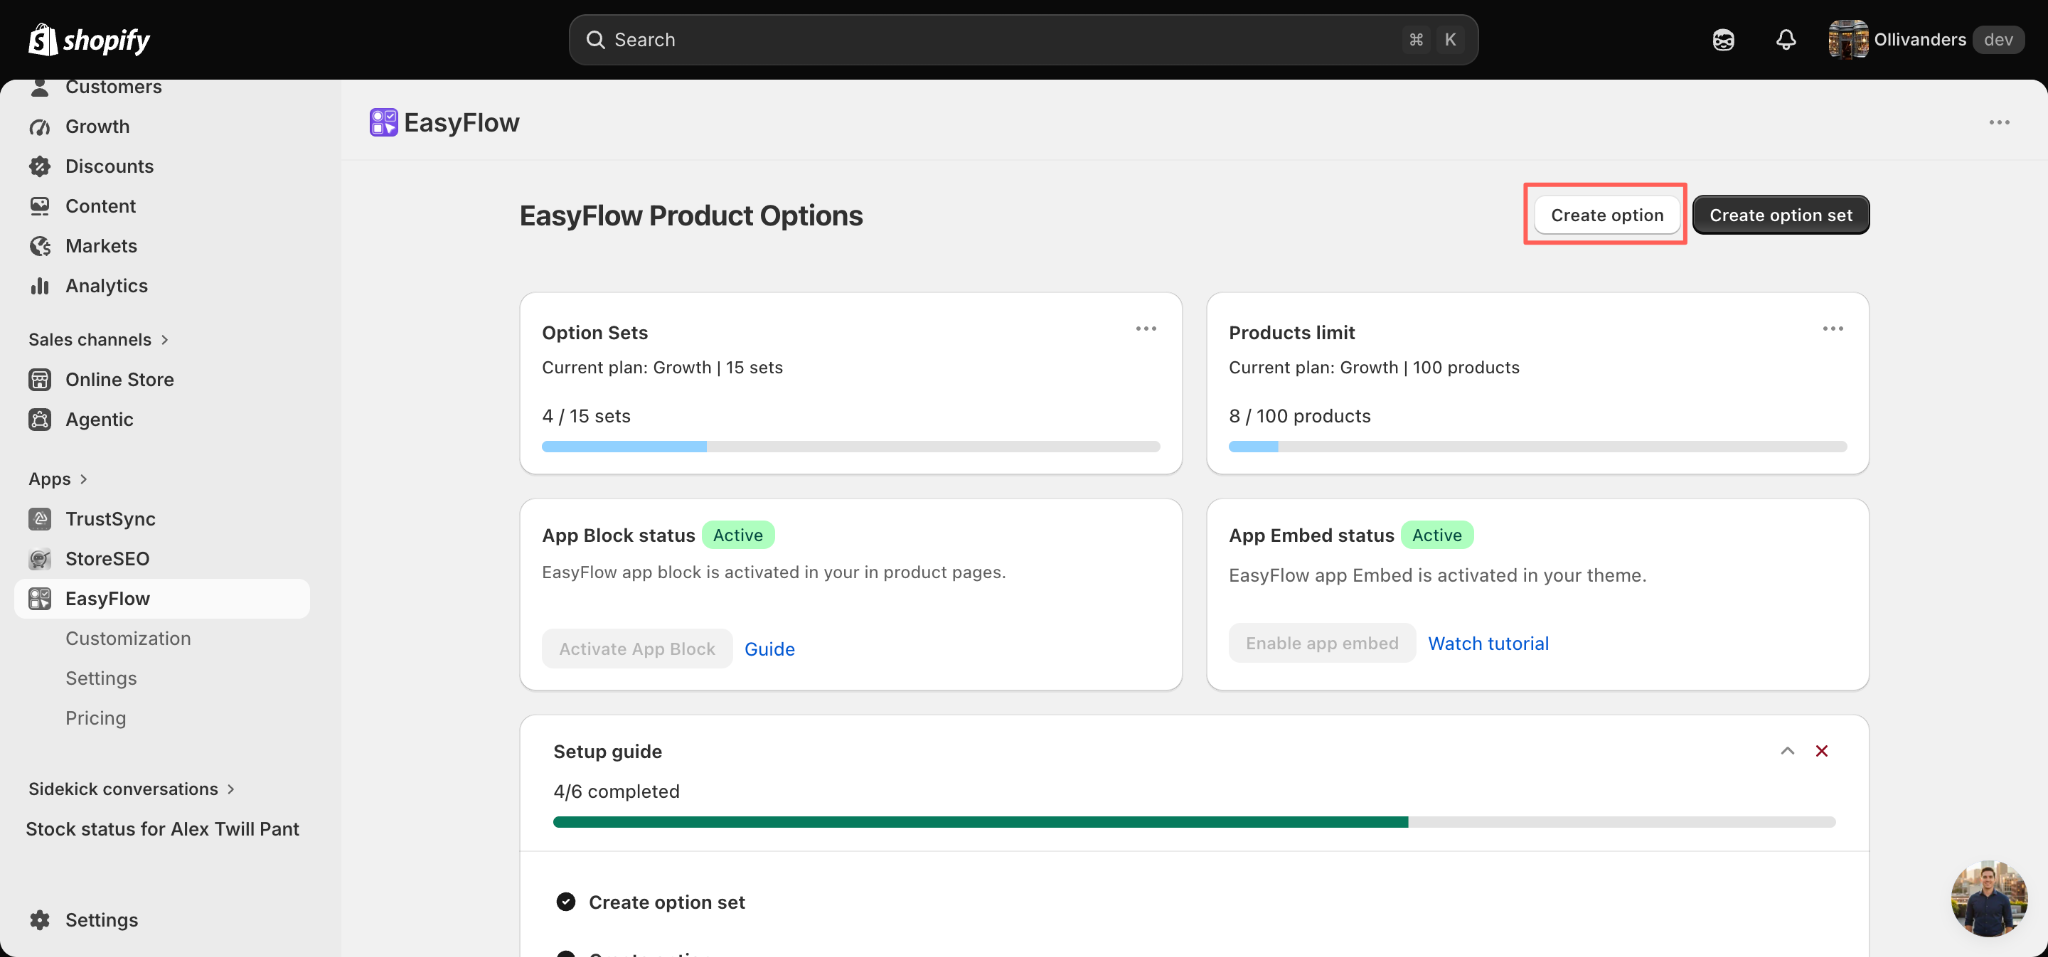
From the EasyFlow Product Options page, click on the ‘Create’ option button in the top right corner to create a new option or open an existing option set where you want to add the Quantity Selector.
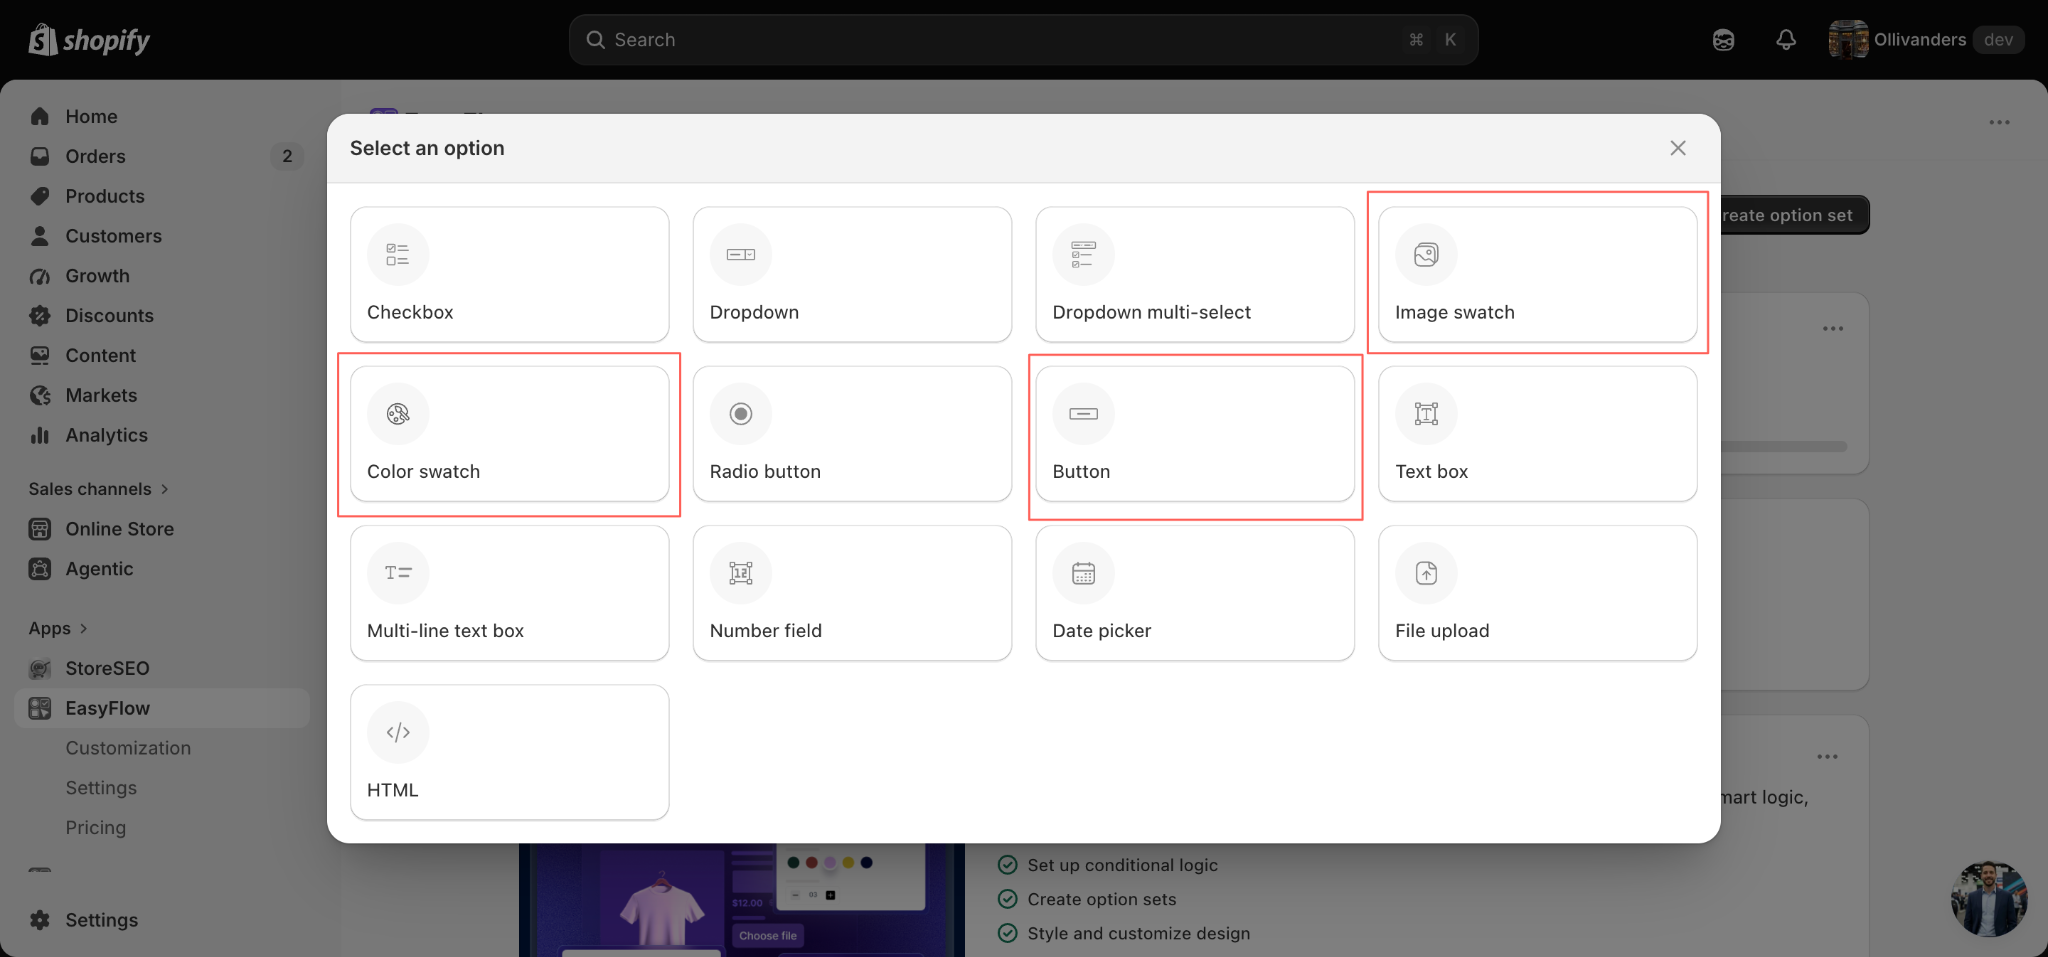
Next, choose the option type that fits your product. The Quantity Selector works with option types that allow multiple selections, such as ‘Image swatch’, ‘Color swatch’ or ‘Button’.
In this example, we are using the Image swatch type for a T-shirt Color Pack so customers can pick more than one color and set a quantity for each one.
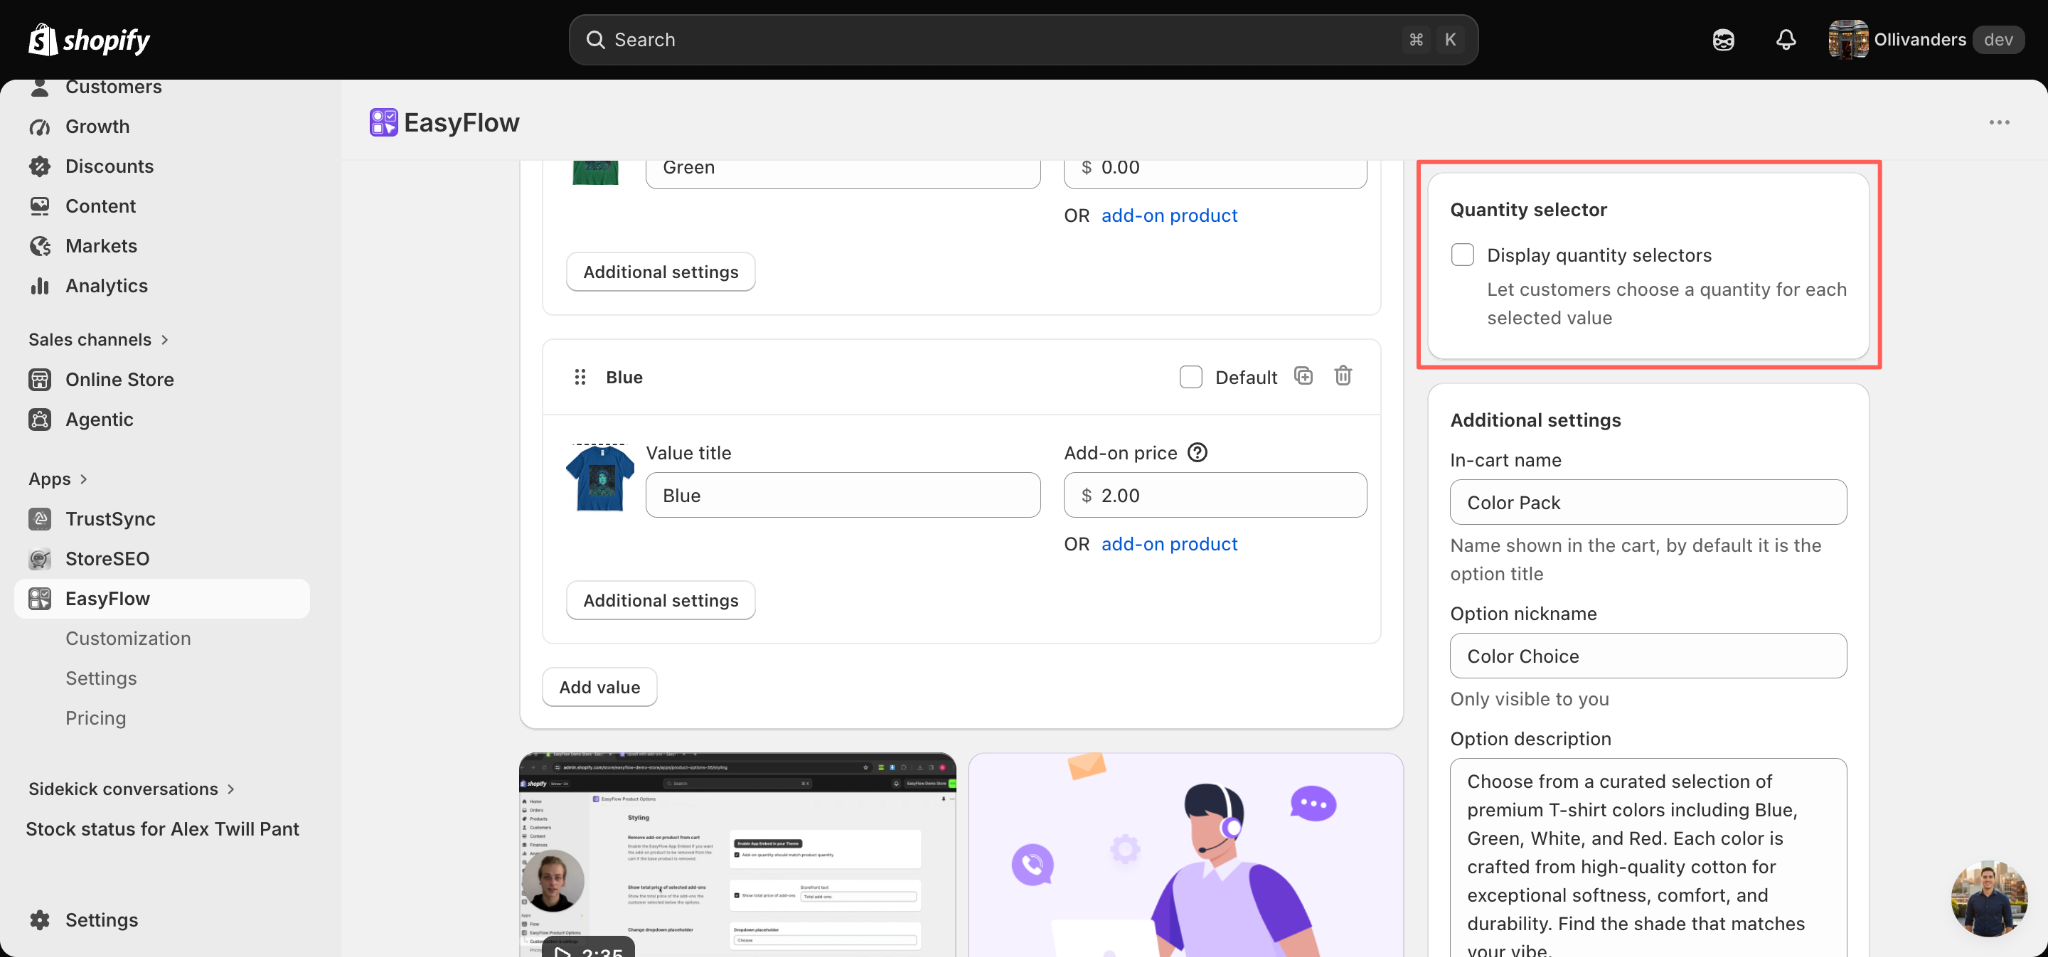
After selecting the option type, add your Option name and configure each Option value with a value title, an add-on price and, if needed, an image.
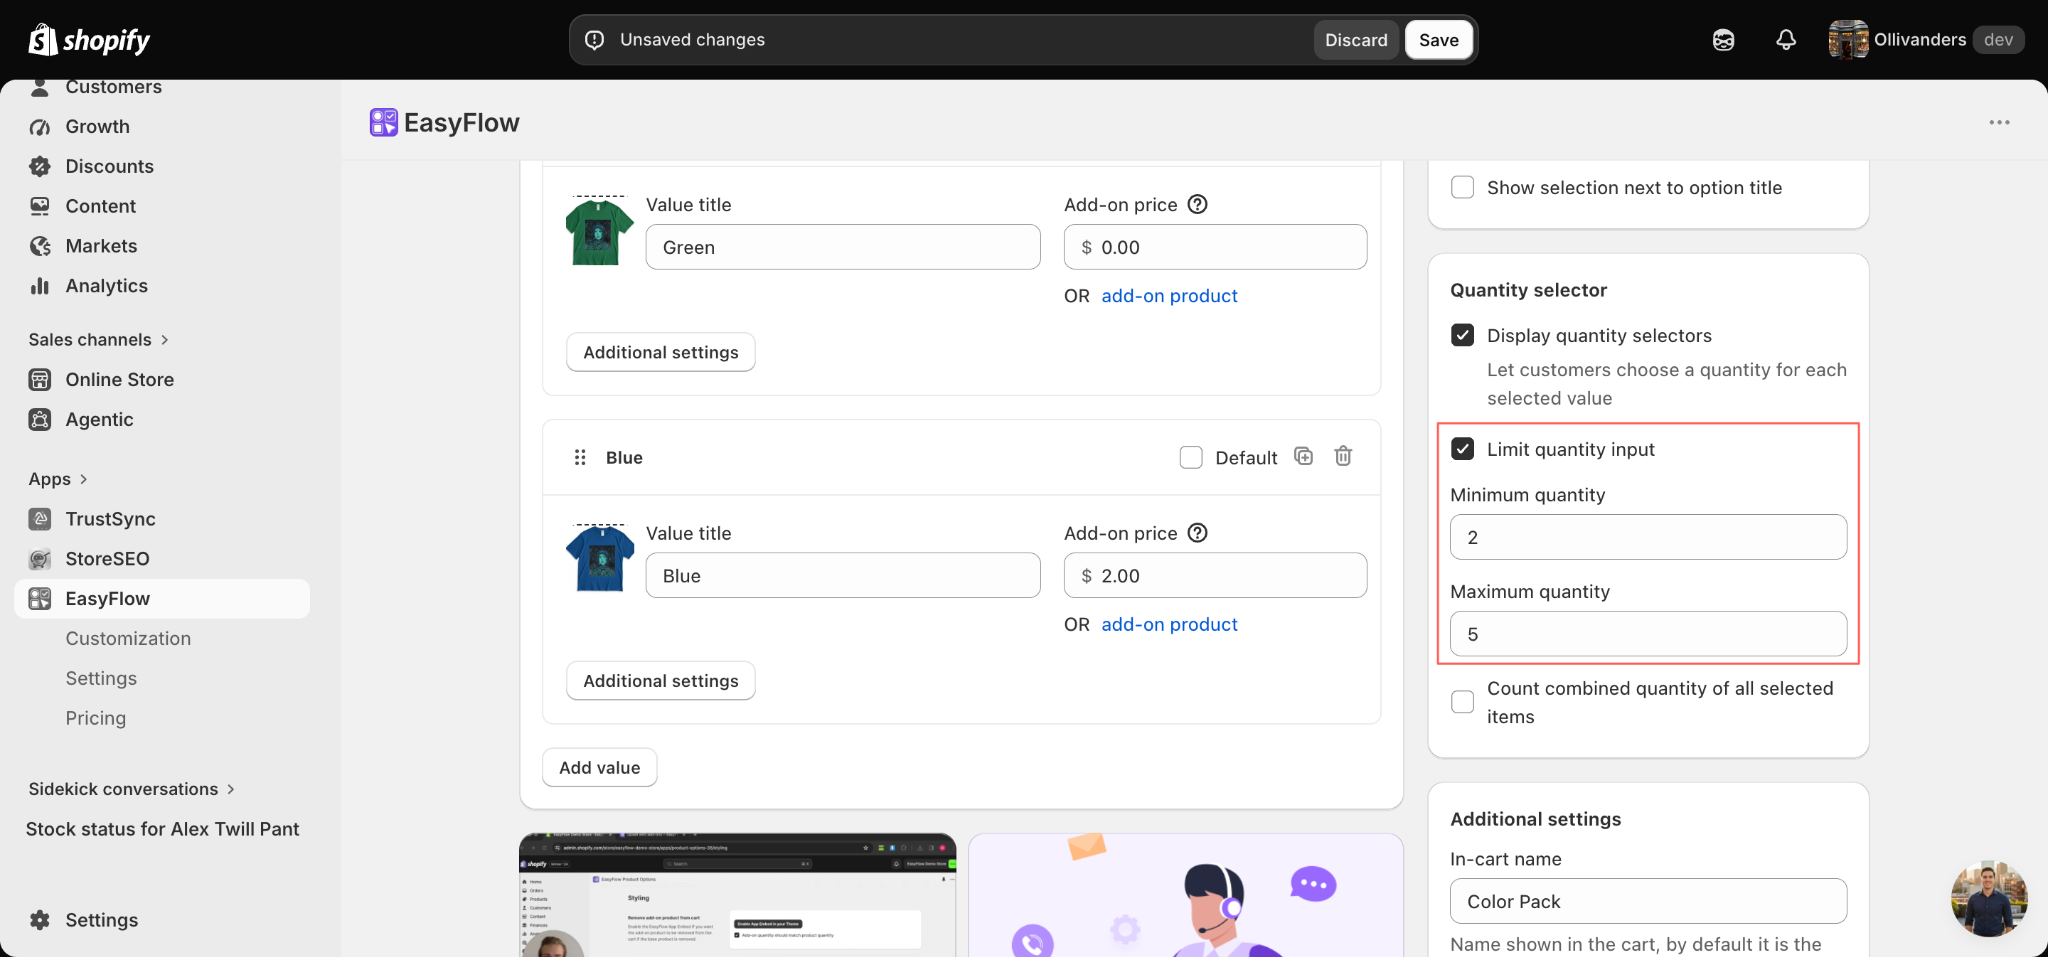
Once your option values are in place, scroll down on the right-hand side panel to locate the ‘Quantity selector’ section. By default, the ‘Display quantity selectors’ checkbox is turned off, which means customers will only be able to select an option without controlling its quantity.
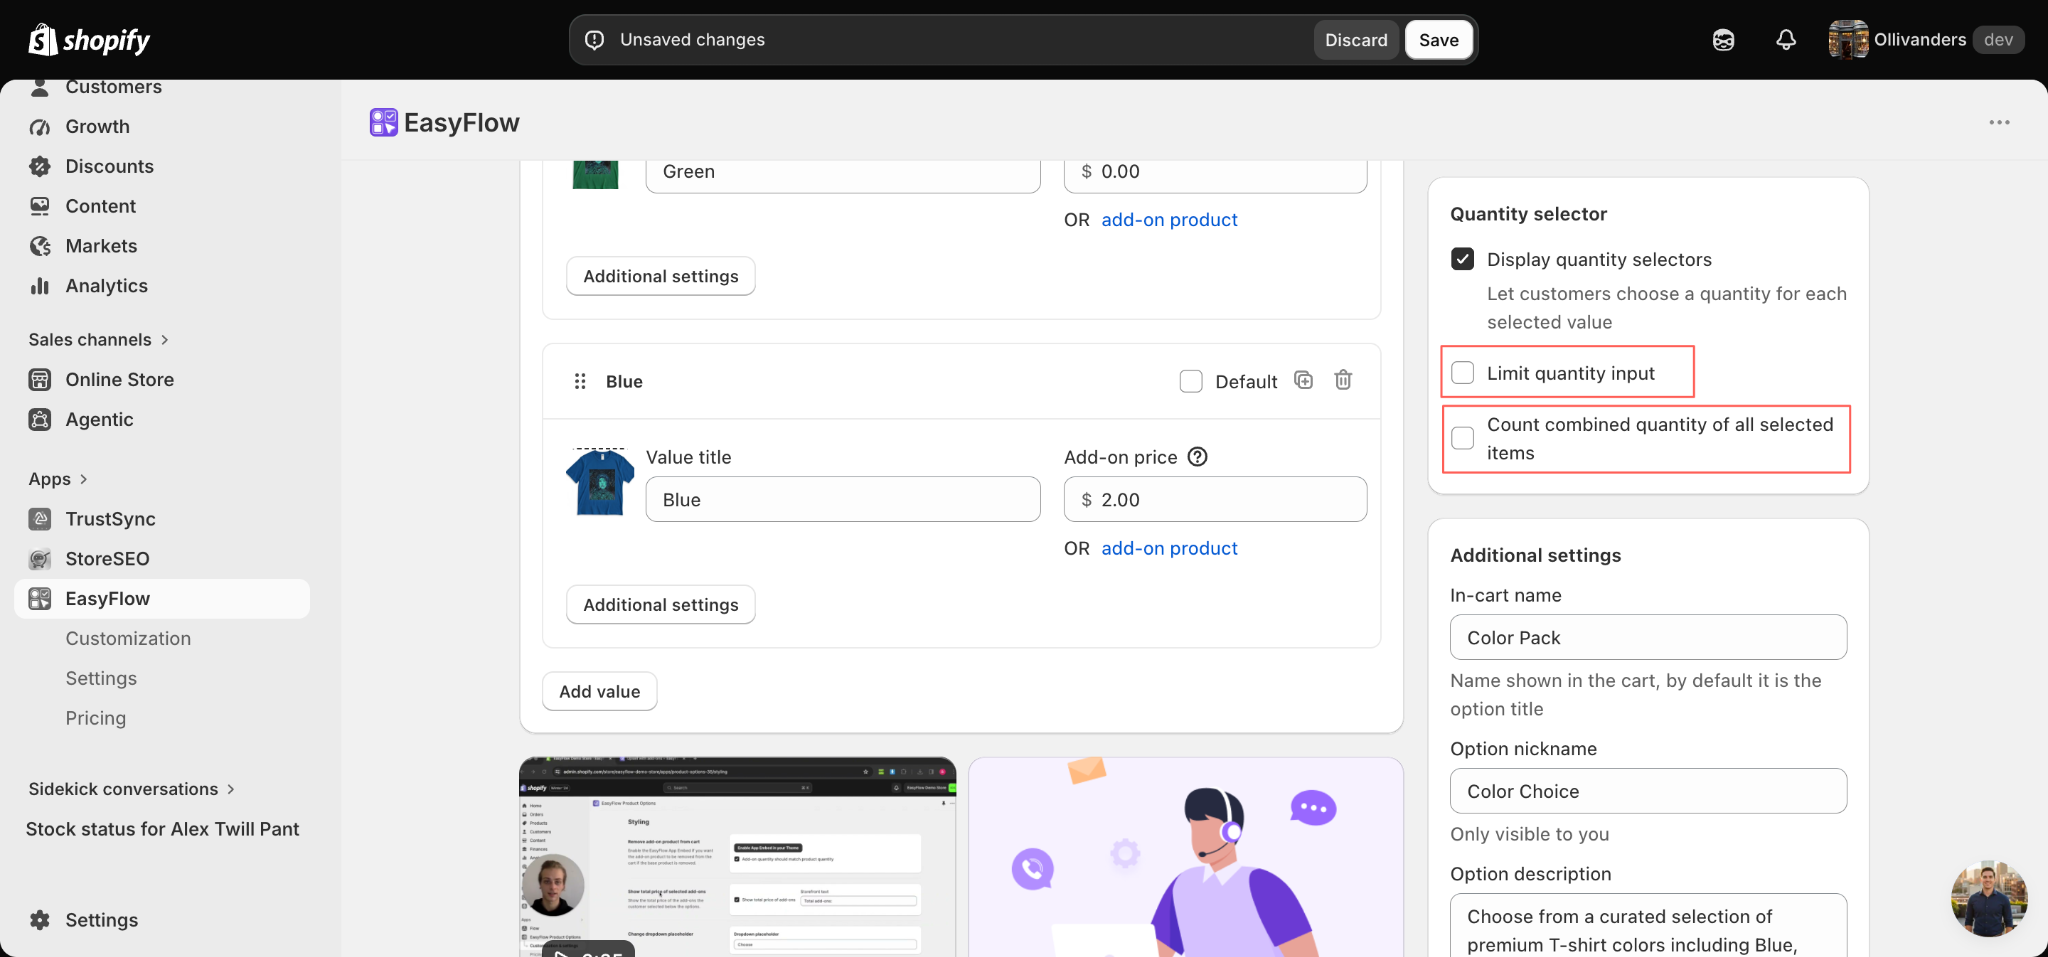
Tick the ‘Display quantity selectors’ checkbox to enable quantity input for each option value. Once enabled, two additional settings will appear:
- ‘Limit quantity input’ lets you set a minimum and maximum quantity that customers can enter for each selected value.
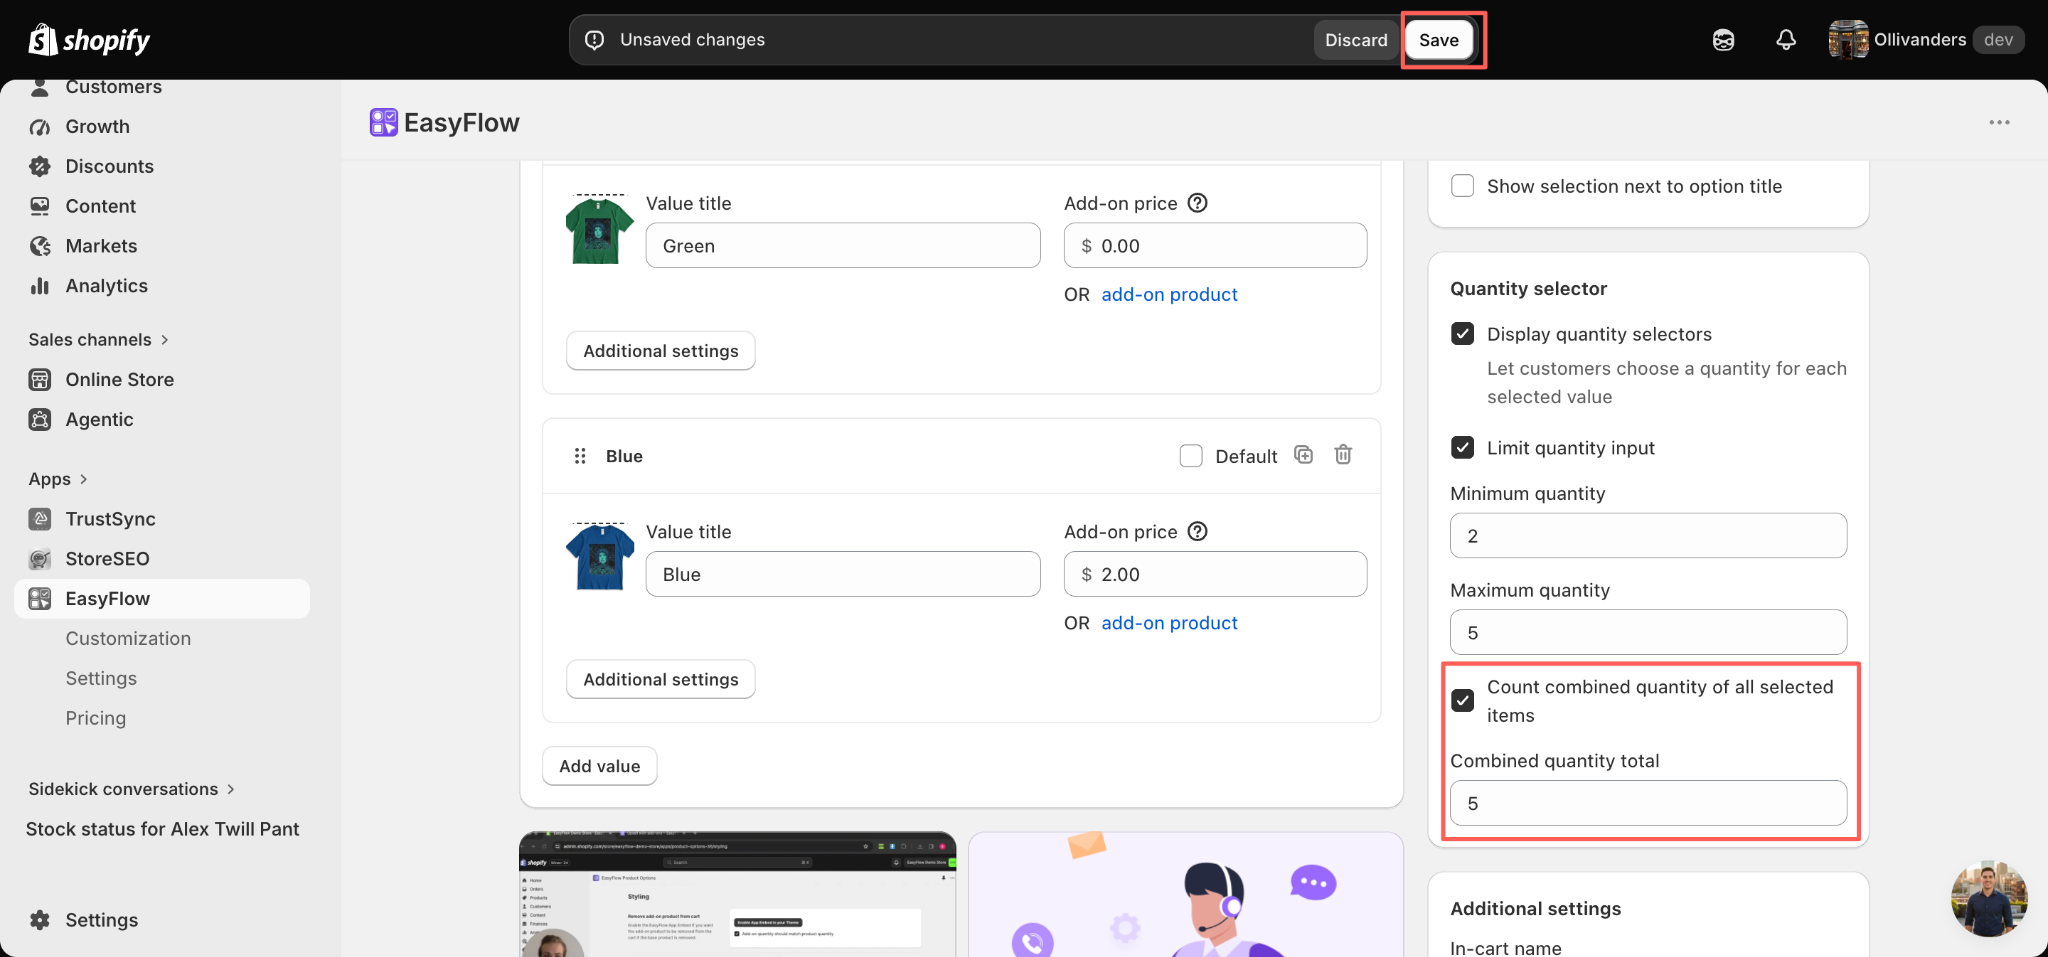
- ‘Count combined quantity of all selected items’ lets you enforce a total quantity across every selected option value, which is ideal for fixed-size bundles or packs.
How to Set Min/Max Limits for Product Options #
To control how many units of a specific option (like a color or size) a customer can purchase, follow these steps:
- Enable Limits: Check the Limit quantity input box.
- Set Your Range: Enter your desired limits in the Minimum quantity and Maximum quantity fields.
Example:
If you set the minimum to 2 and the maximum to 5 for a color option:
- Customers must select at least 2 units to proceed.
- Customers cannot select more than 5 units.
Why Use This Feature?
- Inventory Control: Prevents a single customer from clearing out your stock.
- Order Optimization: Ensures customers order enough units to meet minimum purchase requirements while preventing accidental over-ordering.
How to Set a Combined Quantity Total Across Options #
To require customers to purchase an exact total number of units across all their selected choices (such as colors), follow these steps:
- Enable Combined Quantity: Check the Count combined quantity of all selected items box.
- Set Your Target: Enter your target amount in the Combined quantity total field.
Example:
If you set the combined quantity total to 5:
- The total sum across all selected options must equal exactly 5.
- Valid combination: 2 White + 2 Red + 1 Blue = 5 units total.
Once you have configured your desired settings, click ‘Save’ at the top of the page to apply the changes to your store.
You will see an update in progress as your Quantity Selector settings are applied. Do not close the window until it is complete. The process may take a few moments depending on the size of your option set.
Final Outcome #
When customers visit the product page where the Quantity Selector is applied, they will see a small plus and minus counter next to each selected option value. They can now build their preferred combination and set a quantity for each choice.
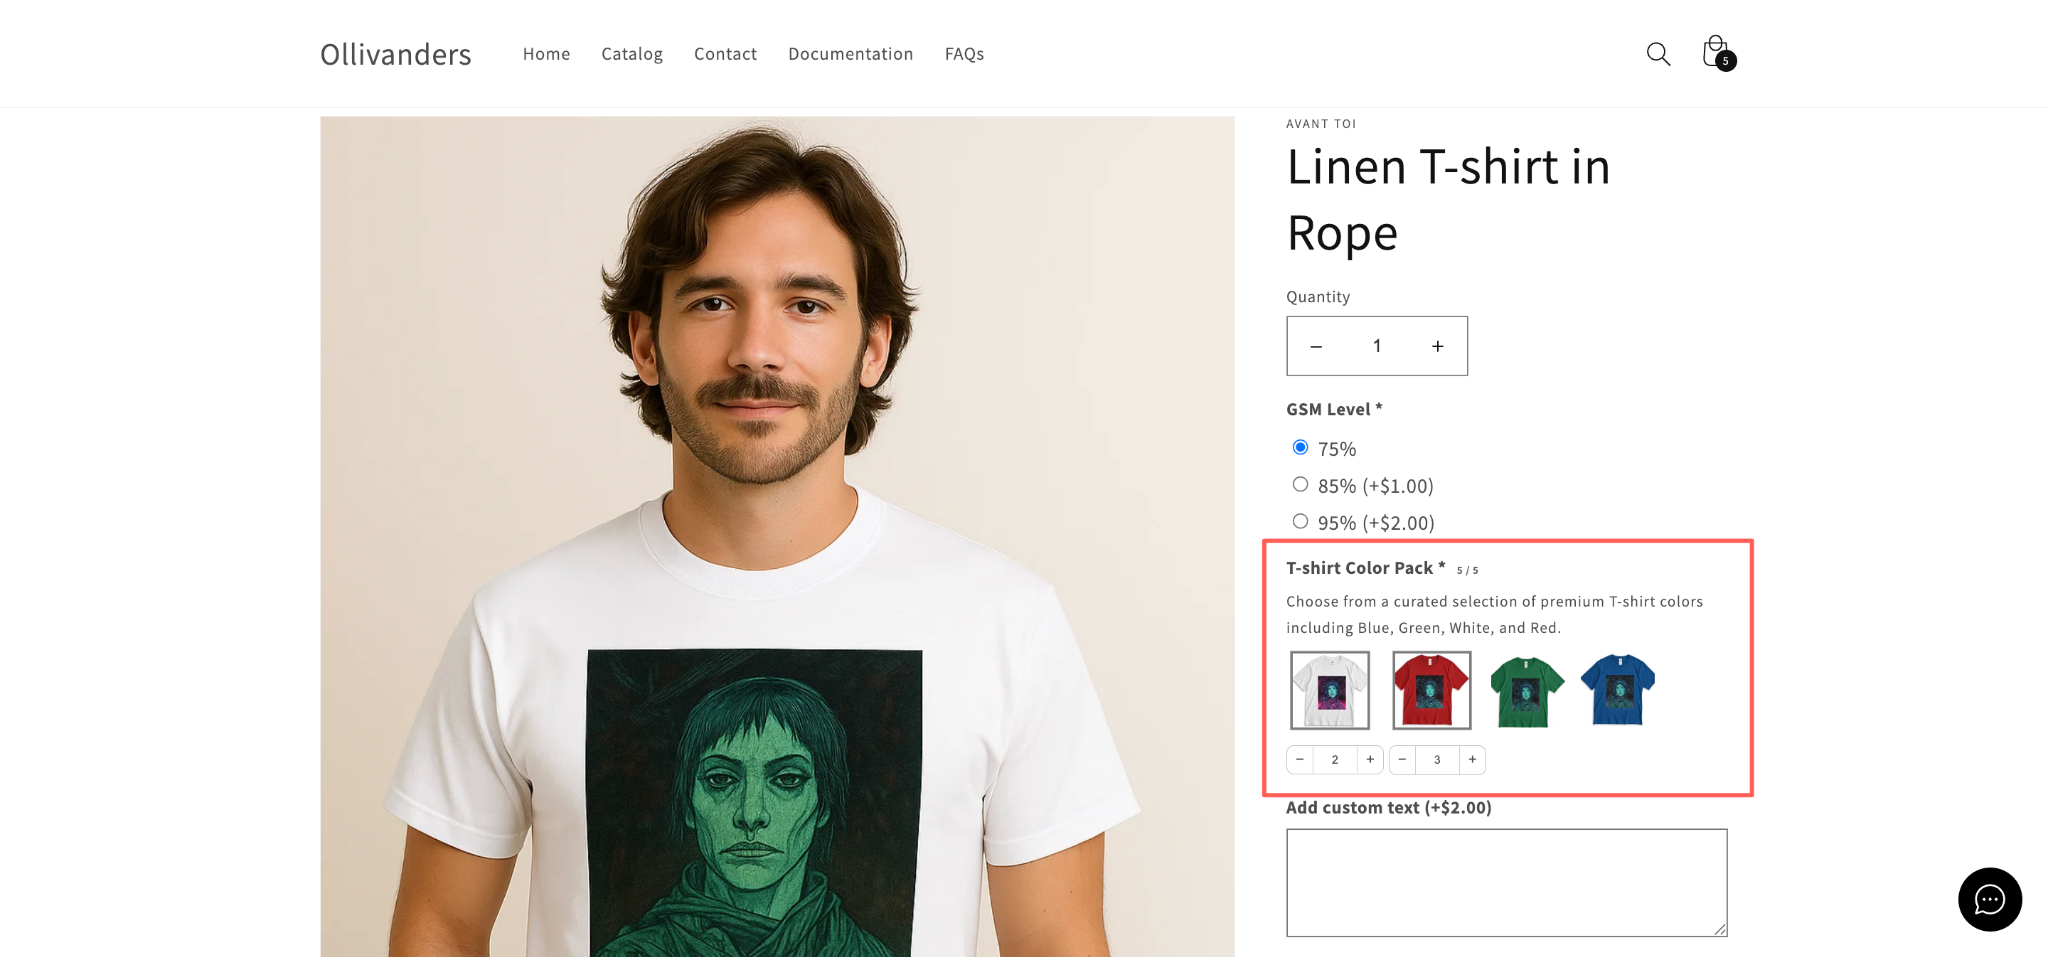
This is how easily you can configure the Quantity Selector in Shopify with EasyFlow. With the ability to enable quantity input per option value, set minimum and maximum limits and enforce a combined quantity total, you can create flexible bundles, packs and kits that give shoppers control while protecting your margins.
If you are feeling stuck at any step, feel free to reach out to our customer support team, we are always happy to help.


