

EasyFlow connects to Codex through MCP (Model Context Protocol), the open standard that lets AI assistants work directly with the tools you already use. Once the server is added and authorized, Codex can search products, build options, create option sets and apply add-on pricing from a plain description.
This guide covers the full Codex path from start to finish. It adds the EasyFlow server with a single command, completes the one-time OAuth sign-in in the browser and finishes by building a real colour option on a live Shopify product.
Step 1: Copy the Codex CLI Command from EasyFlow #
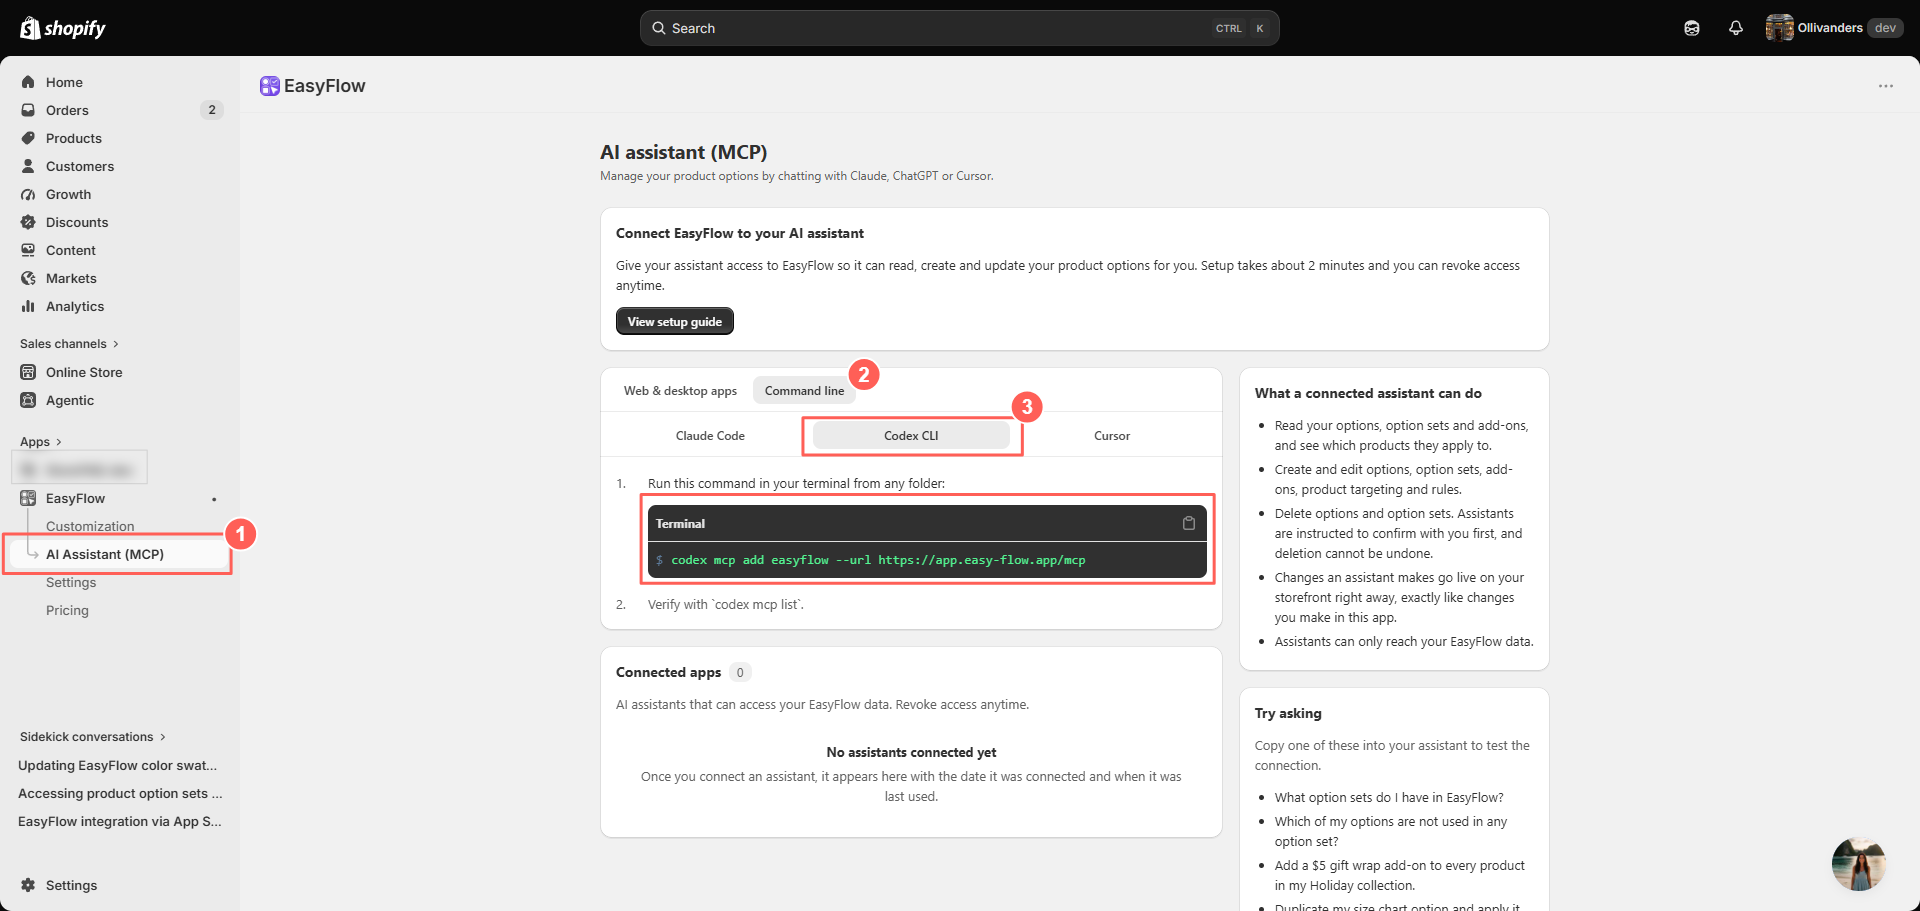
In your Shopify admin, go to Apps, then EasyFlow, then select AI Assistant (MCP) in the left sidebar. On that page, switch to the Command line tab and select the Codex CLI sub-tab.
EasyFlow generates the full command for you, so there is no configuration to write by hand. Select the copy icon on the Terminal block to put the command on your clipboard.
Step 2: Run the Command in Codex #
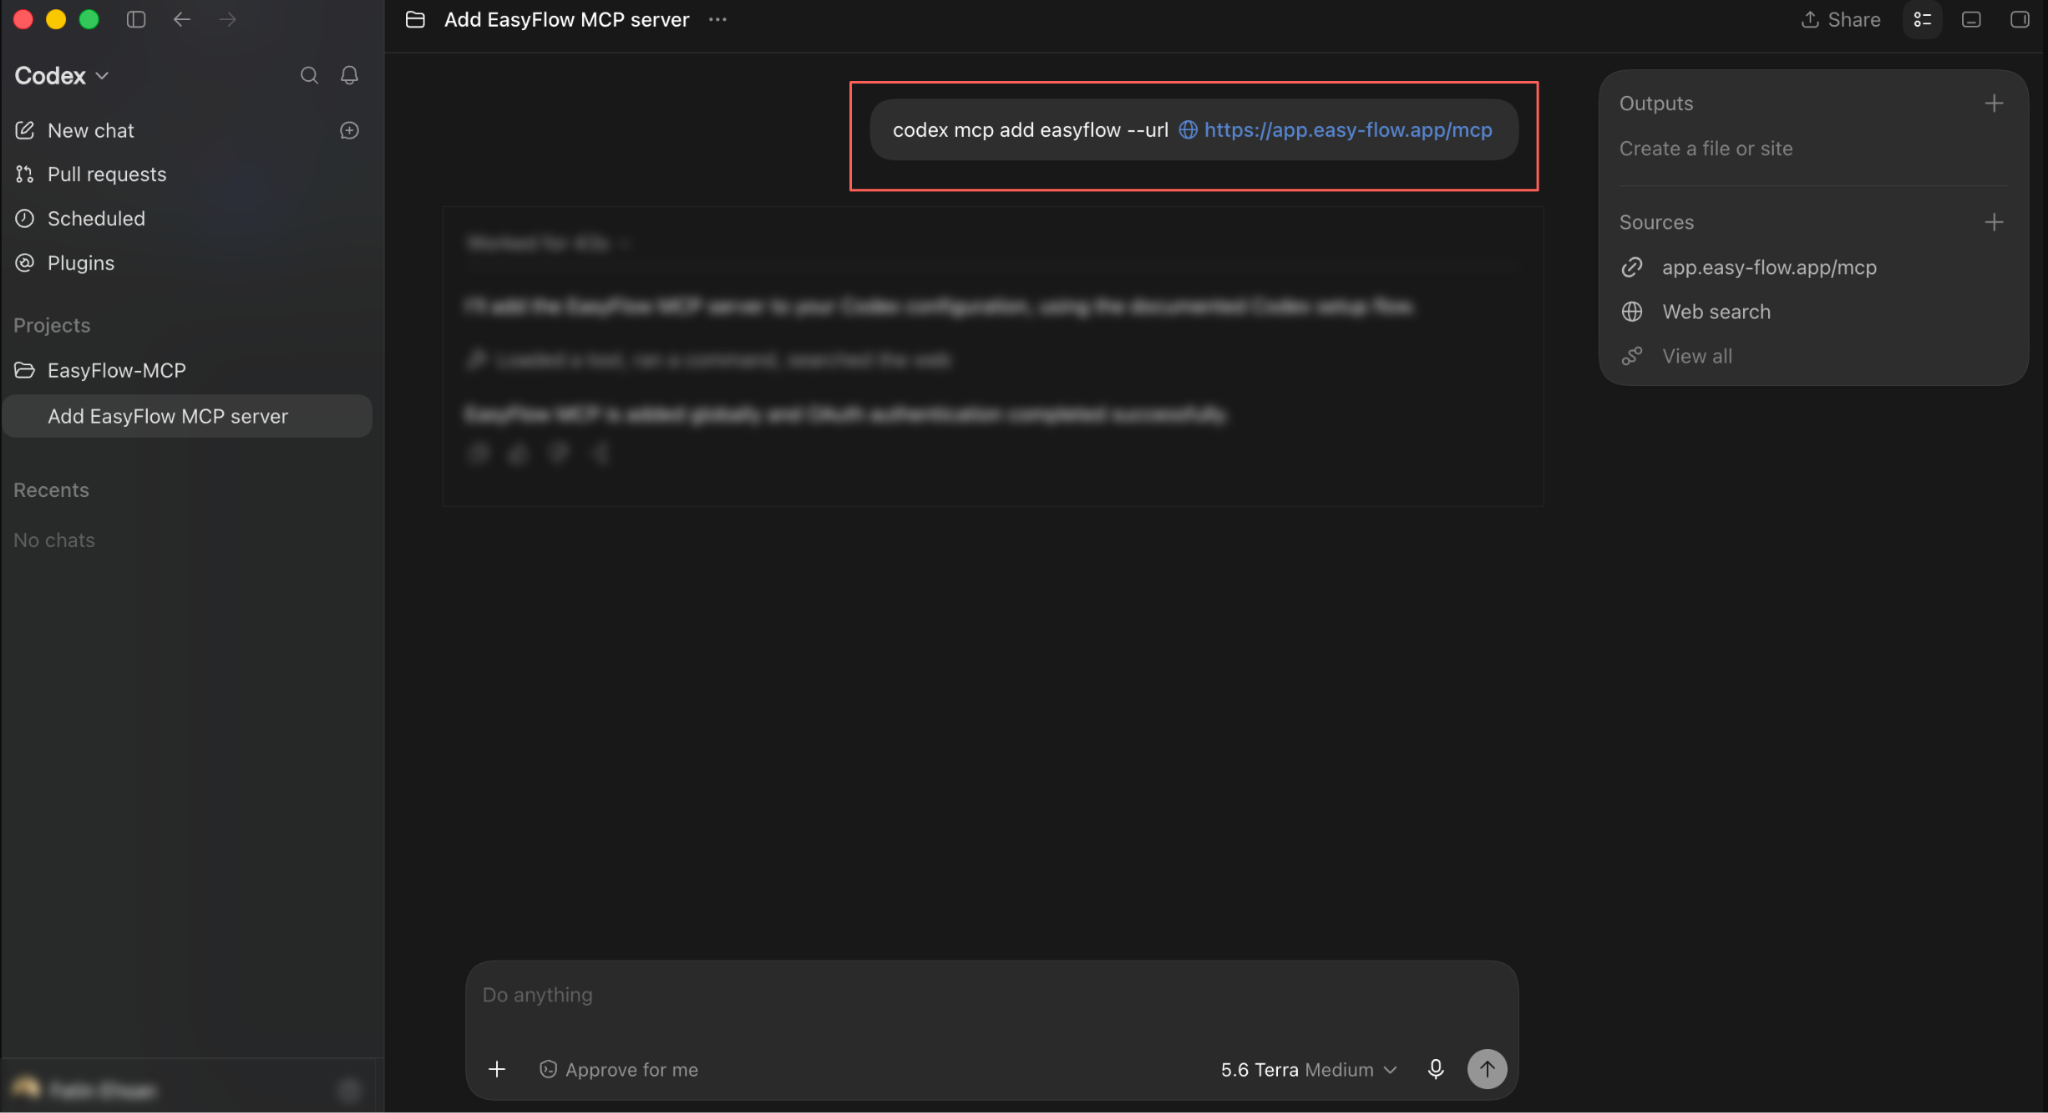
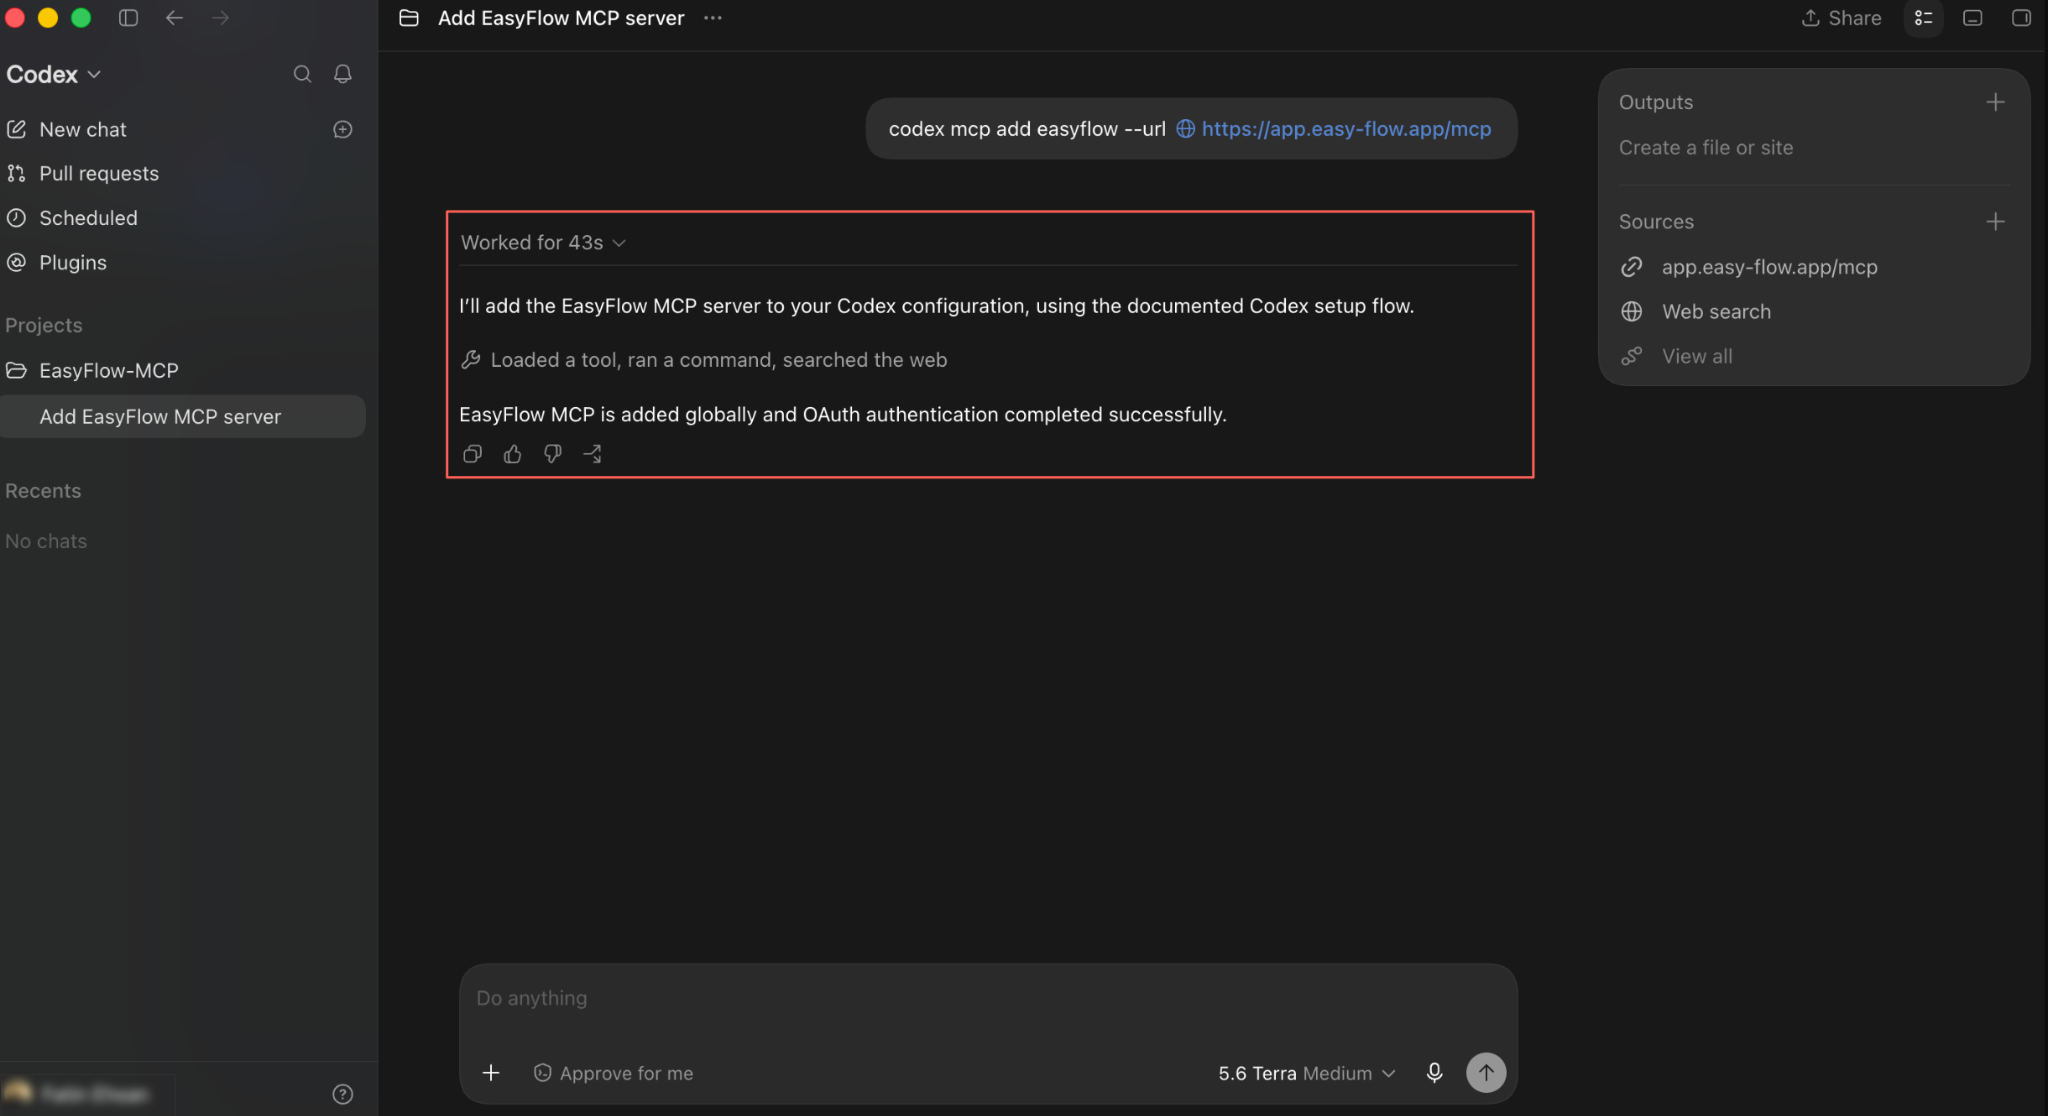
Open Codex and paste the command into a new task:
codex mcp add easyflow --url https://app.easy-flow.app/mcp
Codex loads the tool, runs the command and begins the setup flow described in its own documentation. This step only registers the server. Codex still needs to complete authentication before any tool will run against your store.
Step 3: Complete the OAuth Sign-in #
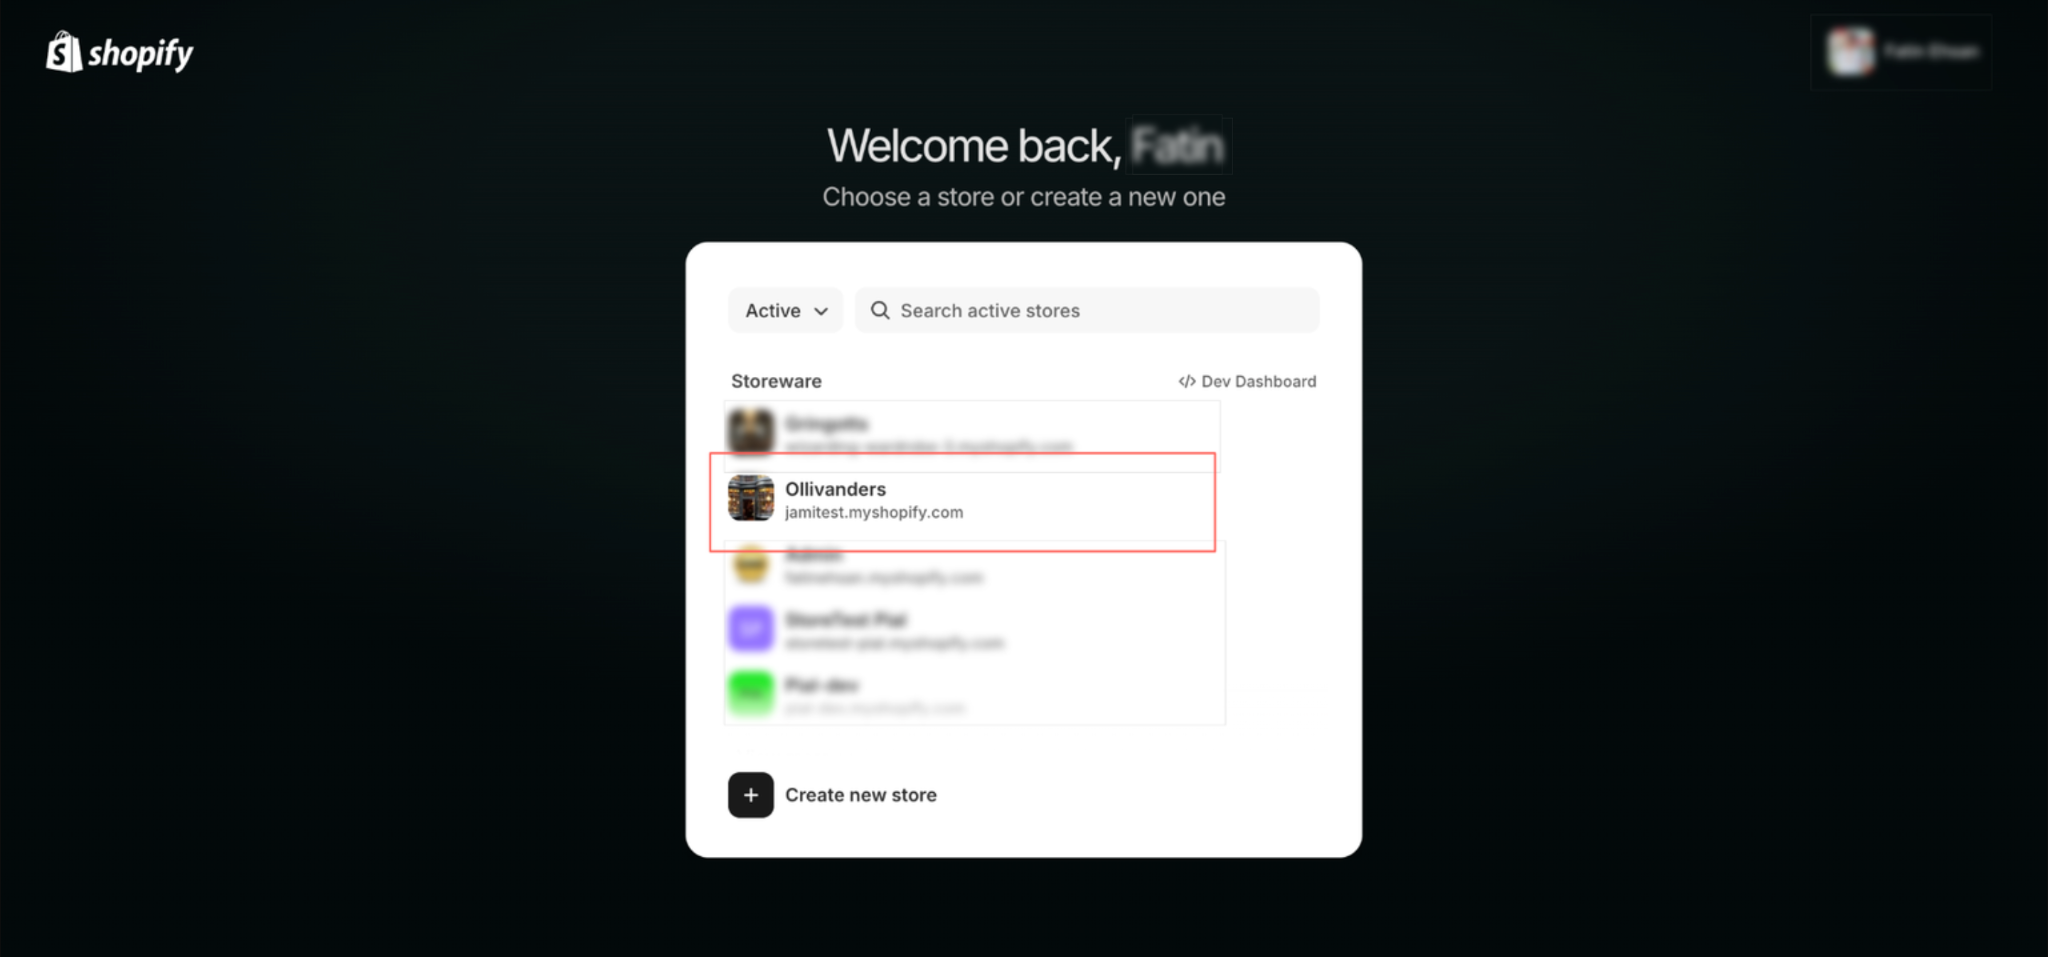
To successfully connect the EasyFlow MCP with Codex, it’ill ask you to pick one Shopify Store. Choose the store you want this connection to manage with EasyFlow MCP, in this example we are choosing ‘Ollivanders’.
Then Codex opens a browser window to show the complete authentication for EasyFlow MCP connection. The browser tab confirms with ‘Authentication complete. You may close this window.’ Close the tab and return to Codex.

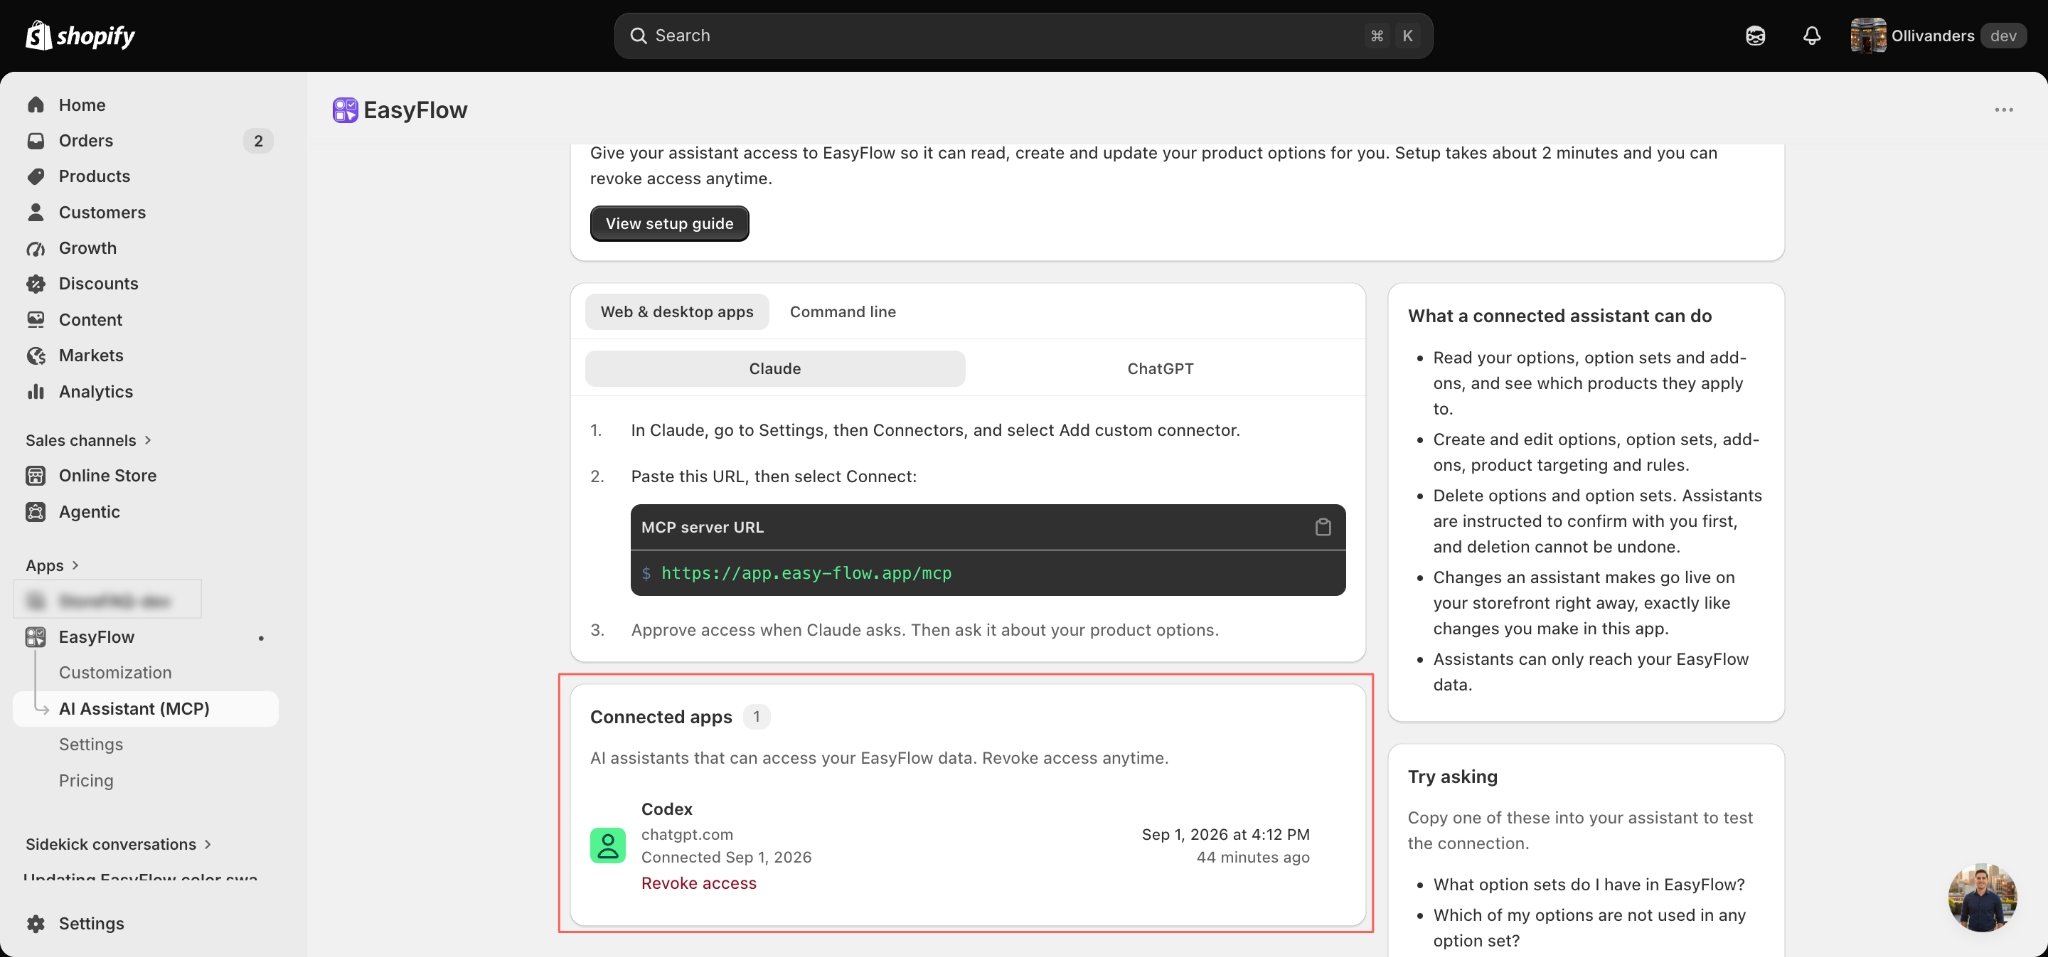
Before asking Codex to change anything, confirm the server registered correctly on both sides.
Step 4: Read the Confirmation from Codex #
Back in Codex, the task reports how long the setup took and summarises what happened. When it finishes, it states plainly that ‘EasyFlow MCP is added globally and OAuth authentication completed successfully.’
Step 5: Ask Codex What About EasyFlow MCP #
Open a new chat in the same project and ask a general question:
‘What is EasyFlow installed for on my Shopify store?’
Codex explains that EasyFlow extends Shopify product customization beyond the default variant limits, letting you add text fields, dropdowns, swatches, uploads, conditional choices and paid add-ons. It also links out to the EasyFlow documentation for more detail.
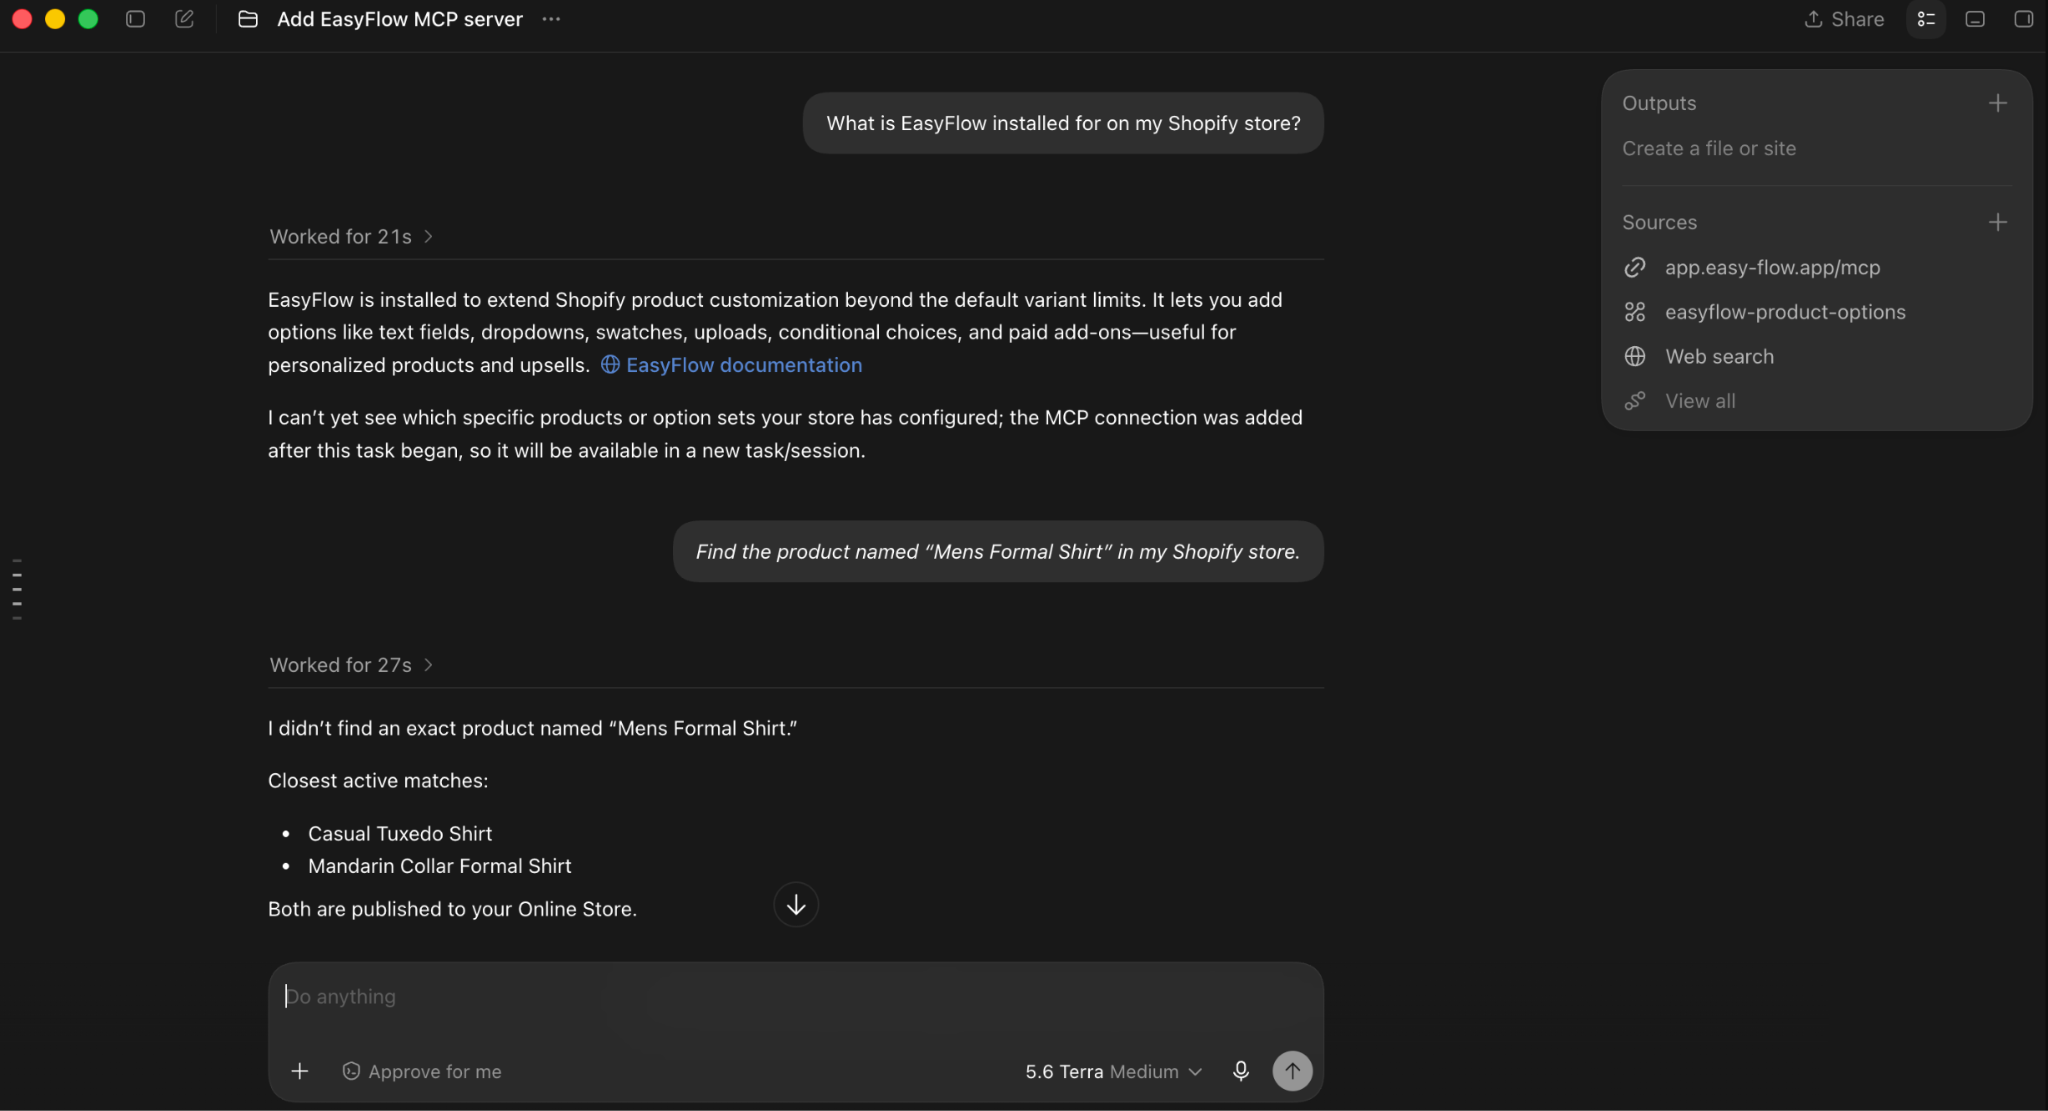
Codex notes it cannot yet see which specific products or option sets your store has configured, since the connection was added after the current task began. That context becomes available in a new task, which is why the next step starts a fresh one.
Build an Option Set from a Plain Description #
Pick one of the products Codex found and ask for an option set:
I’d like to create one option set for Casual Tuxedo Shirt
Codex asks what the option set should be called and which options it should include, suggesting examples such as size, color, engraving or gift wrap. Answering with something as short as Color: Blue is enough.
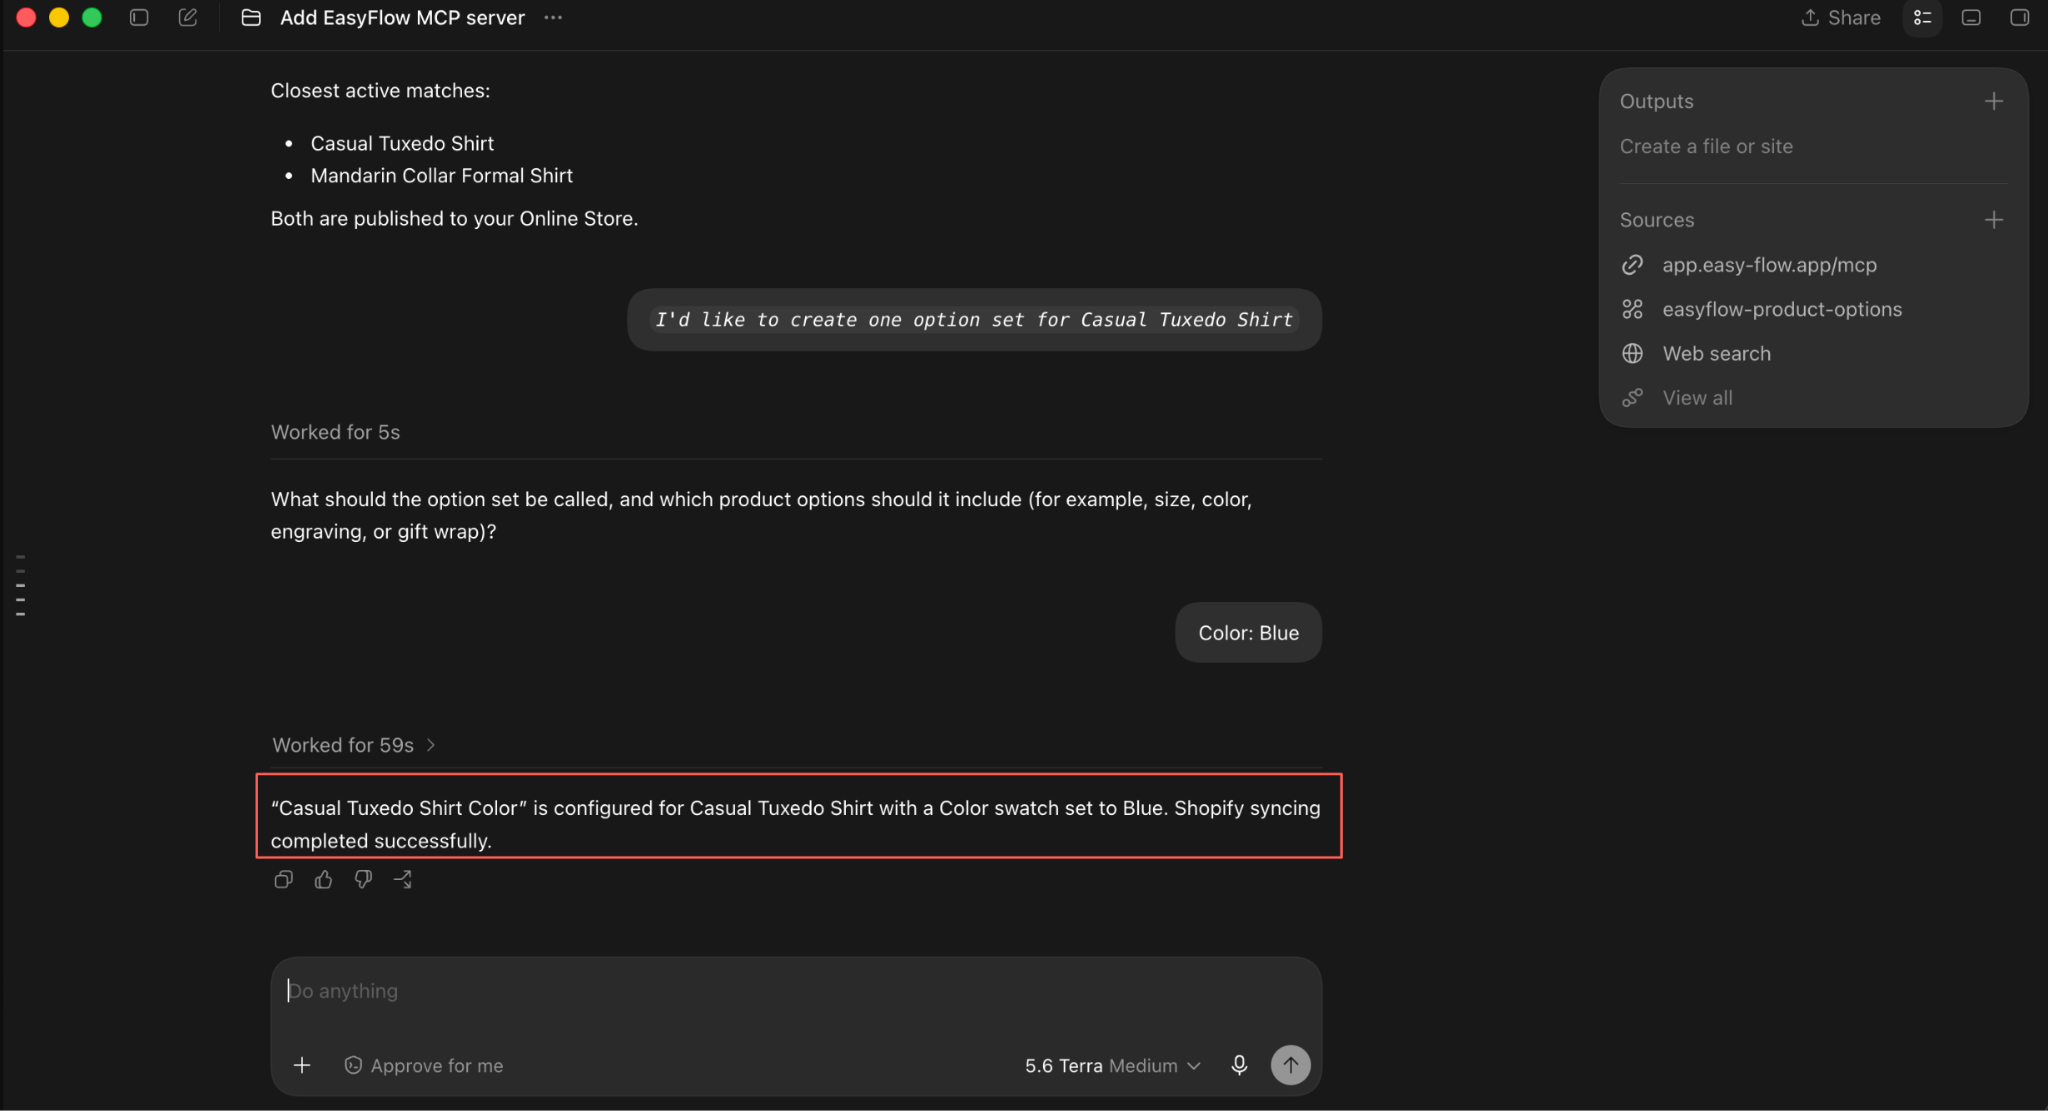
Codex confirms the result once the write finishes: Casual Tuxedo Shirt Color is configured for Casual Tuxedo Shirt with a Color swatch set to Blue, and Shopify syncing completed successfully.
Final Outcome #
Open EasyFlow in your Shopify admin to verify. The Color option now exists as a colour swatch with a single value, Blue, and the Preview panel on the right shows exactly what a shopper will see on the product page.
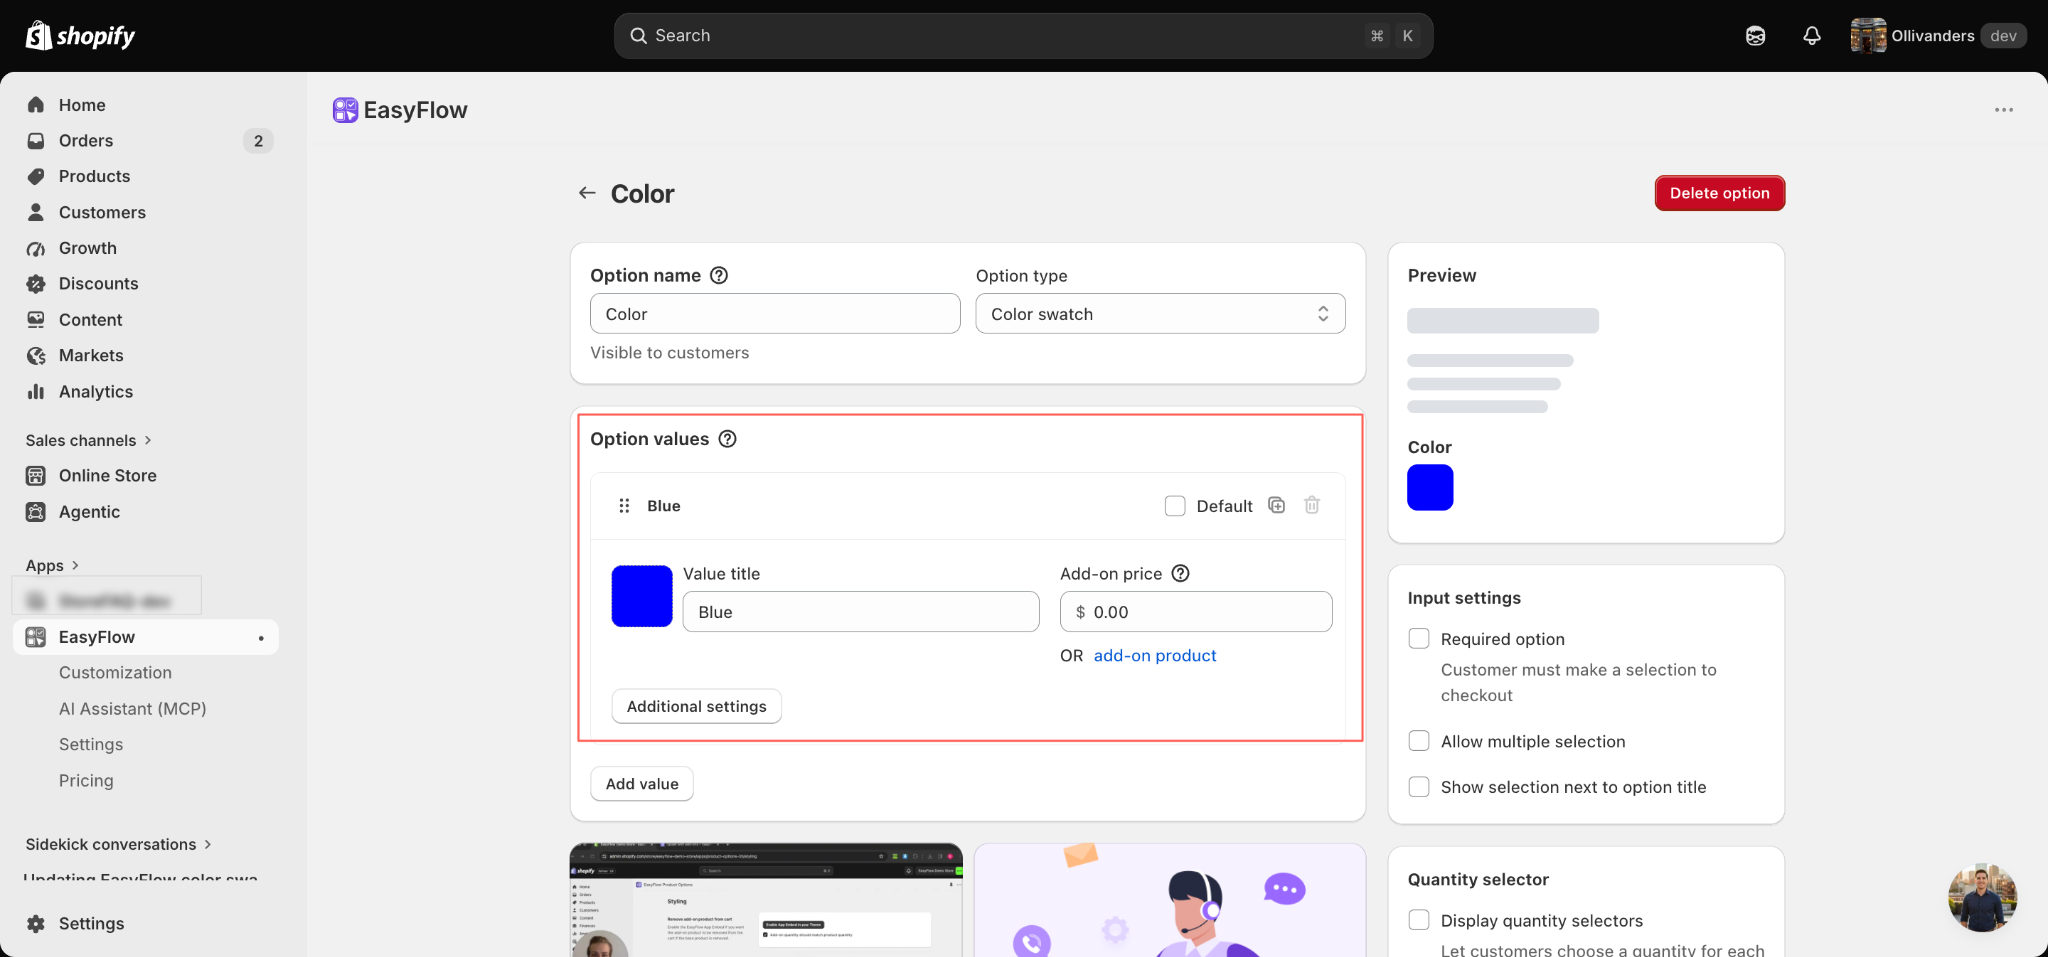
Codex is now a working front end for EasyFlow. From here you can add more values, attach add-on pricing, build conditional rules and target more products by describing what you want and every change goes live on your storefront right away.
This is how easily you can customize Shopify product options with EasyFlow MCP and Codex. One command adds the server, one sign-in authorizes it and from there the whole EasyFlow toolset is available from your terminal.
If you get stuck at any step, feel free to reach out to our customer support team. We are always happy to help.


