

EasyFlow connects to ChatGPT through MCP (Model Context Protocol), the open standard that lets AI assistants work directly with the tools you already use. Once the plugin is created and authorized, you can search products, build options, create option sets and apply add-on pricing by describing what you want in plain language.
This guide covers the full ChatGPT path from start to finish. It creates the plugin, walks through the one-time sign-in and finishes by building a real colour option on a live Shopify product.
Before You Start #
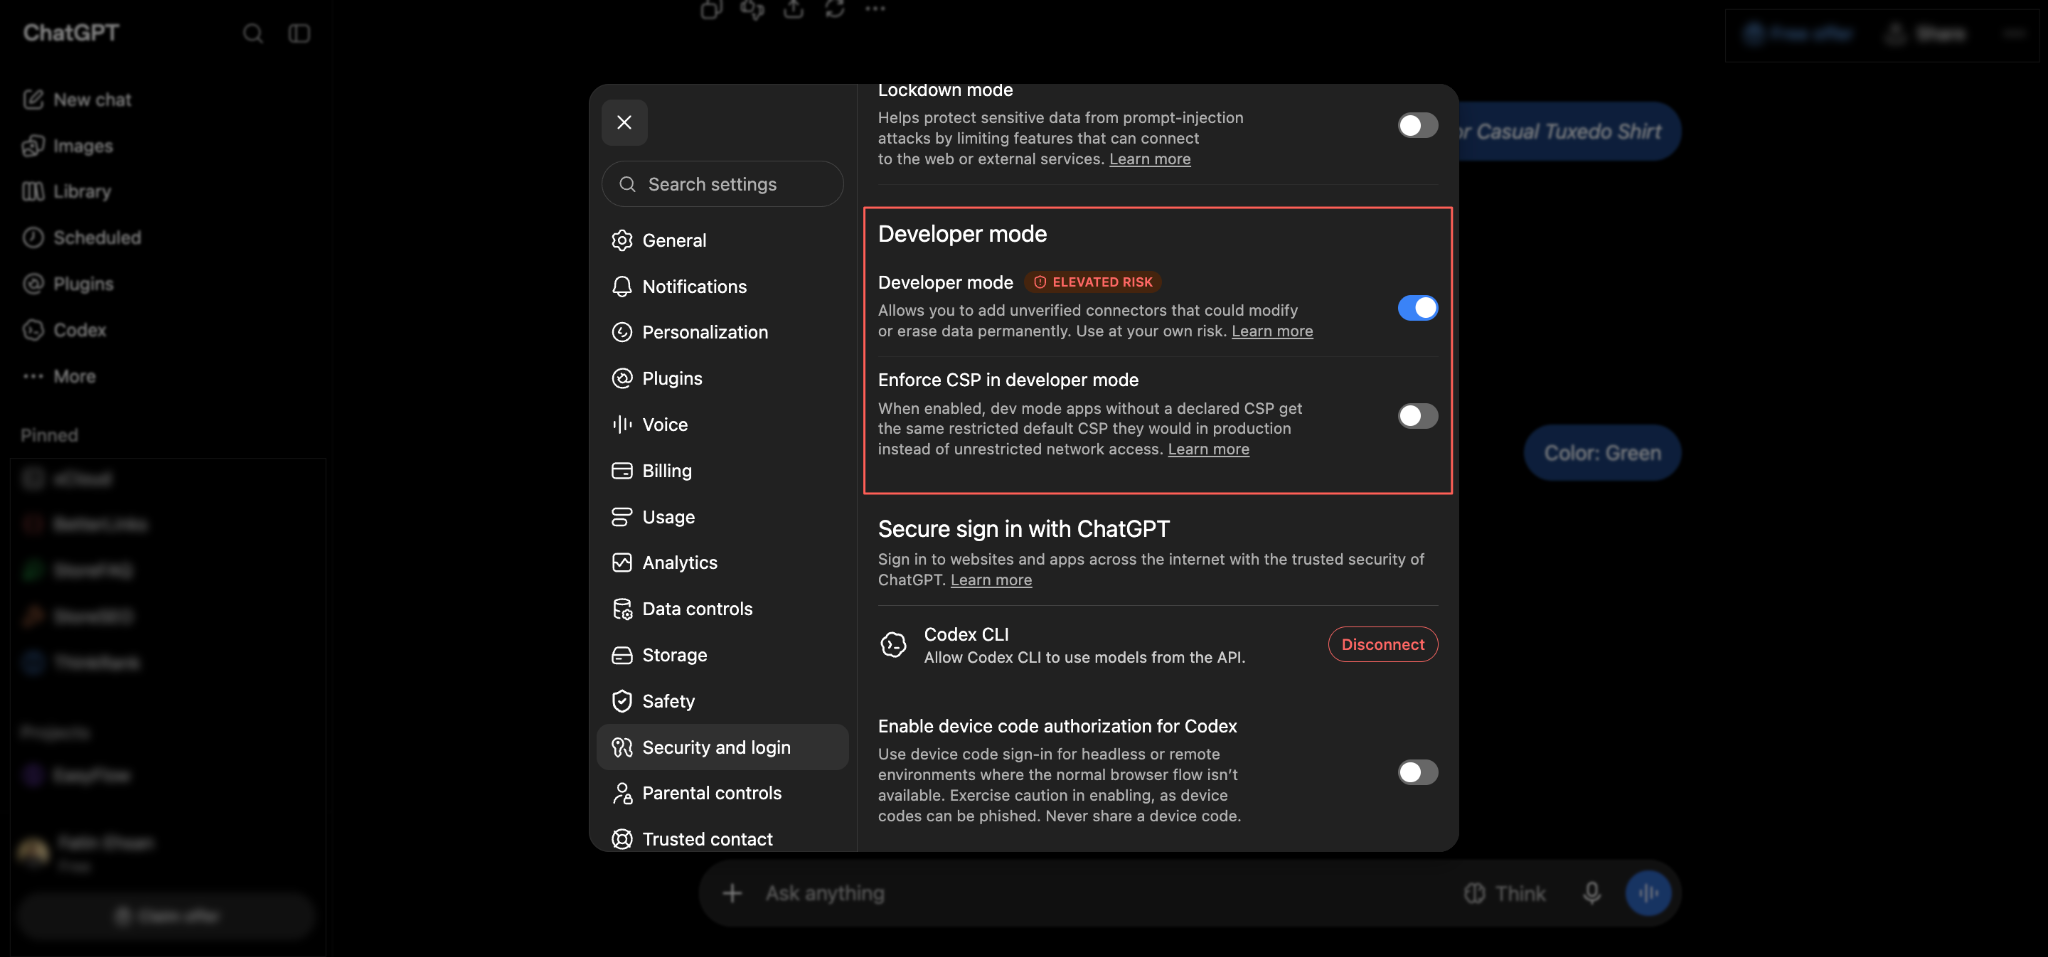
EasyFlow must be installed on your Shopify store. Developer mode must be turned on in ChatGPT, since a custom MCP server is not part of the official directory. You will find it under Settings, then Apps and connectors. You need access to your Shopify admin so you can copy the server URL from the EasyFlow app.
This part creates the plugin inside ChatGPT and points it at your EasyFlow server.
Step 1: Copy the Server URL from EasyFlow #
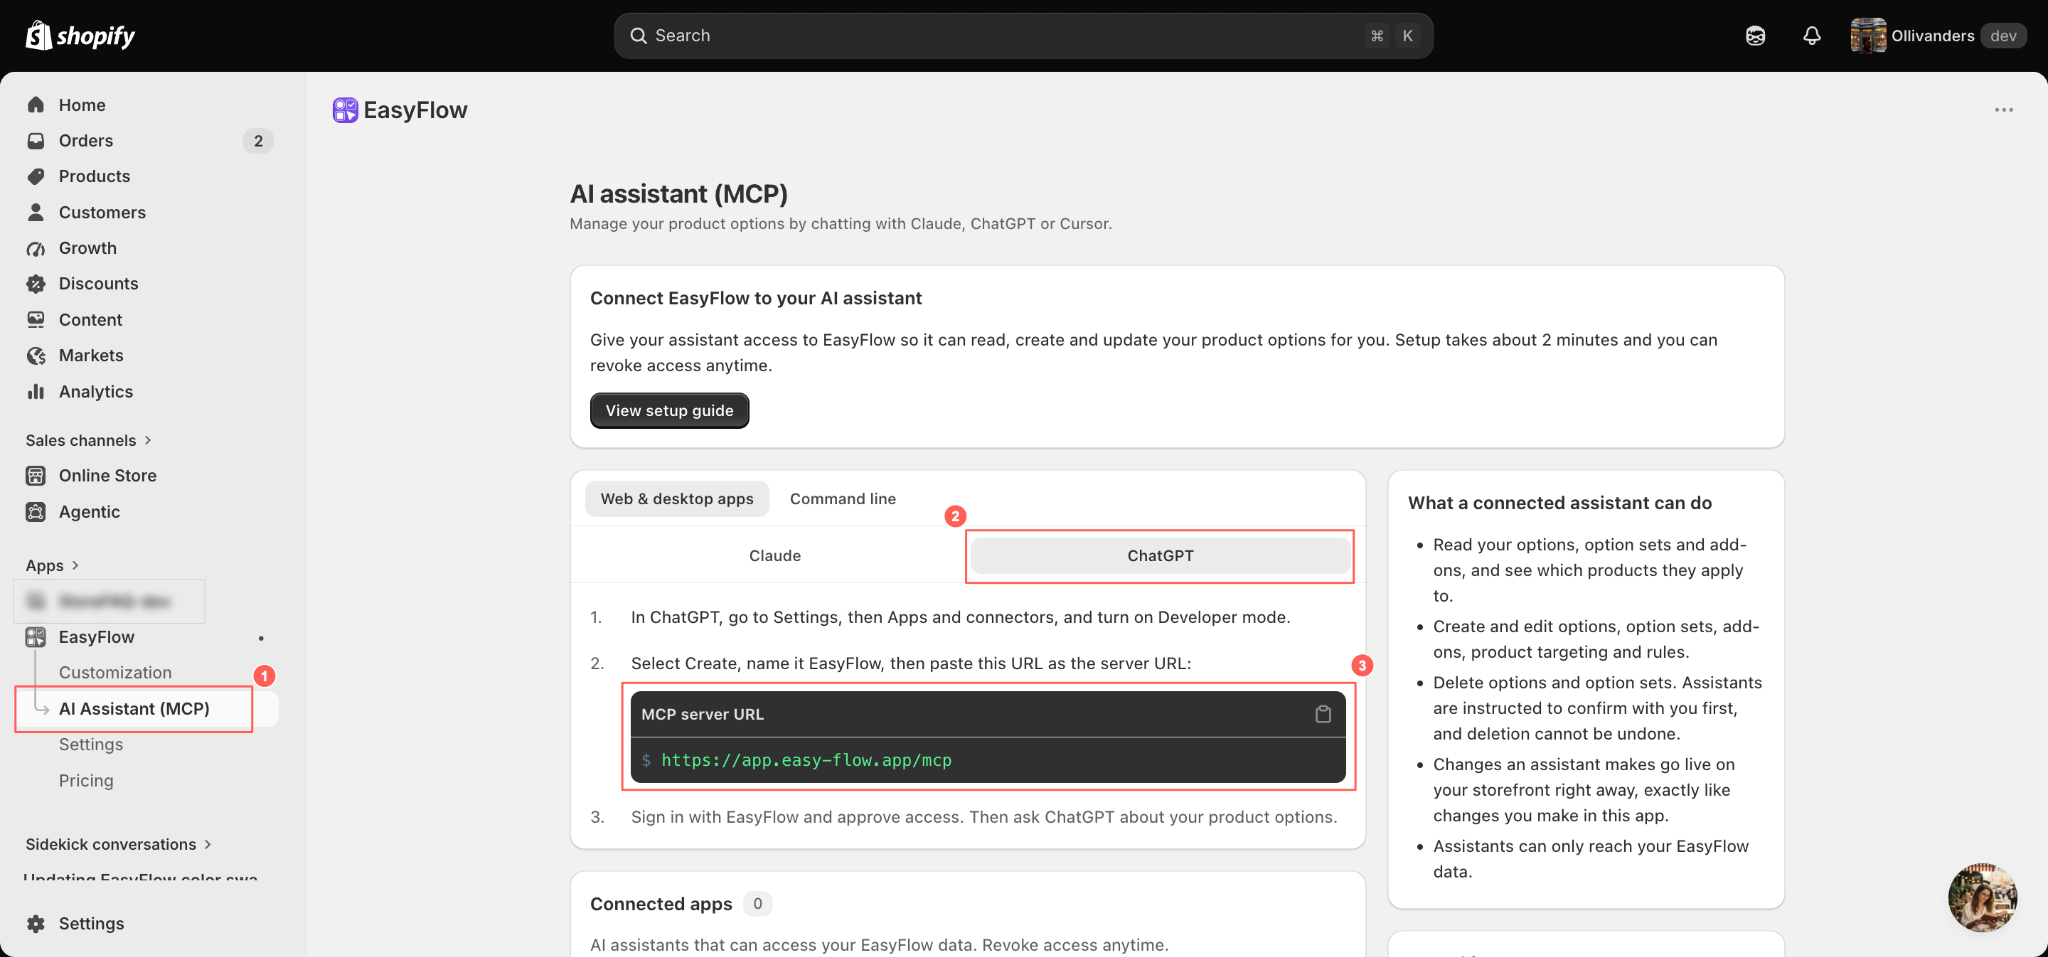
In your Shopify admin, go to Apps, then EasyFlow, then select AI Assistant (MCP) in the left sidebar. Stay on the Web & desktop apps tab and switch to the ChatGPT sub-tab.
The page shows the three setup steps along with your MCP server URL. Select the copy icon on the right of the URL block to put it on your clipboard.
https://app.easy-flow.app/mcp
Step 2: Open the Plugins Page in ChatGPT #
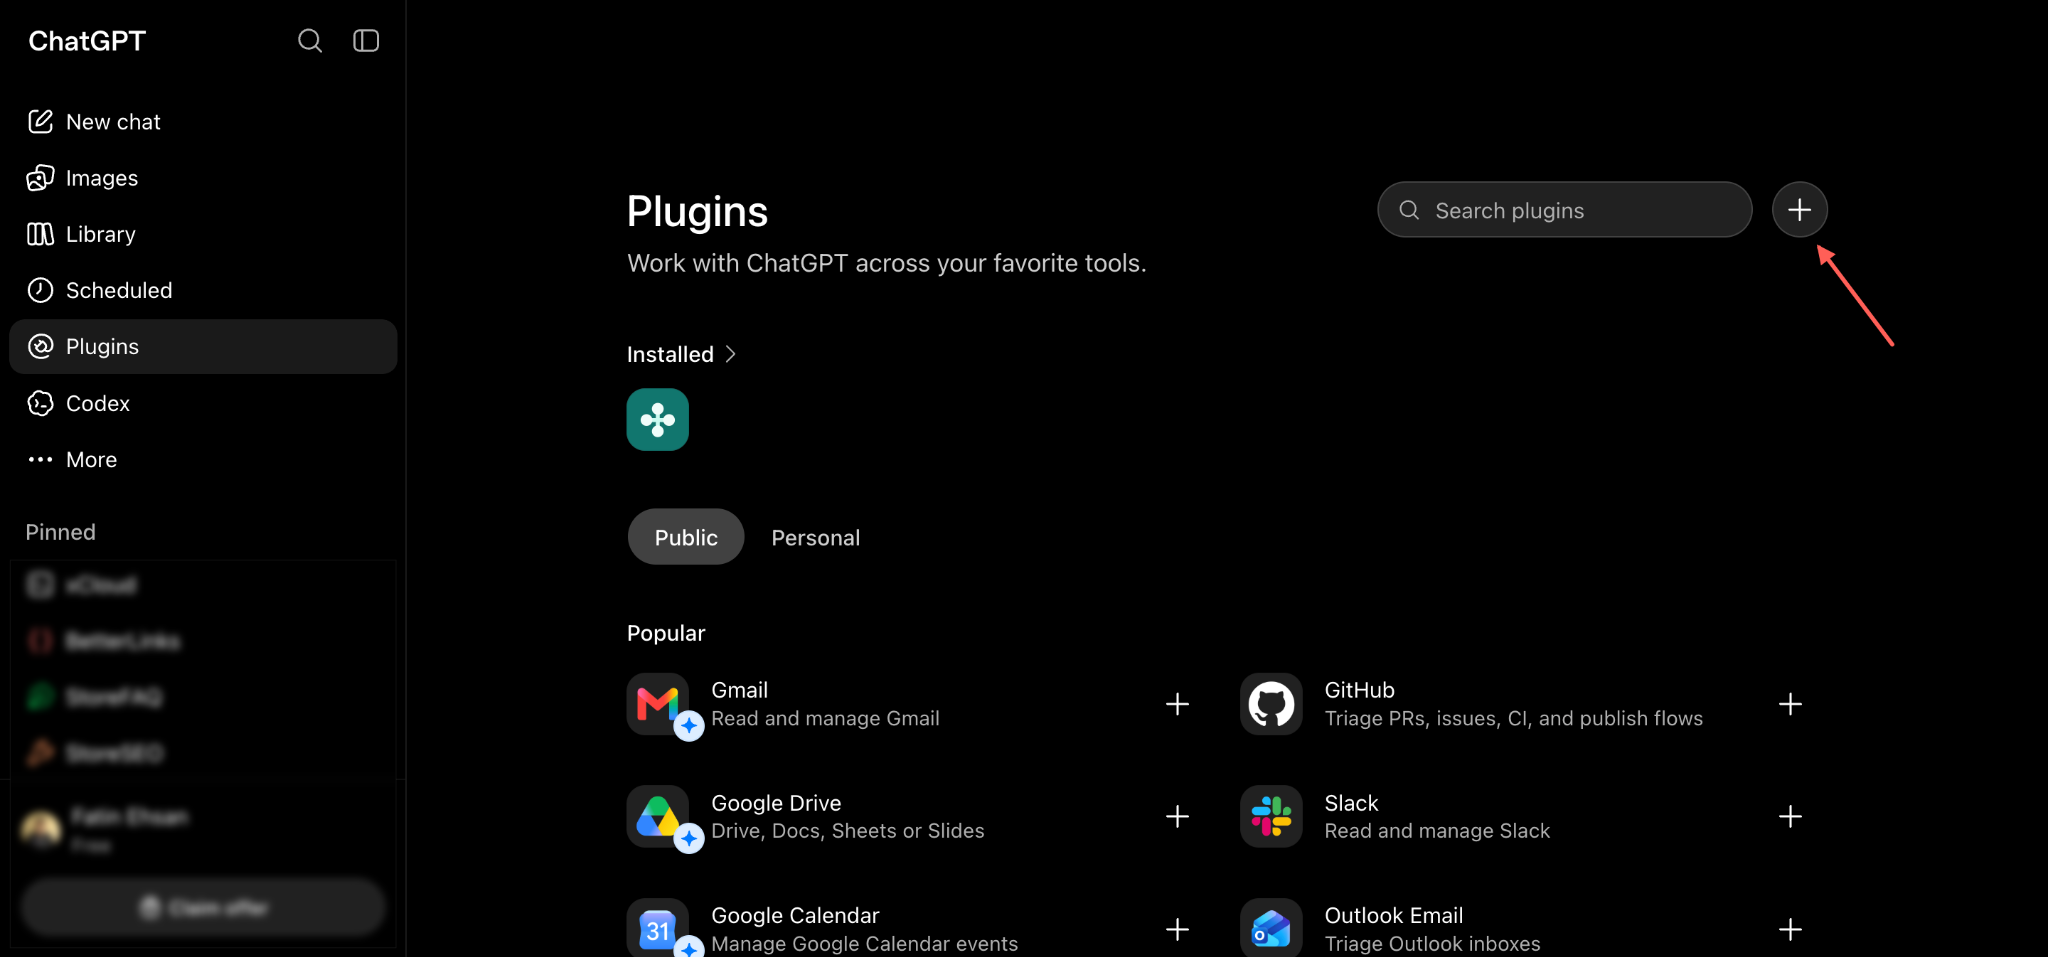
Open ChatGPT and select Plugins in the left sidebar. This screen lists every tool ChatGPT can work with, split into Public and Personal tabs.
Select the plus button to the right of the Search plugins field to start creating a new one.
Step 3: Fill in the Plugin Details #
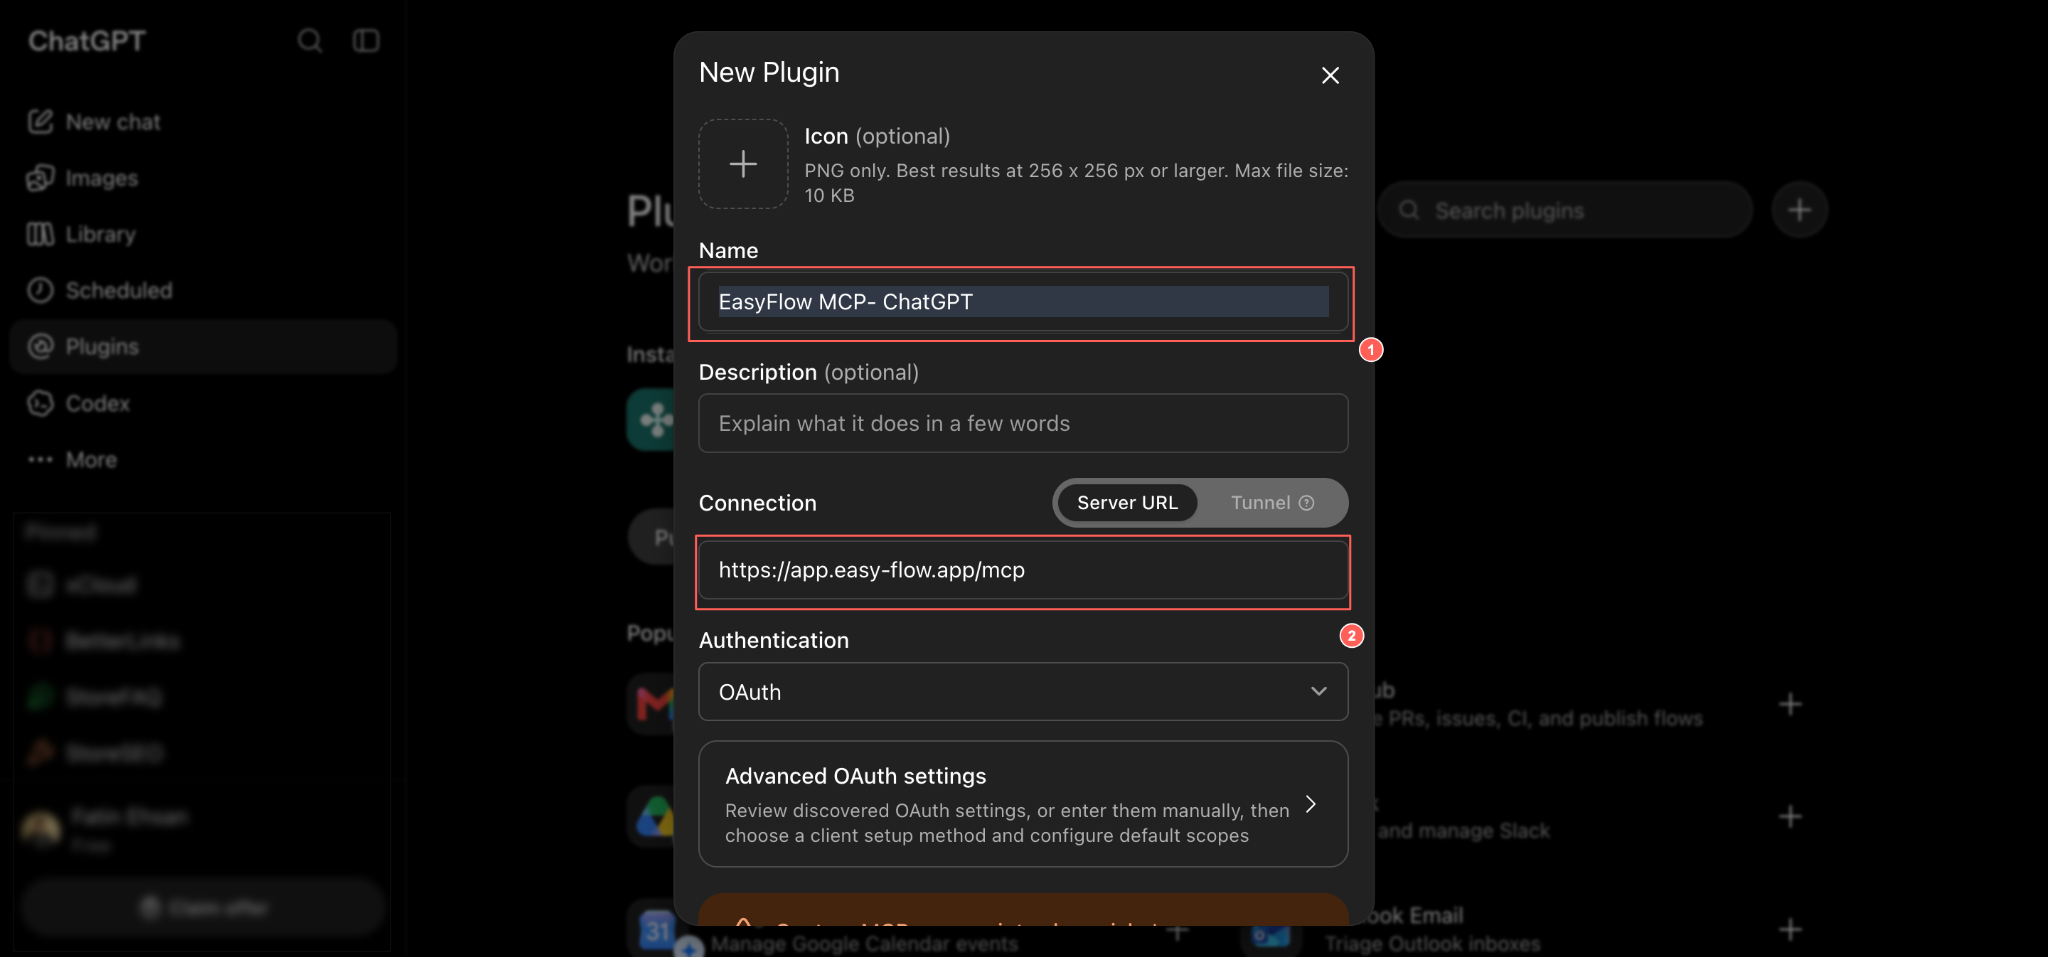
The New Plugin dialog opens. Fill in the two fields that matter.
- Name: type something you will recognise later, for example, EasyFlow MCP- ChatGPT.
- Connection: keep the type set to Server URL and paste the URL you copied in Step 1.
Leave Authentication set to OAuth, which is what EasyFlow uses to verify you. The Icon and Description fields are optional and have no effect on the connection.
Step 4: Accept the Risk Notice and Create the Plugin #
Tick the ‘I understand and want to continue’ checkbox to acknowledge it, then select Create.
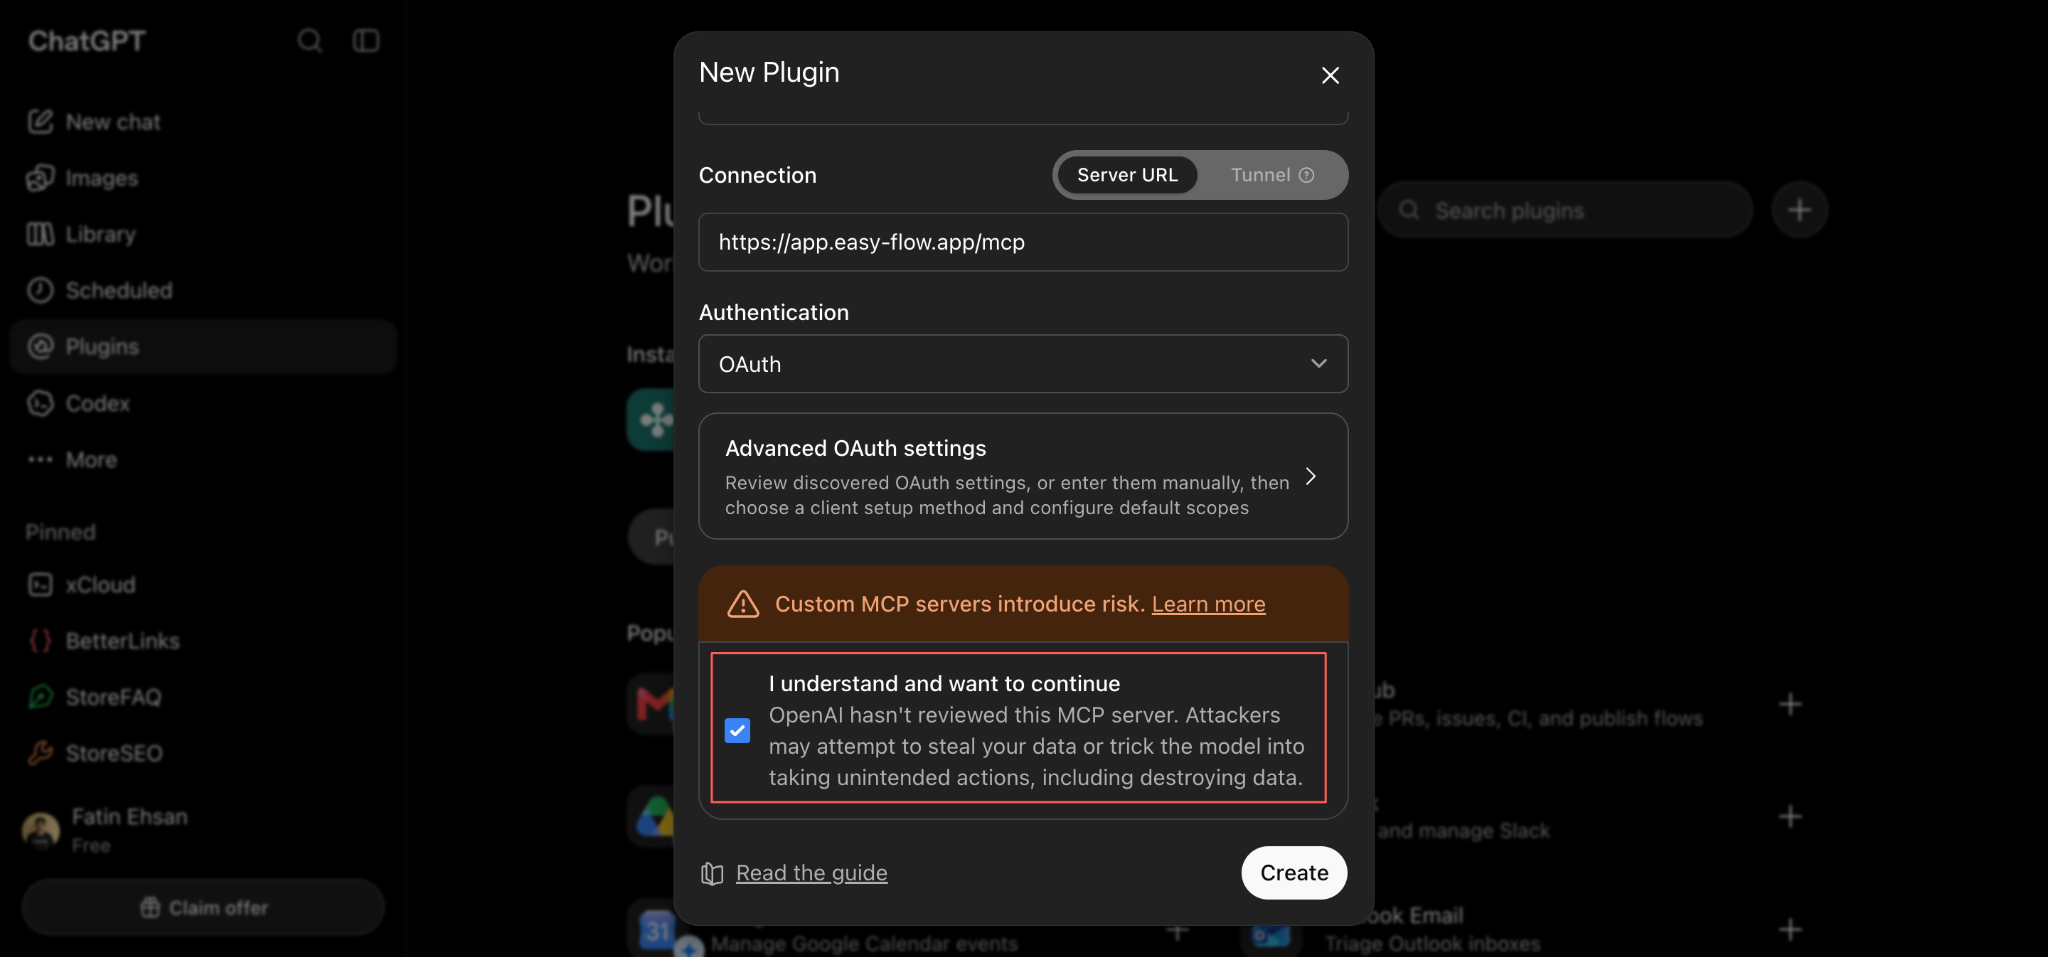
Creating the plugin registers the server. It does not yet grant access to your store, so there is a one-time sign-in before any tool will run.
Step 5: Sign In with EasyFlow MCP #
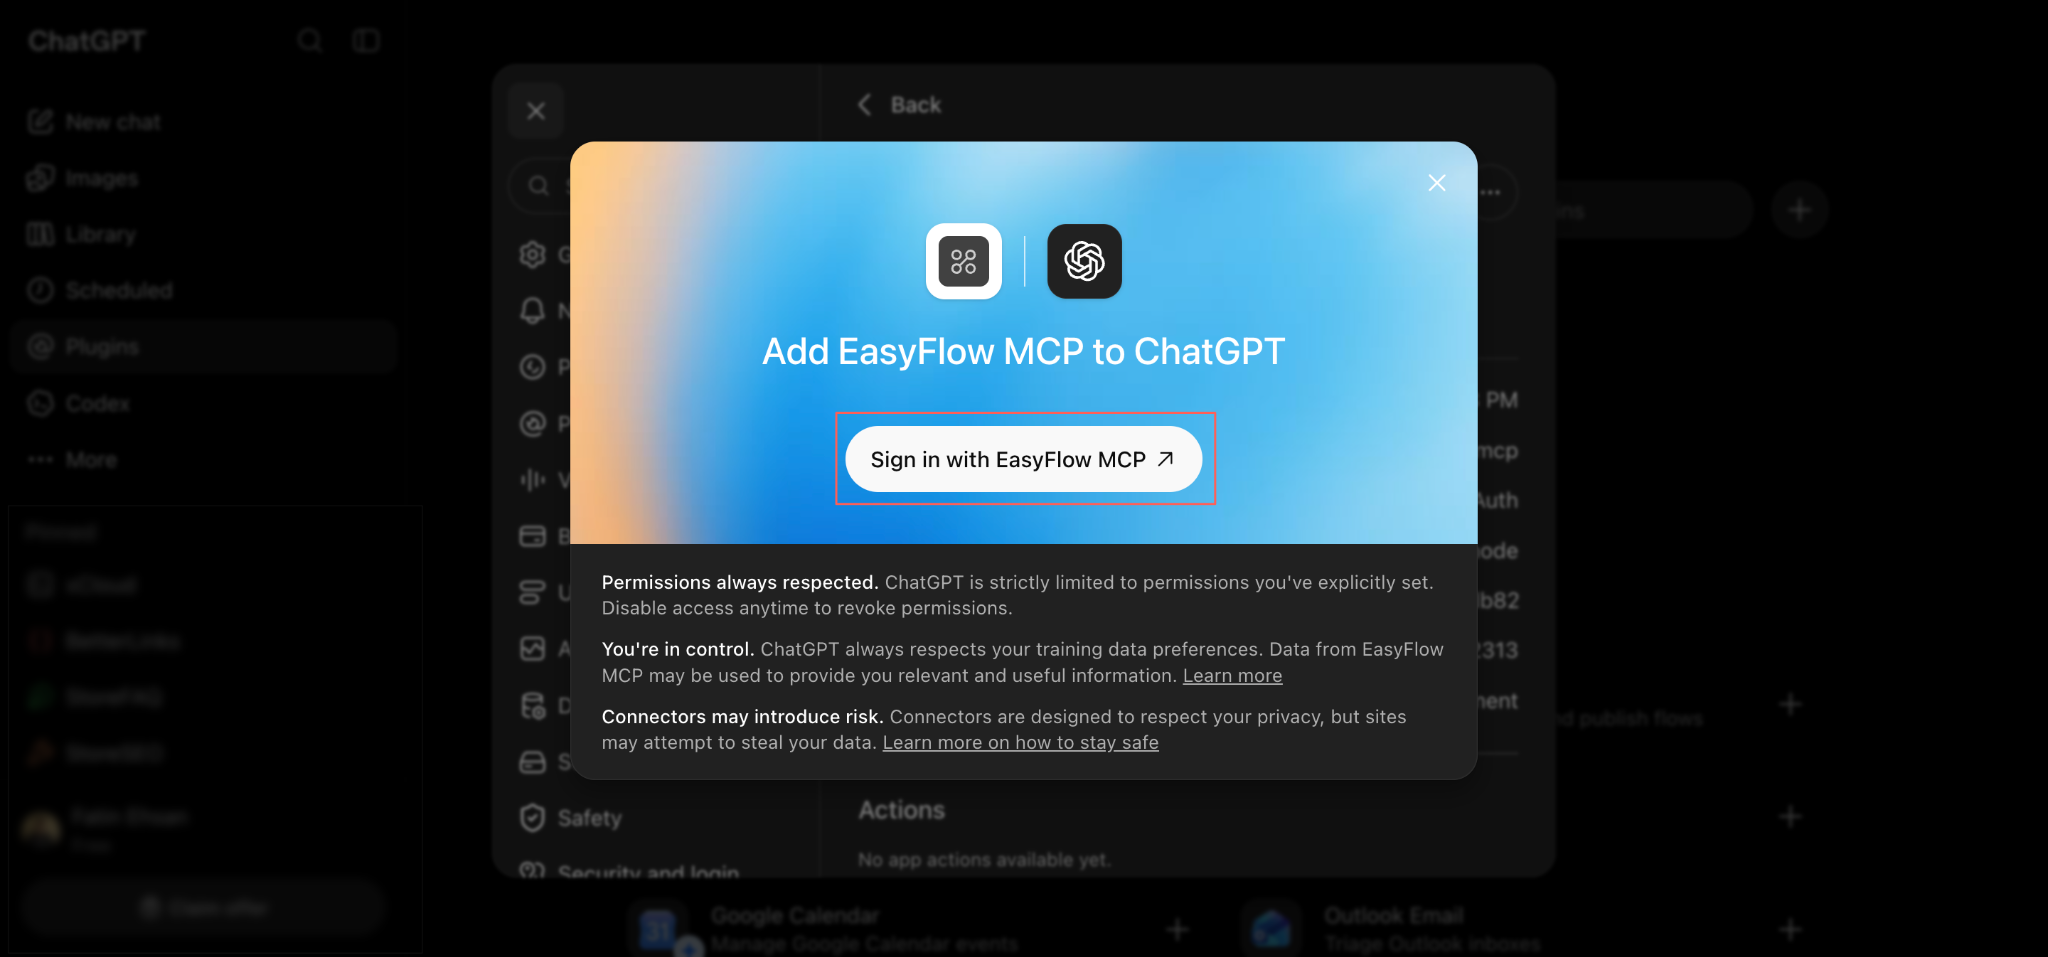
ChatGPT shows an Add EasyFlow MCP to ChatGPT screen. Select Sign in with EasyFlow MCP to start the authorization flow.
The panel underneath explains what you are agreeing to: permissions are limited to what you explicitly set, you can disable access at any time and connectors carry the usual risks of any third-party integration.
Step 6: Choose the Store You Want to Connect #
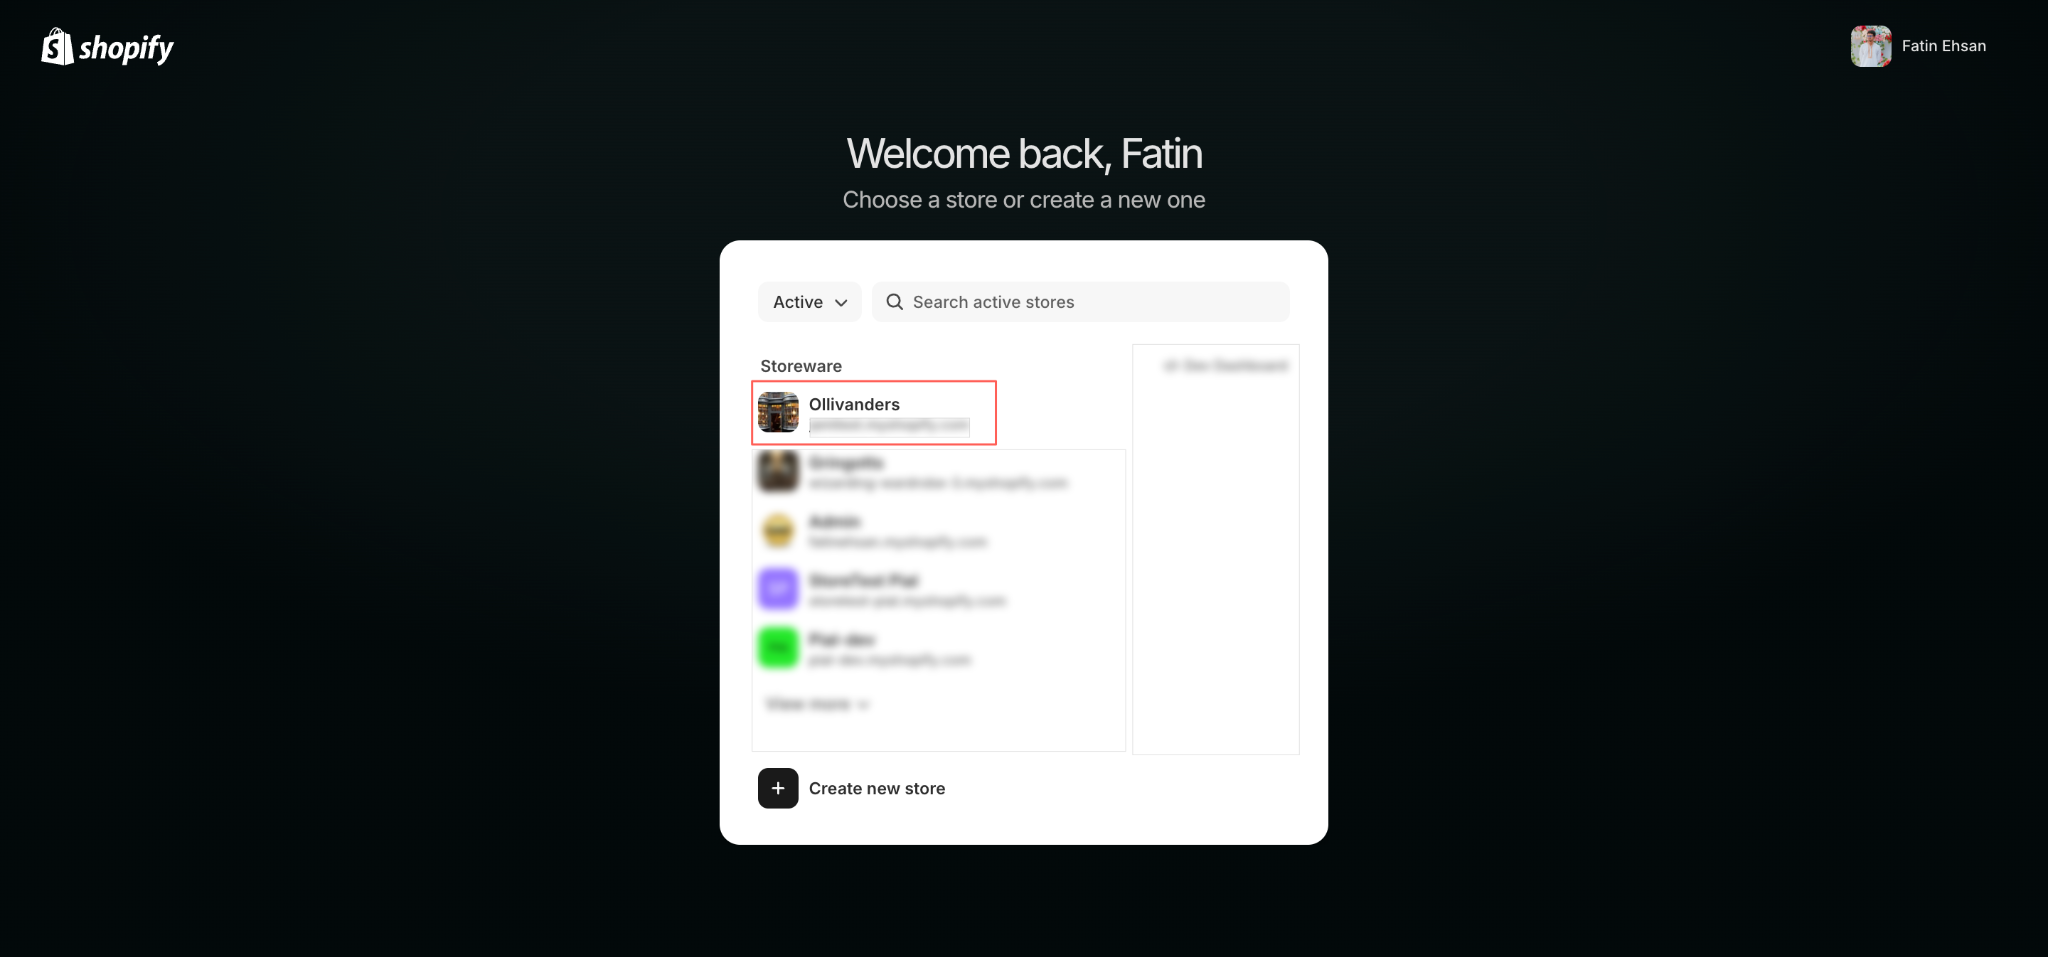
Shopify asks which store you are authorizing. Pick the store that has EasyFlow installed, then continue. In this example the store is Ollivanders.
Step 7: Review the Connection And Permissions #
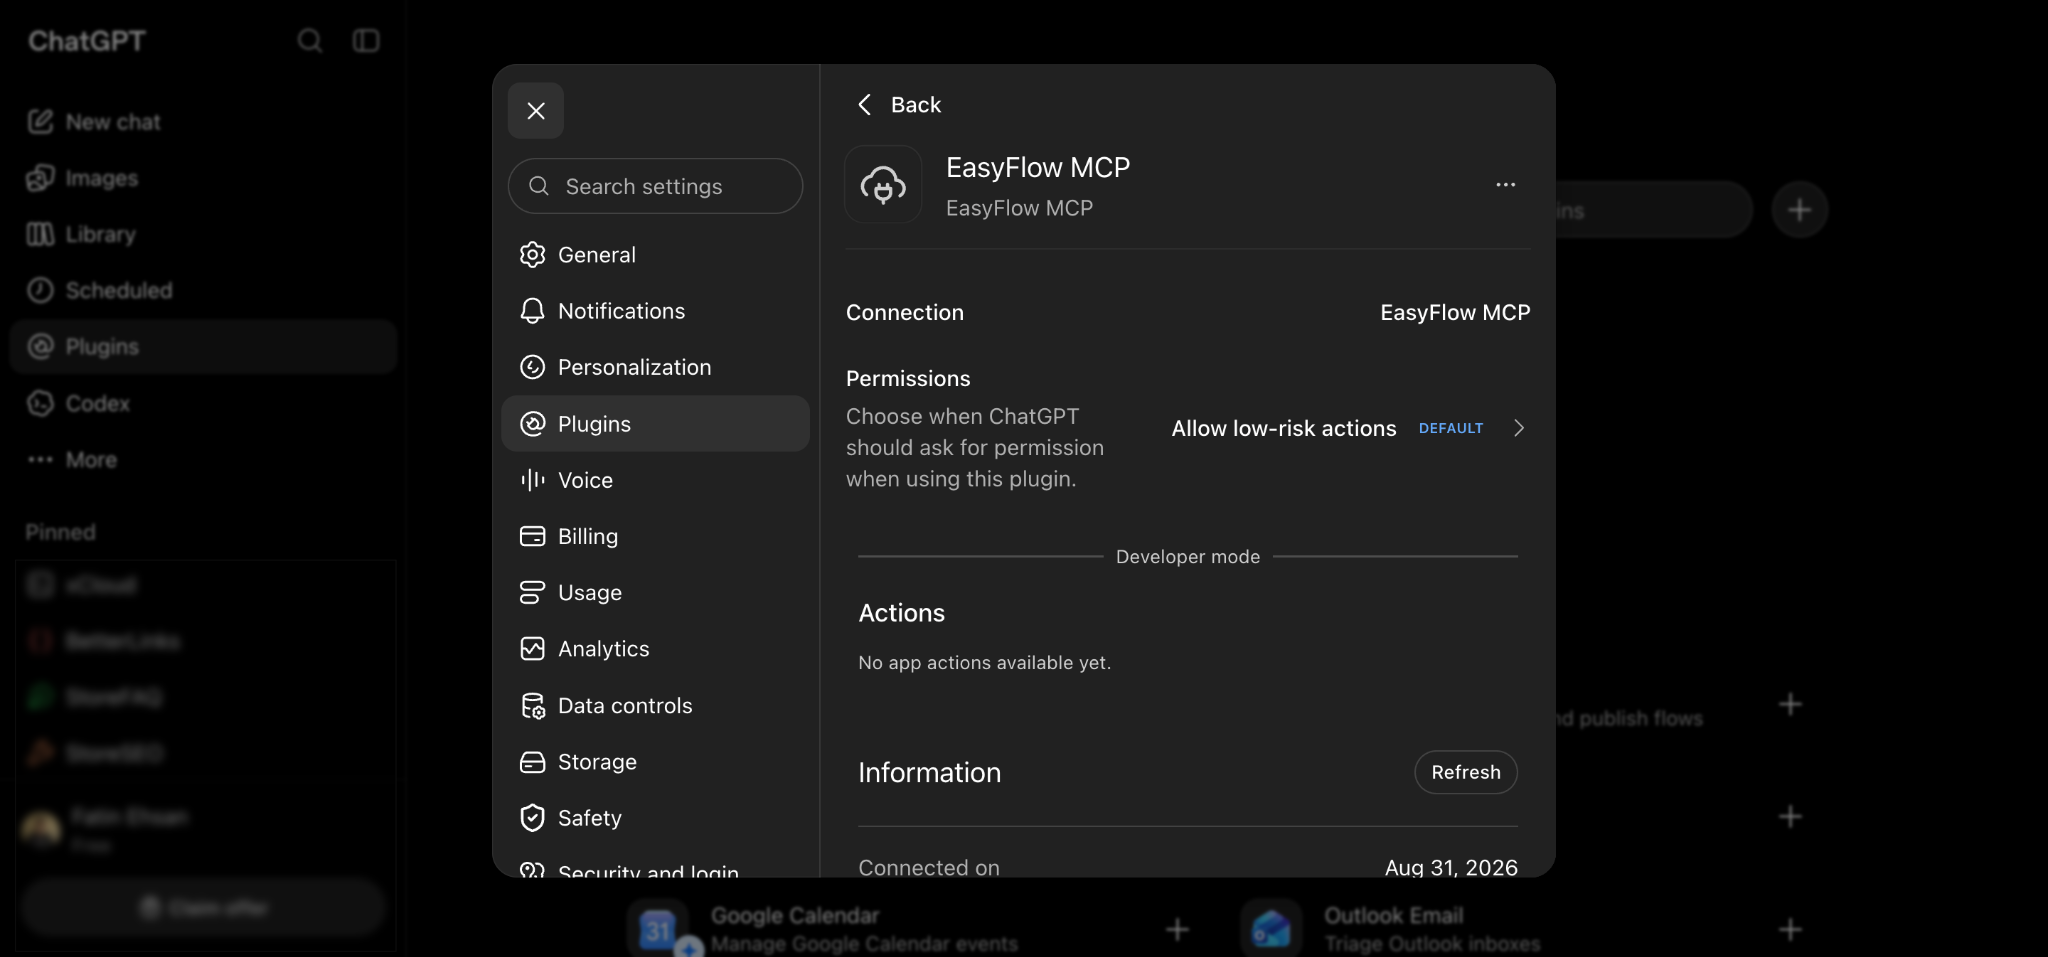
After signing in, the plugin detail page shows the active connection along with the date it was connected. The Permissions row controls when ChatGPT asks before running a tool, and it defaults to Allow low-risk actions.
That default means ChatGPT will ask you before anything that changes your data. Select the Permissions row if you want to make it stricter or more relaxed.
Step 8: Confirm the Plugin Is Installed #
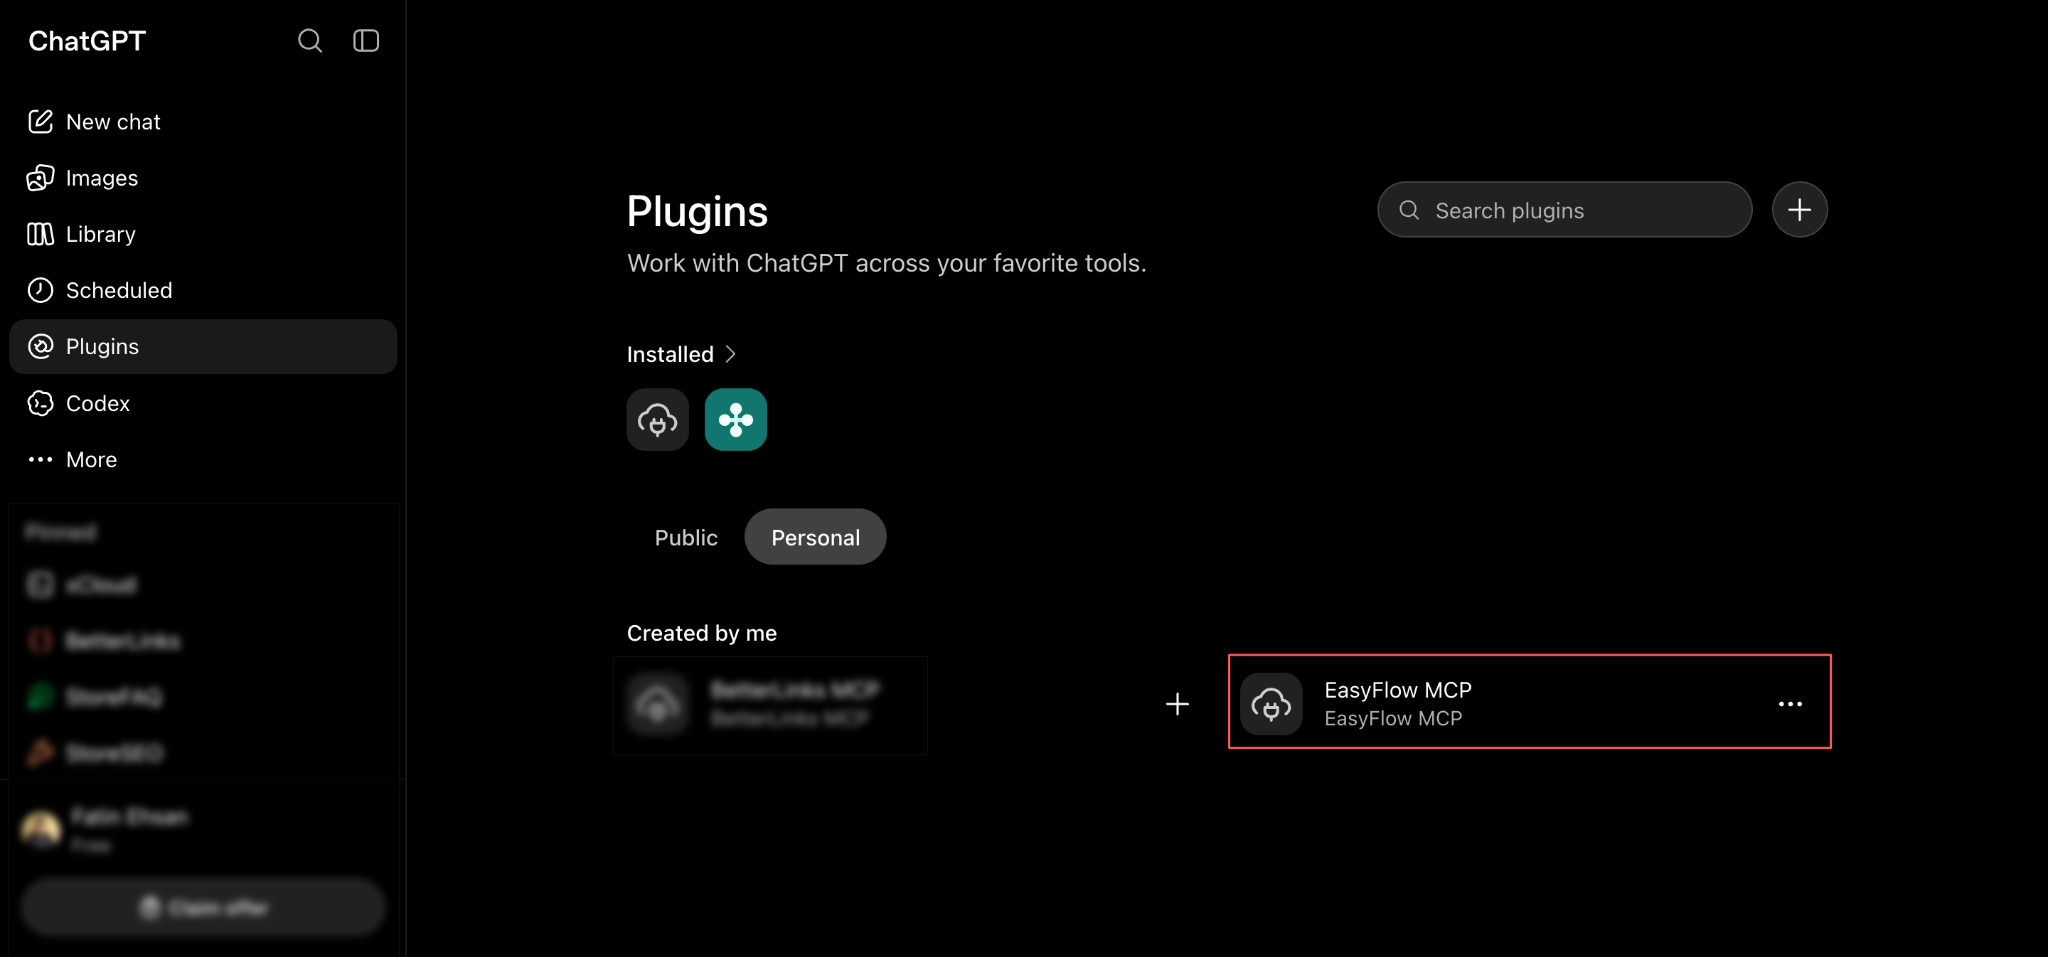
Go back to Plugins and open the Personal tab. EasyFlow MCP now appears under Created by me, and its icon shows in the Installed row at the top of the page.
With the plugin authorized, ChatGPT can work against your live store. Start with a read-only lookup before making any changes.
Step 9: Ask ChatGPT to Find a Product #
Open a new chat and ask for a specific product:
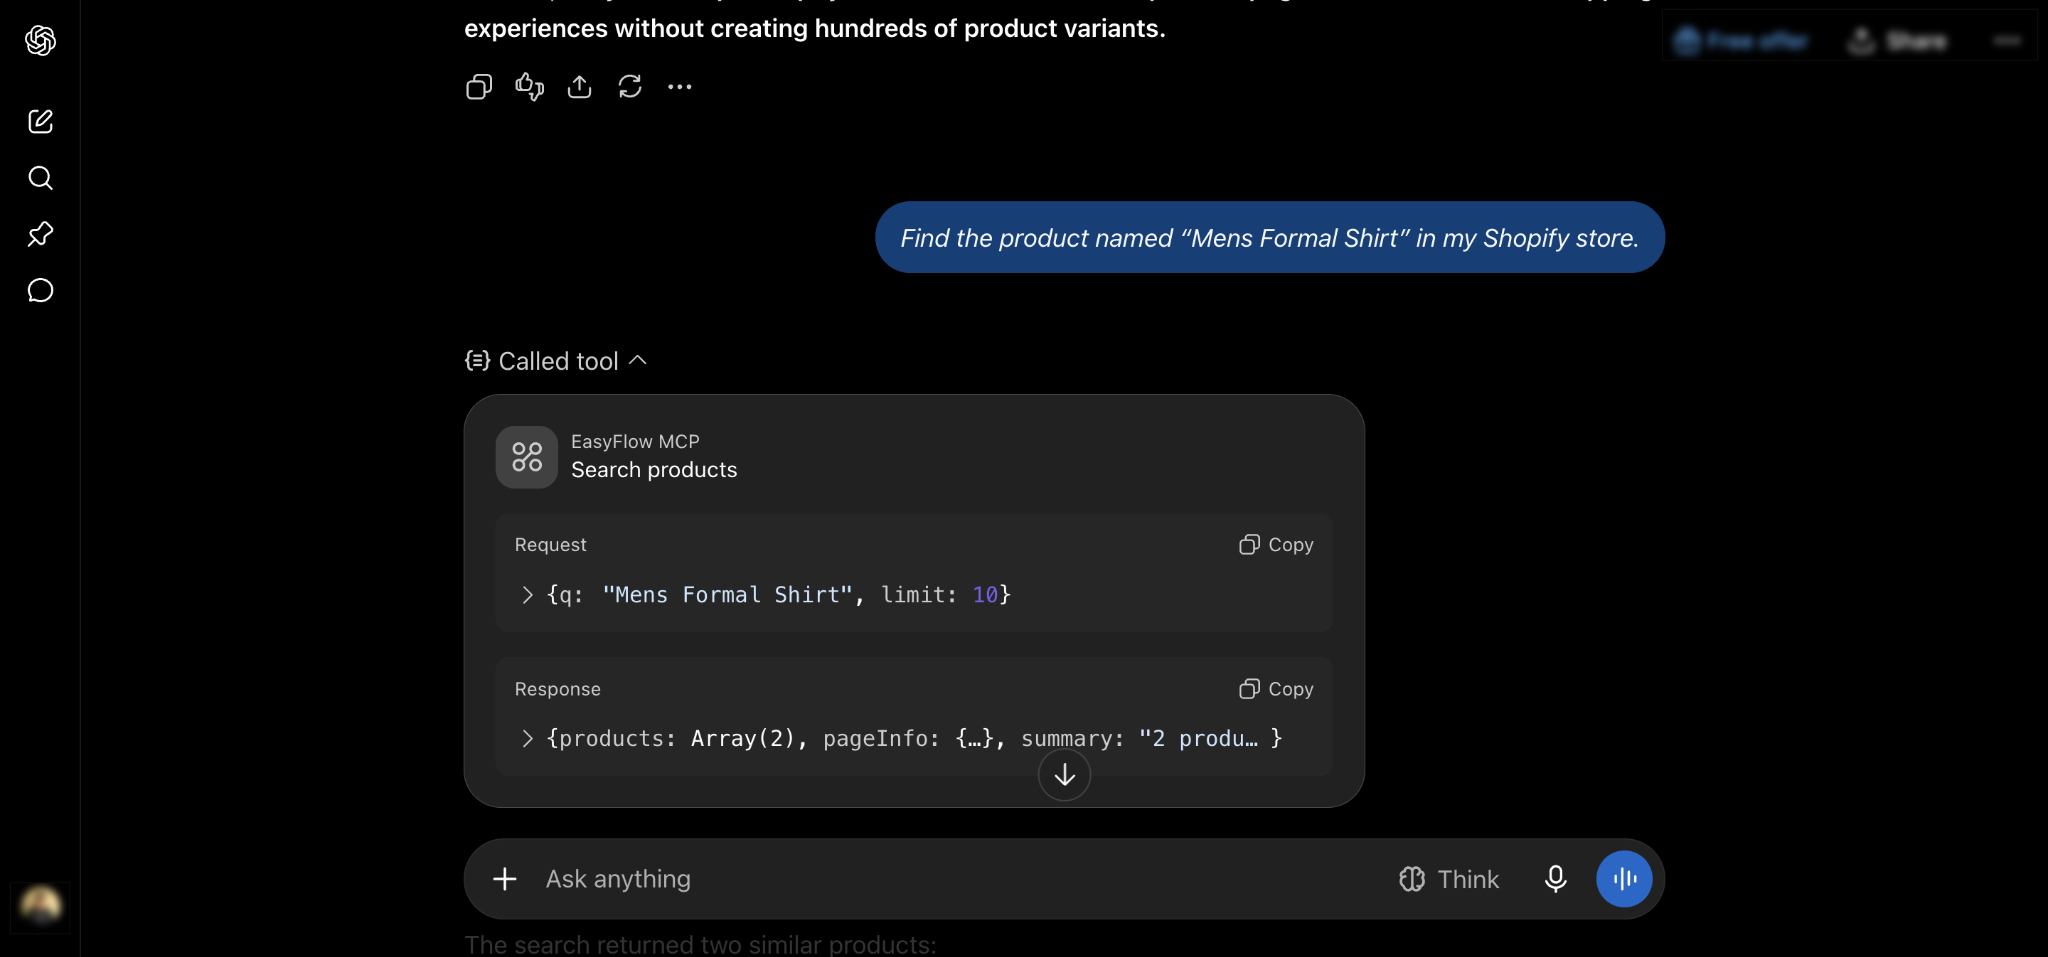
Find the product named "Mens Formal Shirt" in my Shopify store.
ChatGPT calls the EasyFlow Search products tool and shows the exchange under a Called tool block. Expand it to see the exact request it sent and the response it received, which is the fastest way to confirm the connection is returning real store data.
Step 10: Create an Option Set & Approve the Tool Call #
Once you know which product you want to work on, ask for the option set:
I'd like to create one option set for Casual Tuxedo Shirt
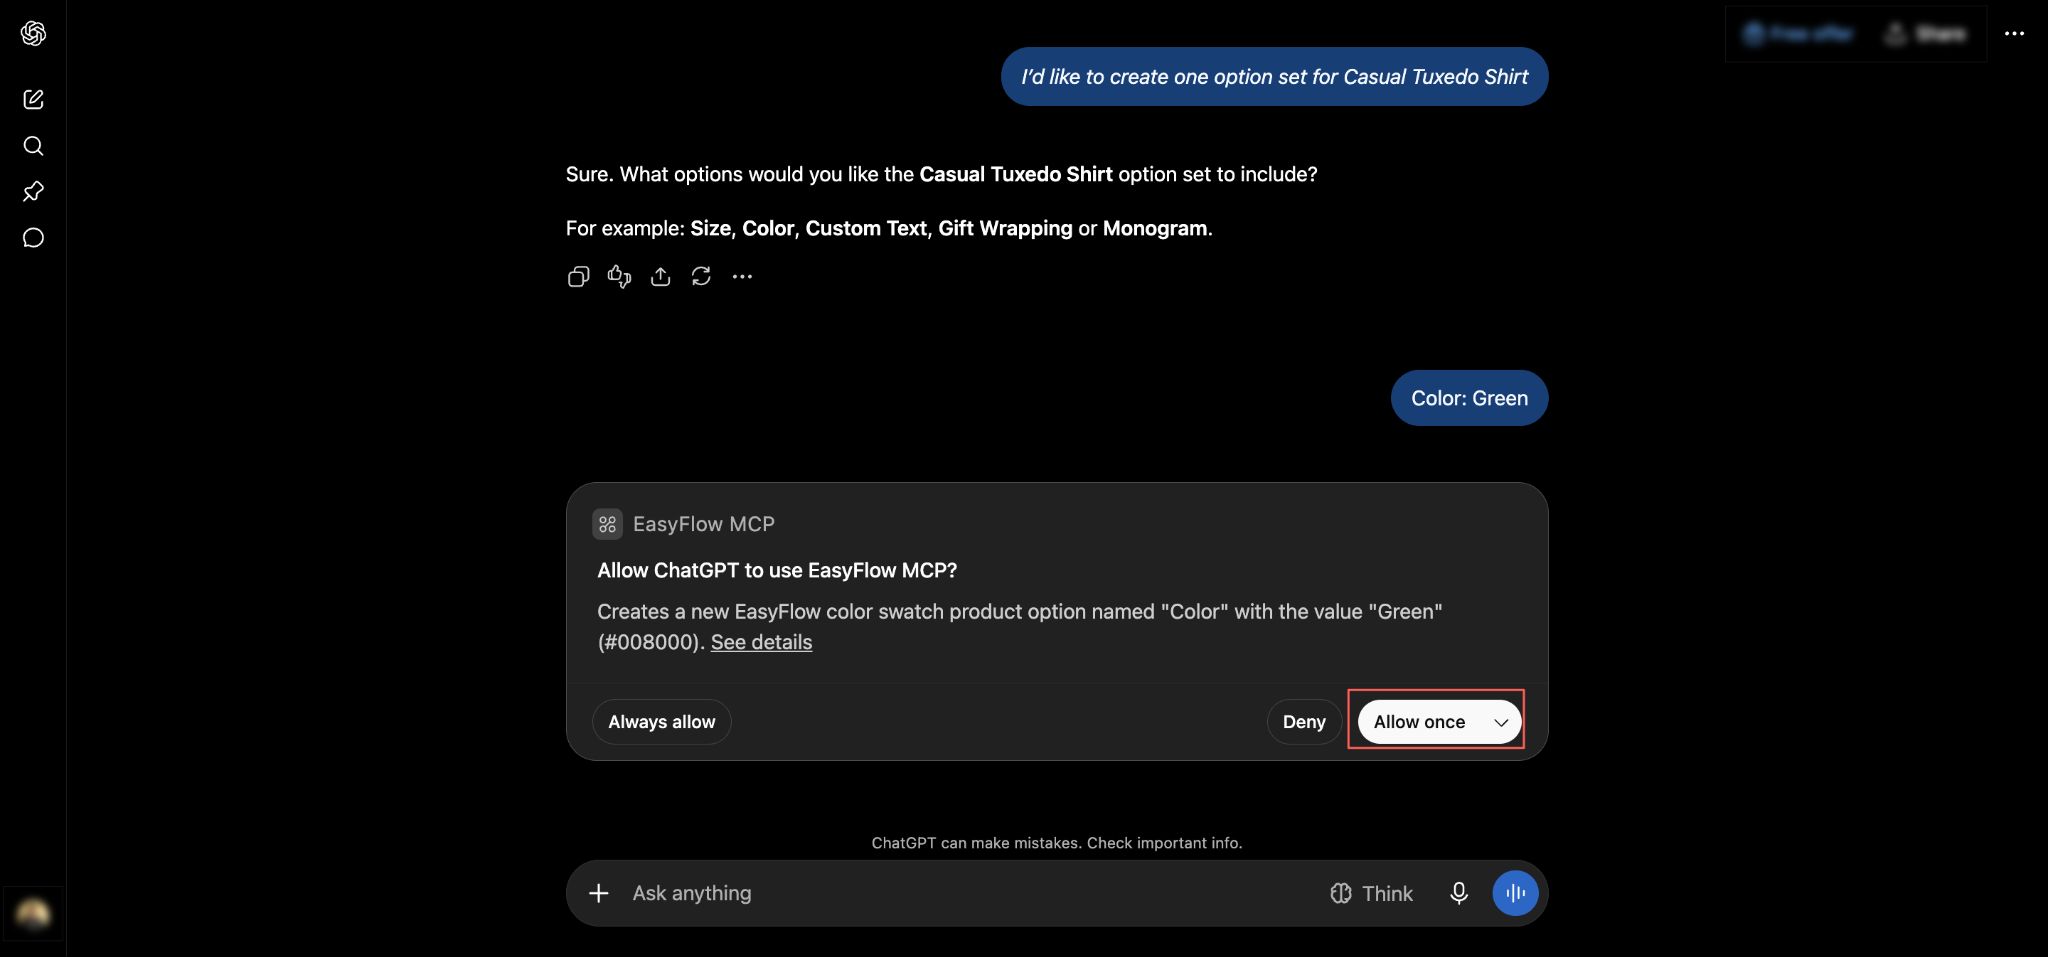
ChatGPT asks what the option set should include and suggests common examples such as Size, Color, Custom Text, Gift Wrapping or Monogram. Answering with something as short as Color: Green is enough.
Because this request changes data, ChatGPT asks for permission first and states exactly what it is about to do, in this case creating a colour swatch option named Color with the value Green. Select Allow once for a single run, Always allow to stop prompting for that tool or Deny to block it.
Step 11: Read the Confirmation #
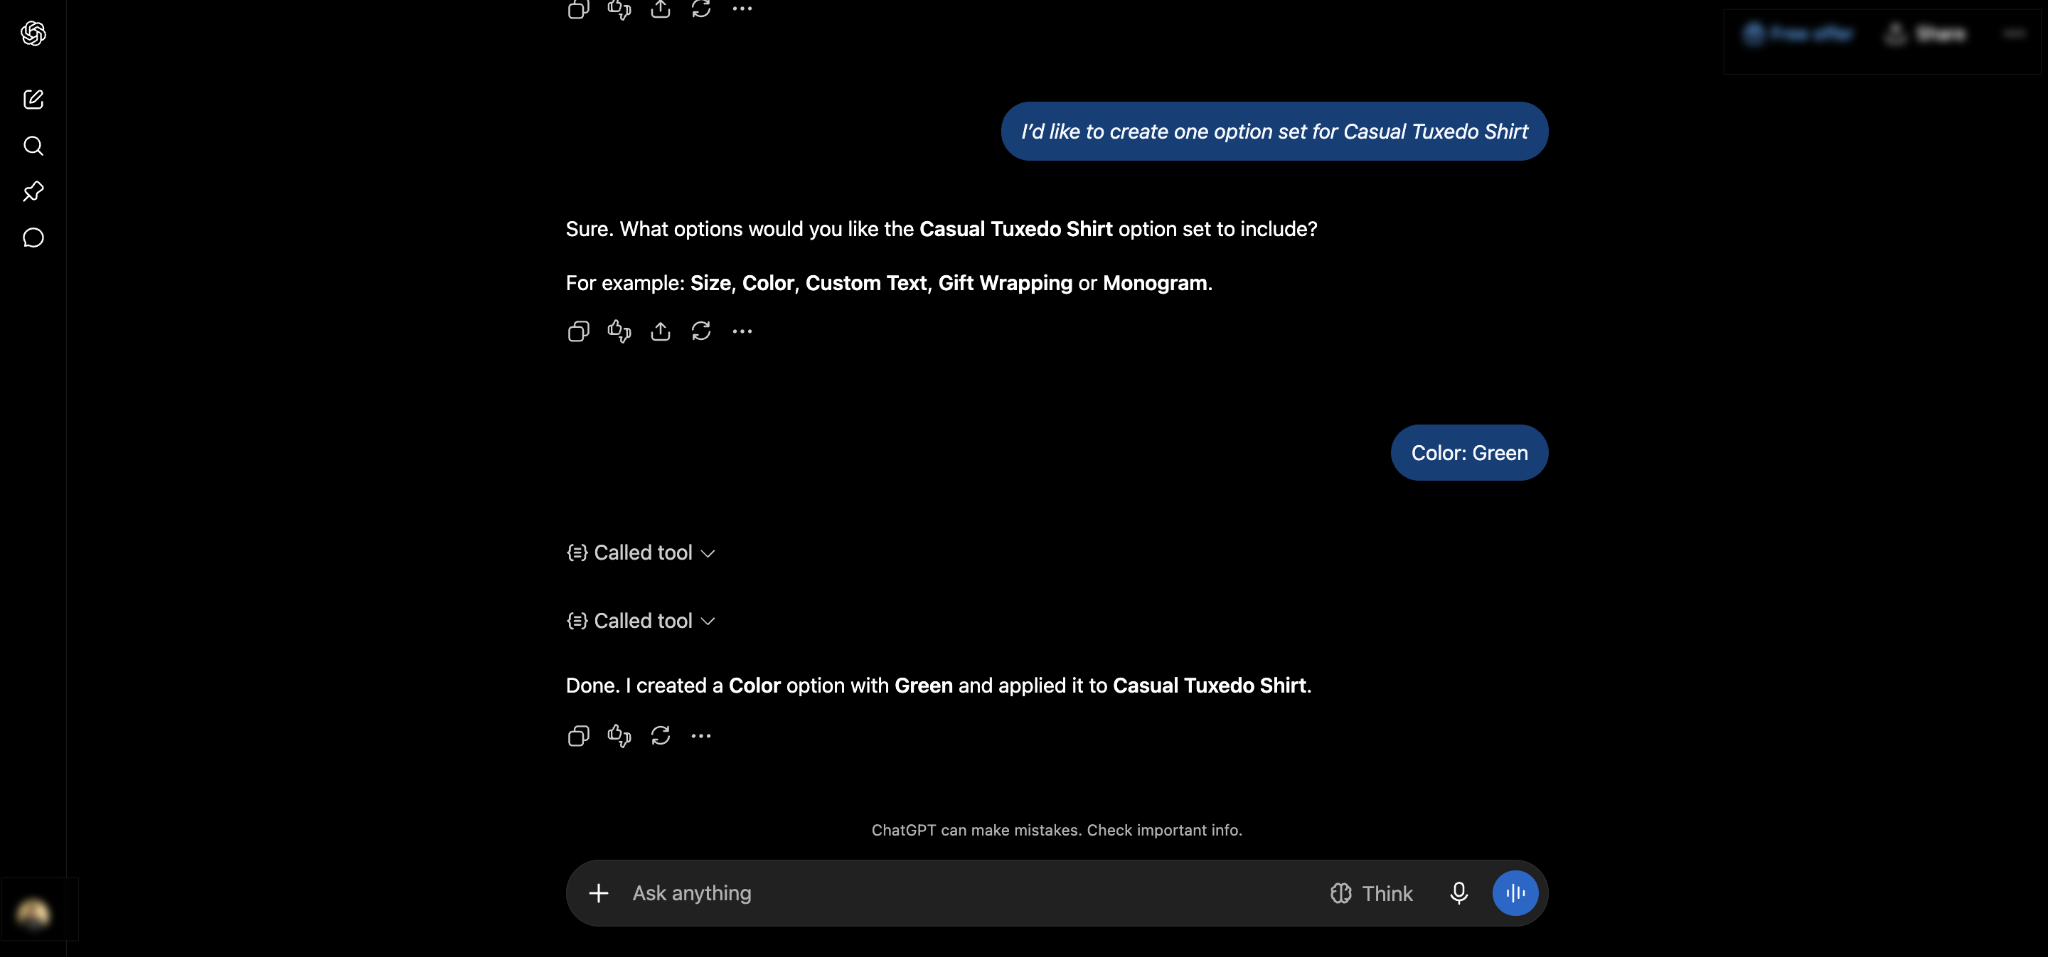
ChatGPT runs the tools and confirms the result in one line: it created a Color option with Green and applied it to Casual Tuxedo Shirt. The Called tool blocks above the confirmation stay expandable if you want to check exactly what ran.
Final Outcome #
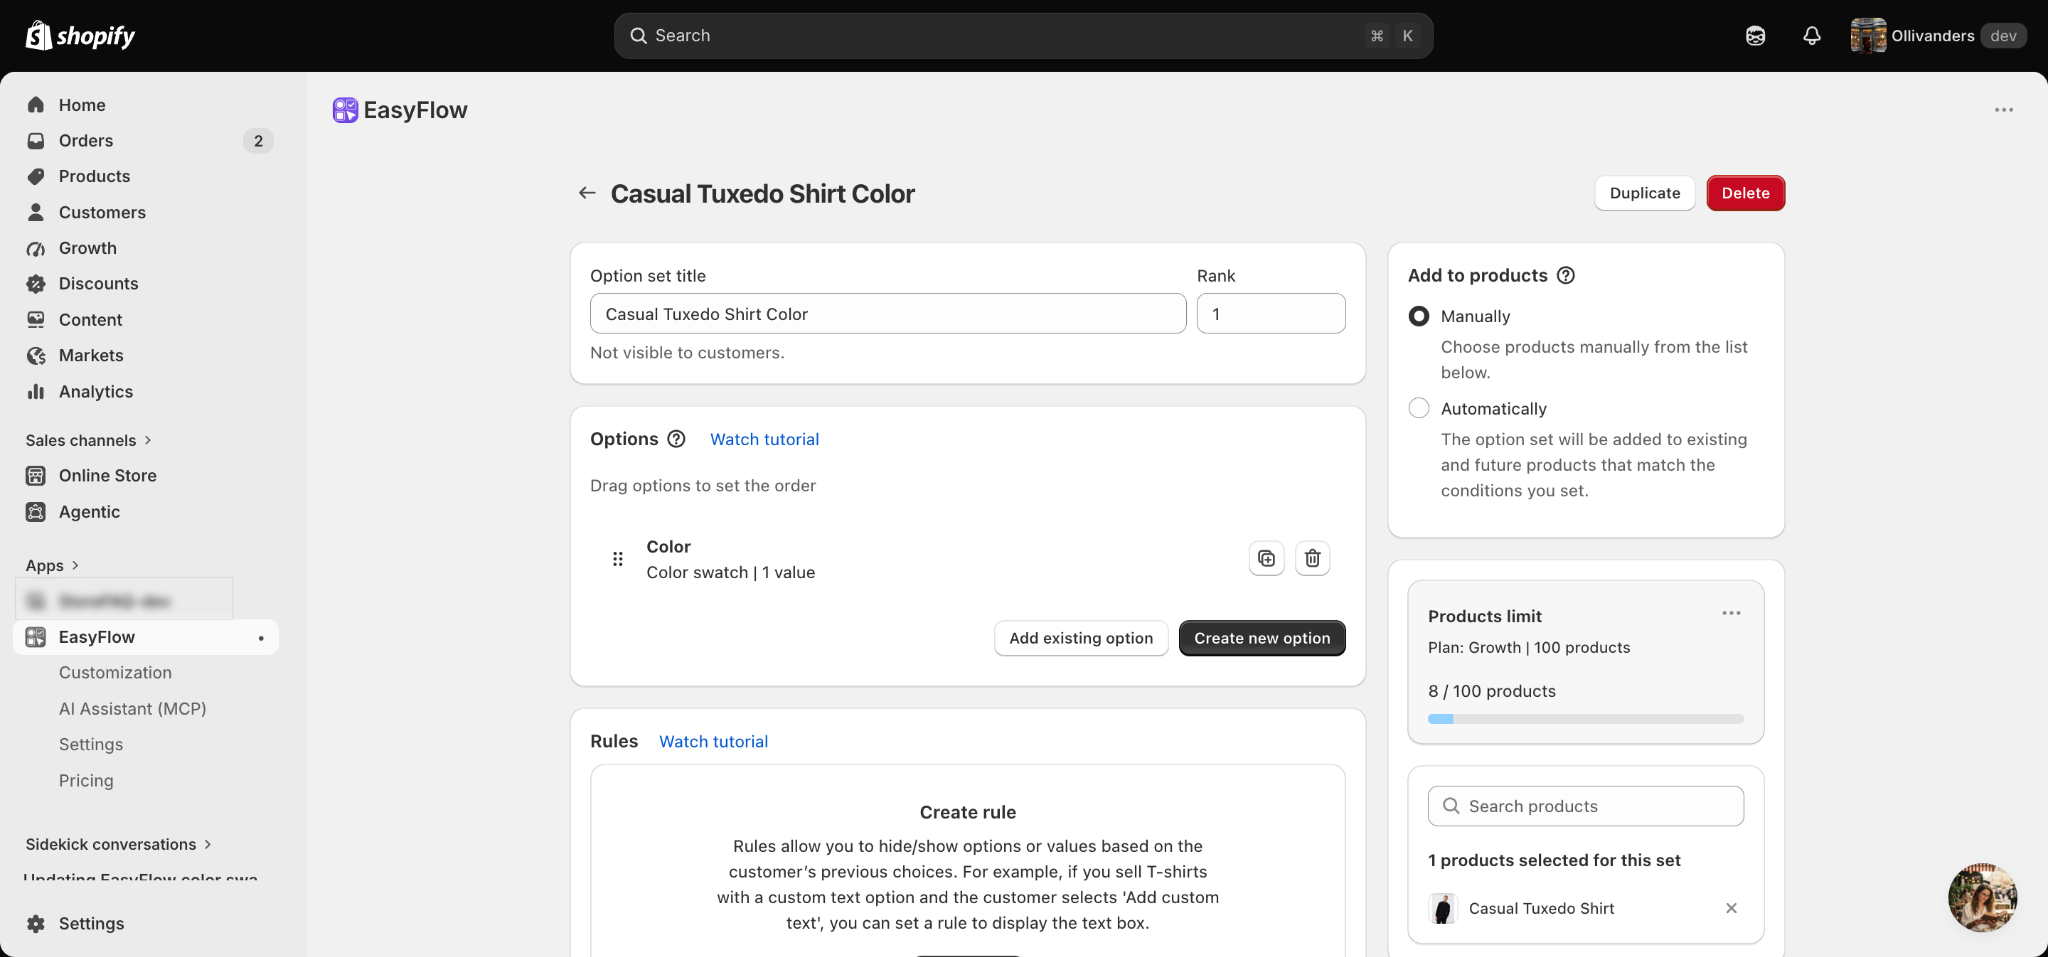
Open EasyFlow in your Shopify admin to verify. The option set Casual Tuxedo Shirt Color now exists, holding a single Color option of type colour swatch with one value. The panel on the right confirms it is applied to one product, Casual Tuxedo Shirt.
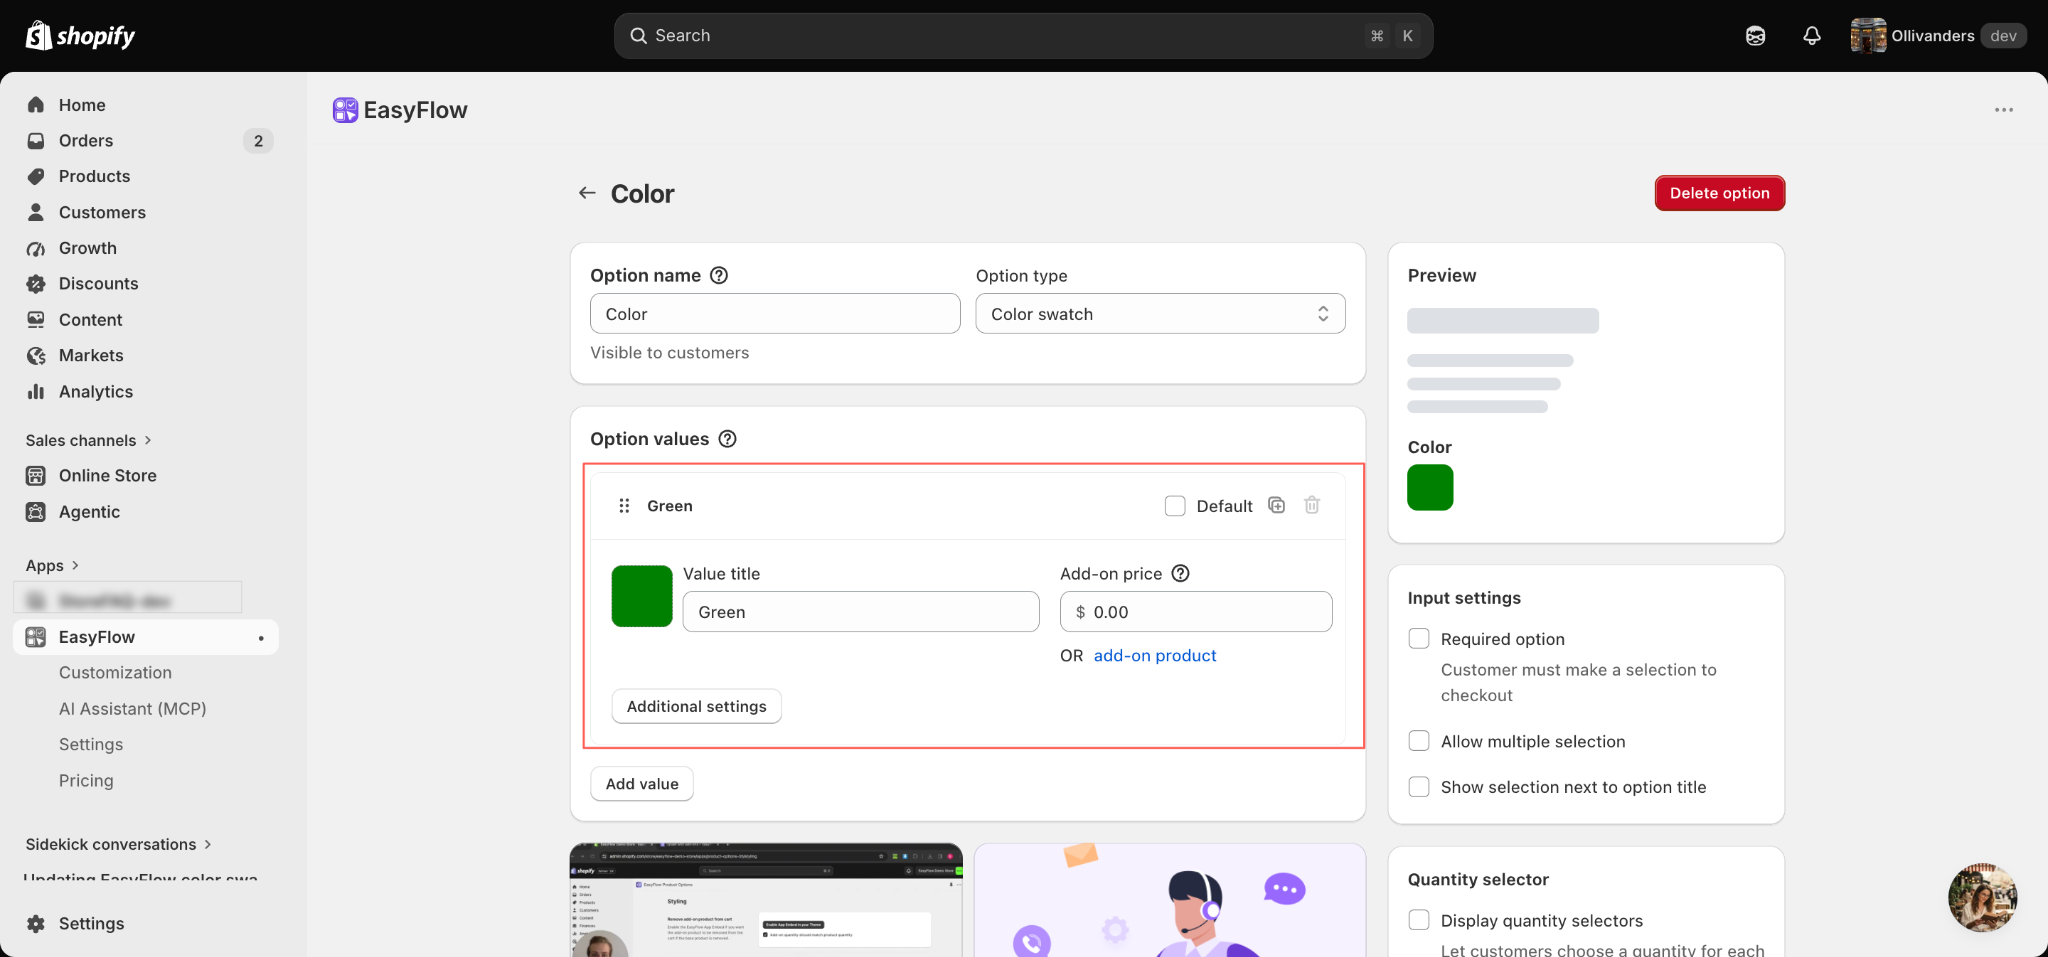
Open the Color option itself to see the value. Green is there as a colour swatch with its hex value applied, and the Preview panel on the right shows exactly what a shopper will see on the product page.
ChatGPT is now a working front end for EasyFlow. From here you can add more values, attach add-on pricing, build conditional rules and target more products by describing what you want, and every change goes live on your storefront right away.
This is how easily you can customize Shopify product options with EasyFlow MCP and ChatGPT. One plugin adds the server, one sign-in authorizes it and from there the whole EasyFlow toolset is available inside your chat.
If you get stuck at any step, feel free to reach out to our customer support team. We are always happy to help.


