

EasyFlow now connects to Claude through MCP (Model Context Protocol), the open standard that lets AI assistants talk directly to the tools you already use. Once the connection is on, you no longer have to open the EasyFlow app every time to check, build or clean up a product option.
Follow this guide to learn how to turn on AI assistant (Claude) access in EasyFlow, connect it and put that into work auditing and editing your product options directly from a chat conversation.
Step 01: Connect EasyFlow MCP to Claude #
From your Shopify admin, go to Apps →EasyFlow, then select AI Assistant (MCP) in the left sidebar. The page opens with the “Connect EasyFlow to your AI assistant” card at the top.
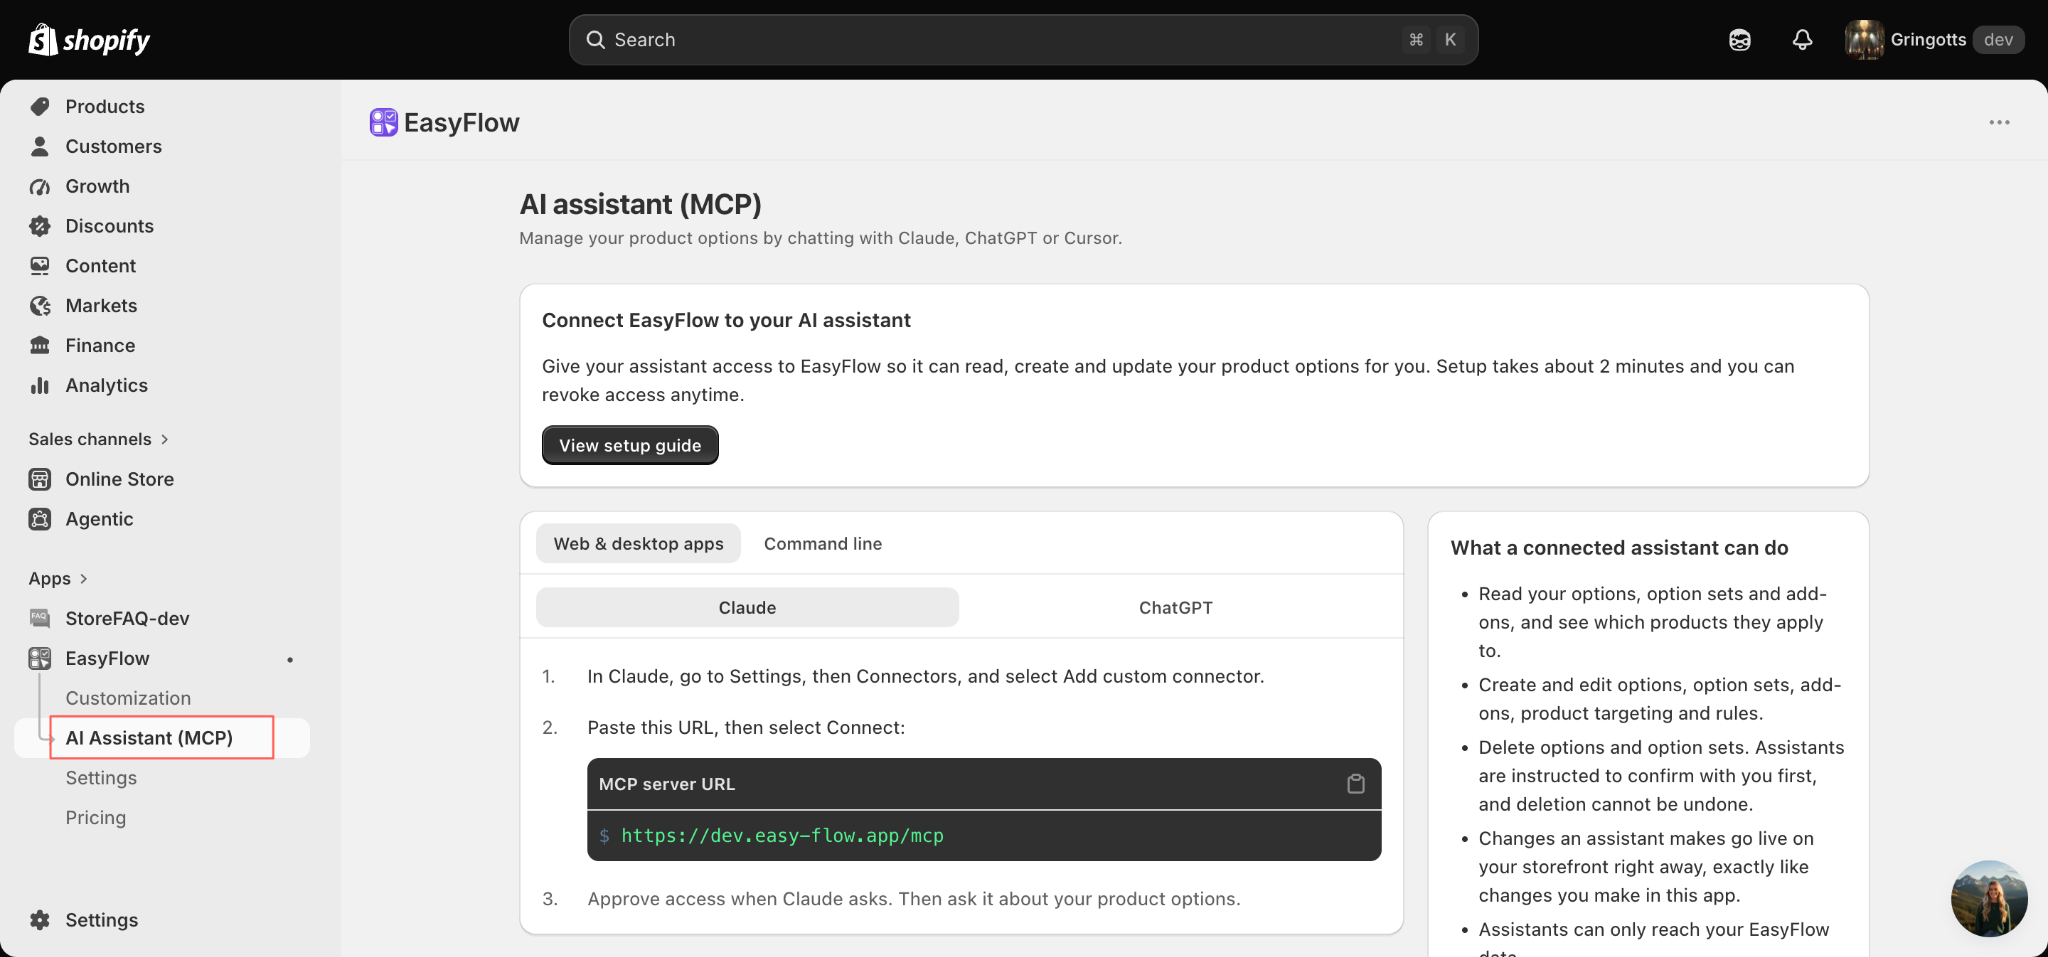
Directly below the card, you’ll have two tabs: Web & desktop apps and Command line. Web & desktop apps are selected by default with Claude as the first option, which is the fastest path if you already use Claude.ai or the Claude desktop app.
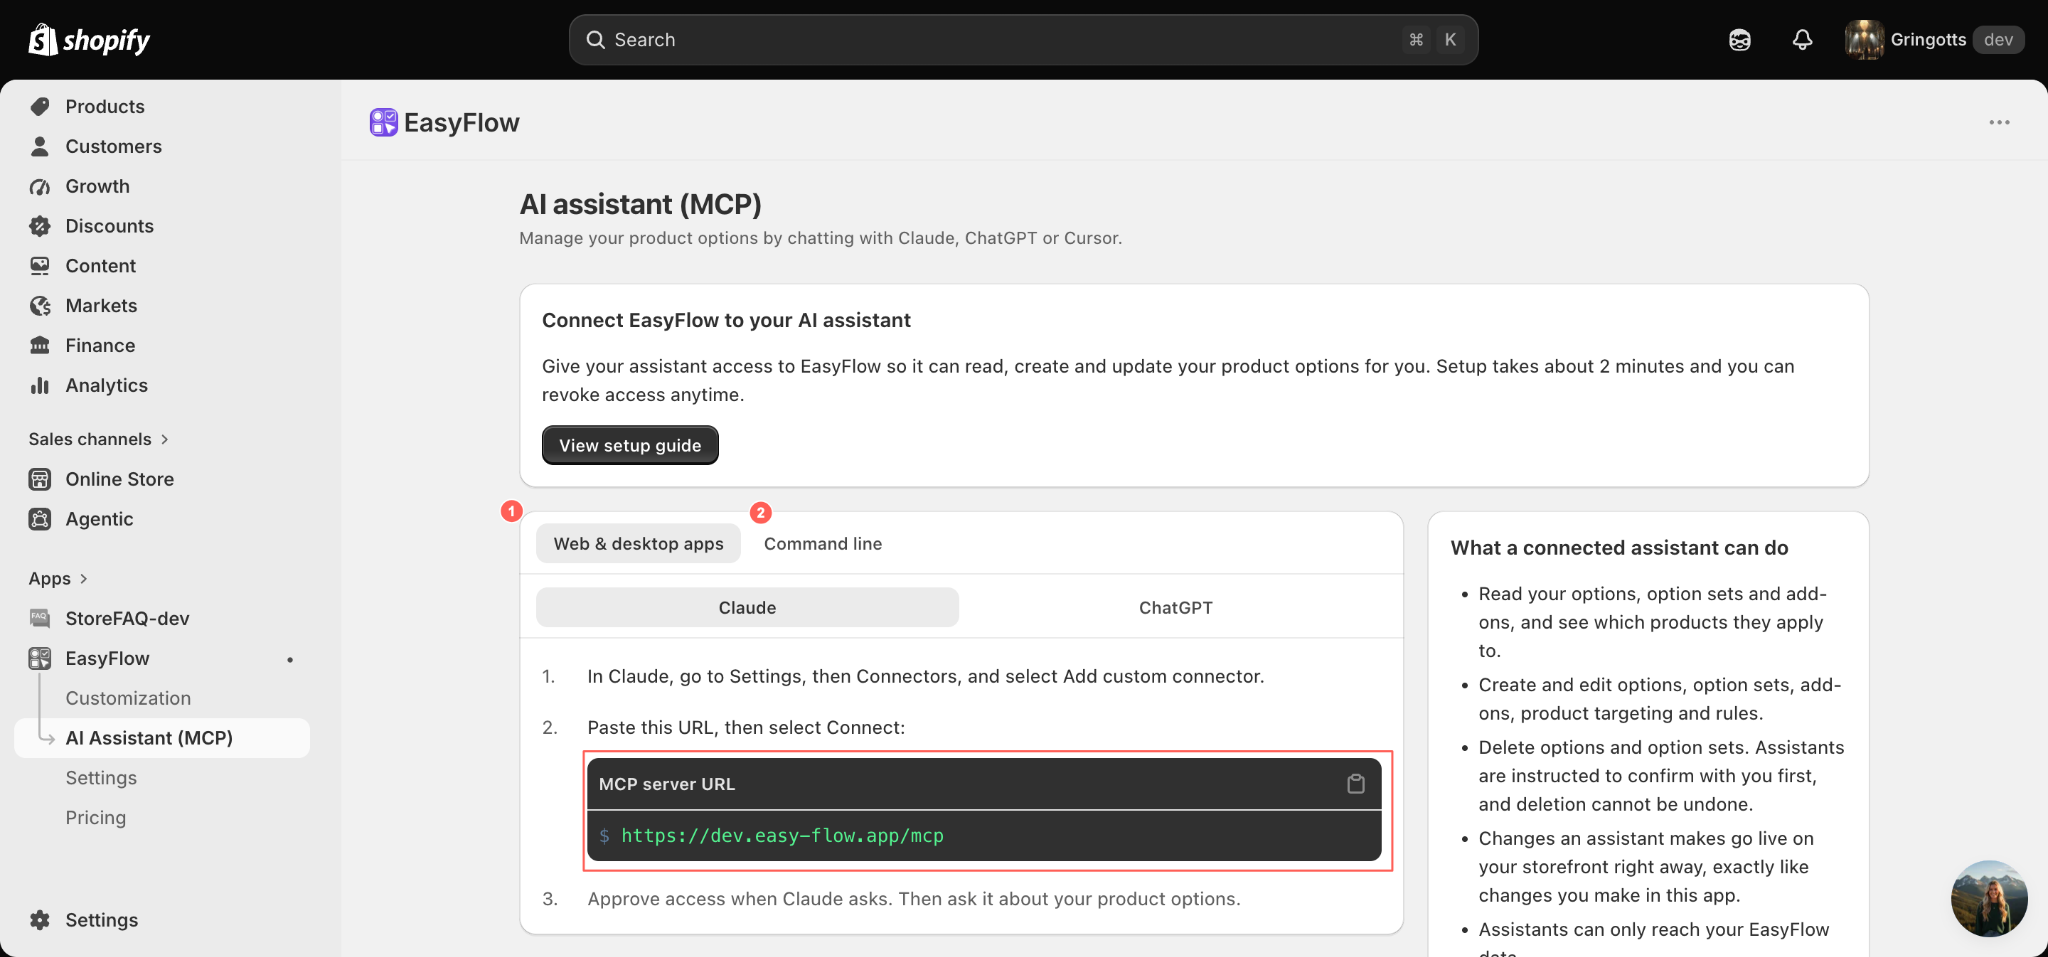
Copy the MCP server URL as shown.
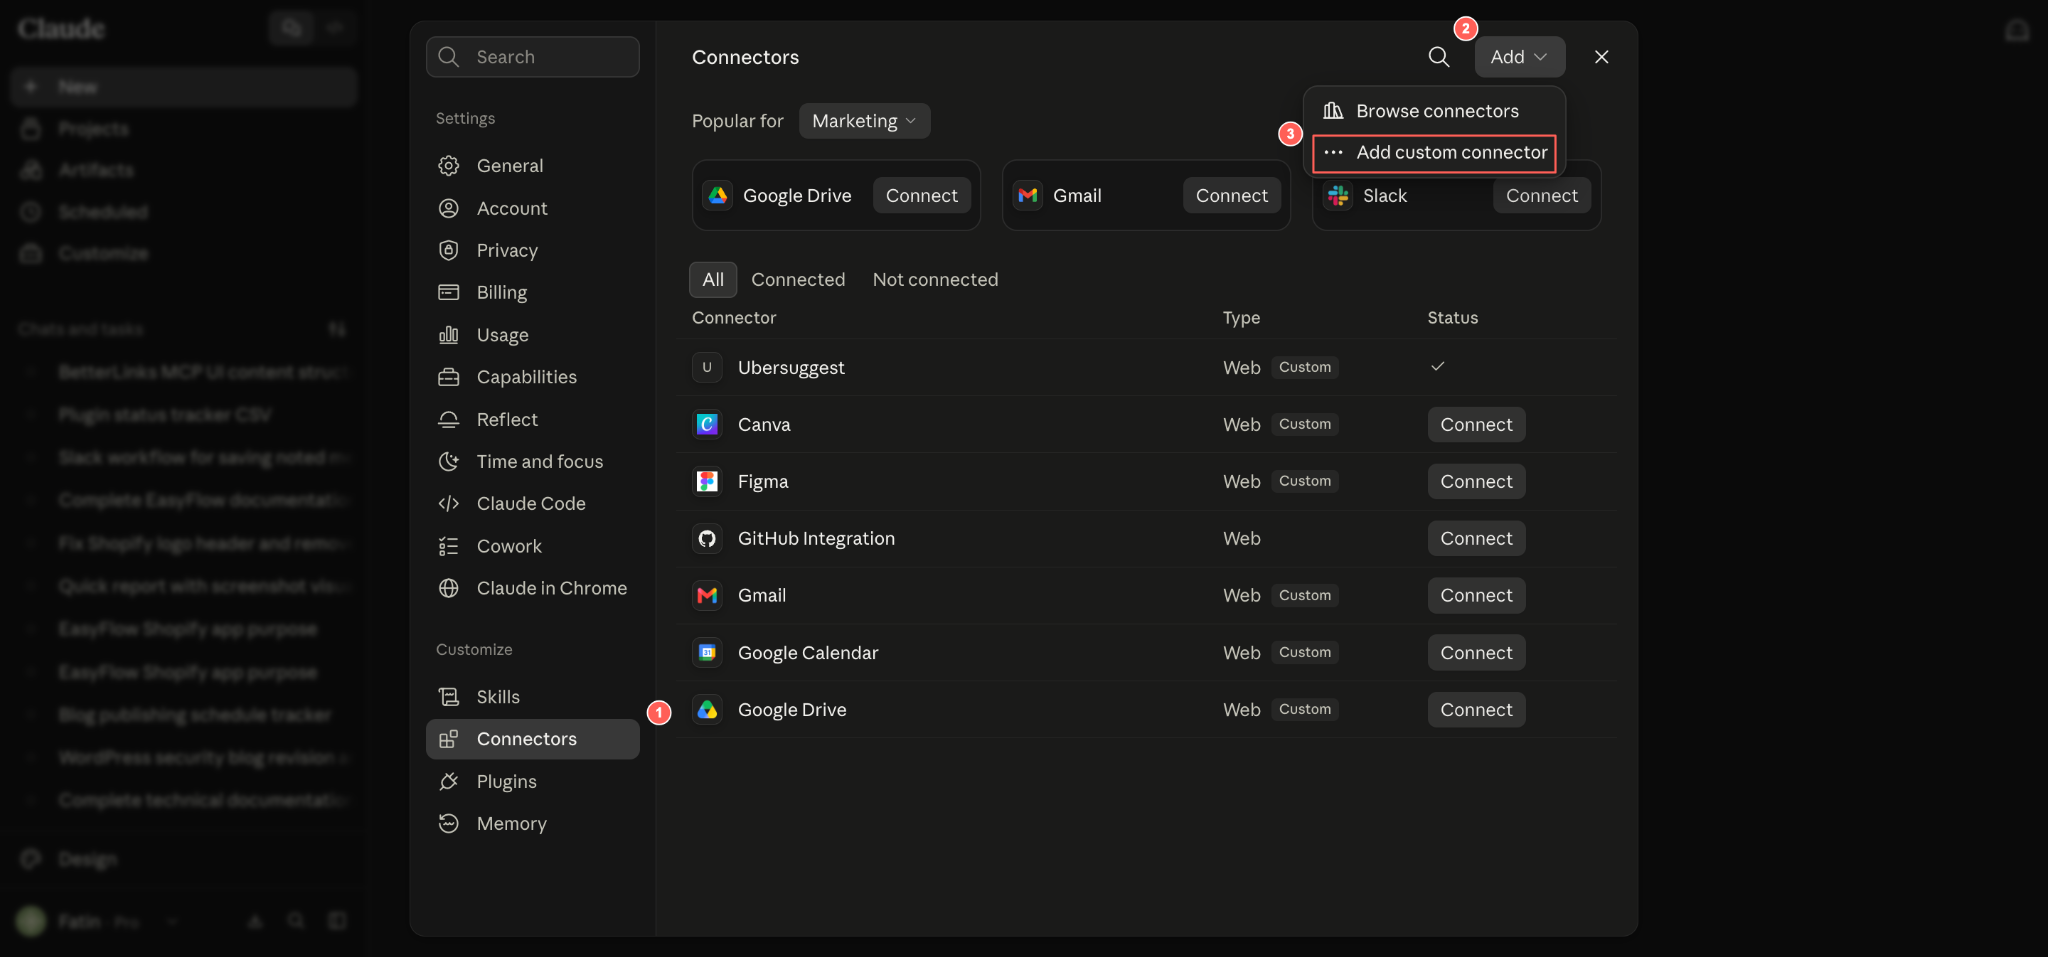
In Claude, go to Settings, then Connectors and select Add custom connector.
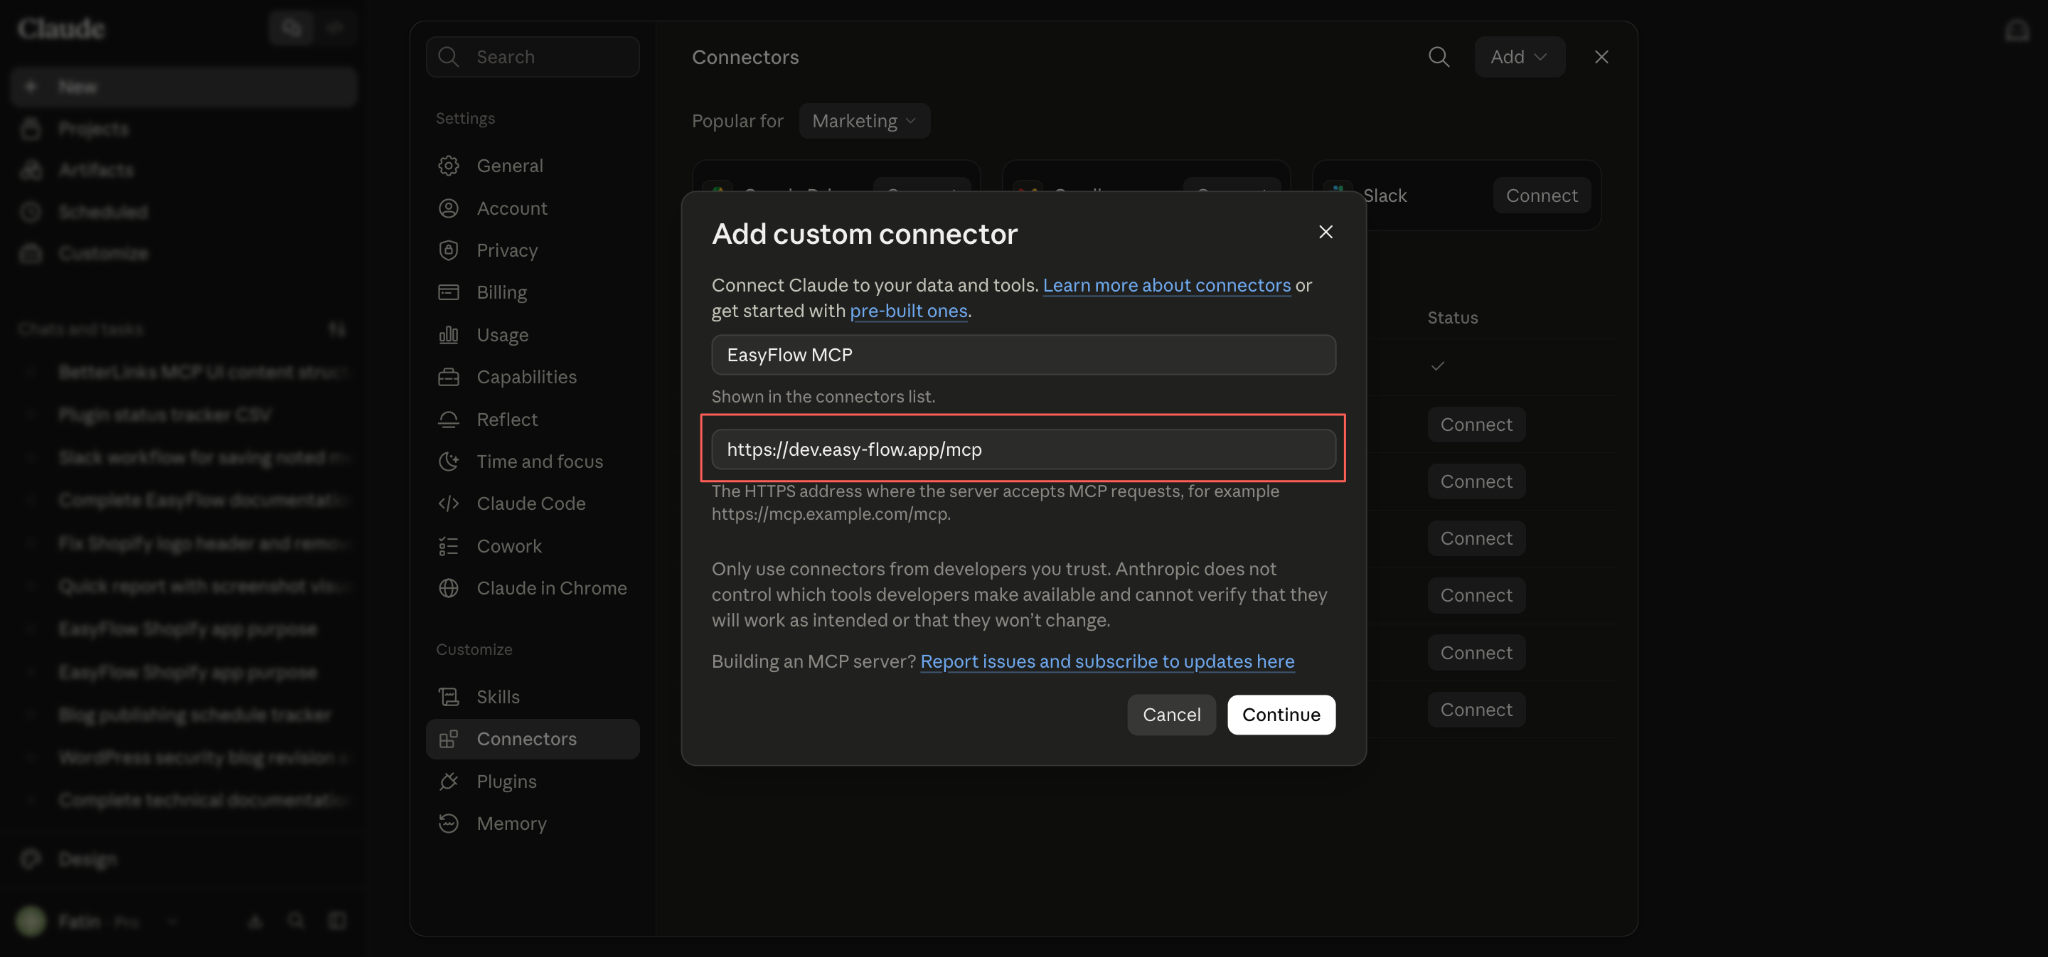
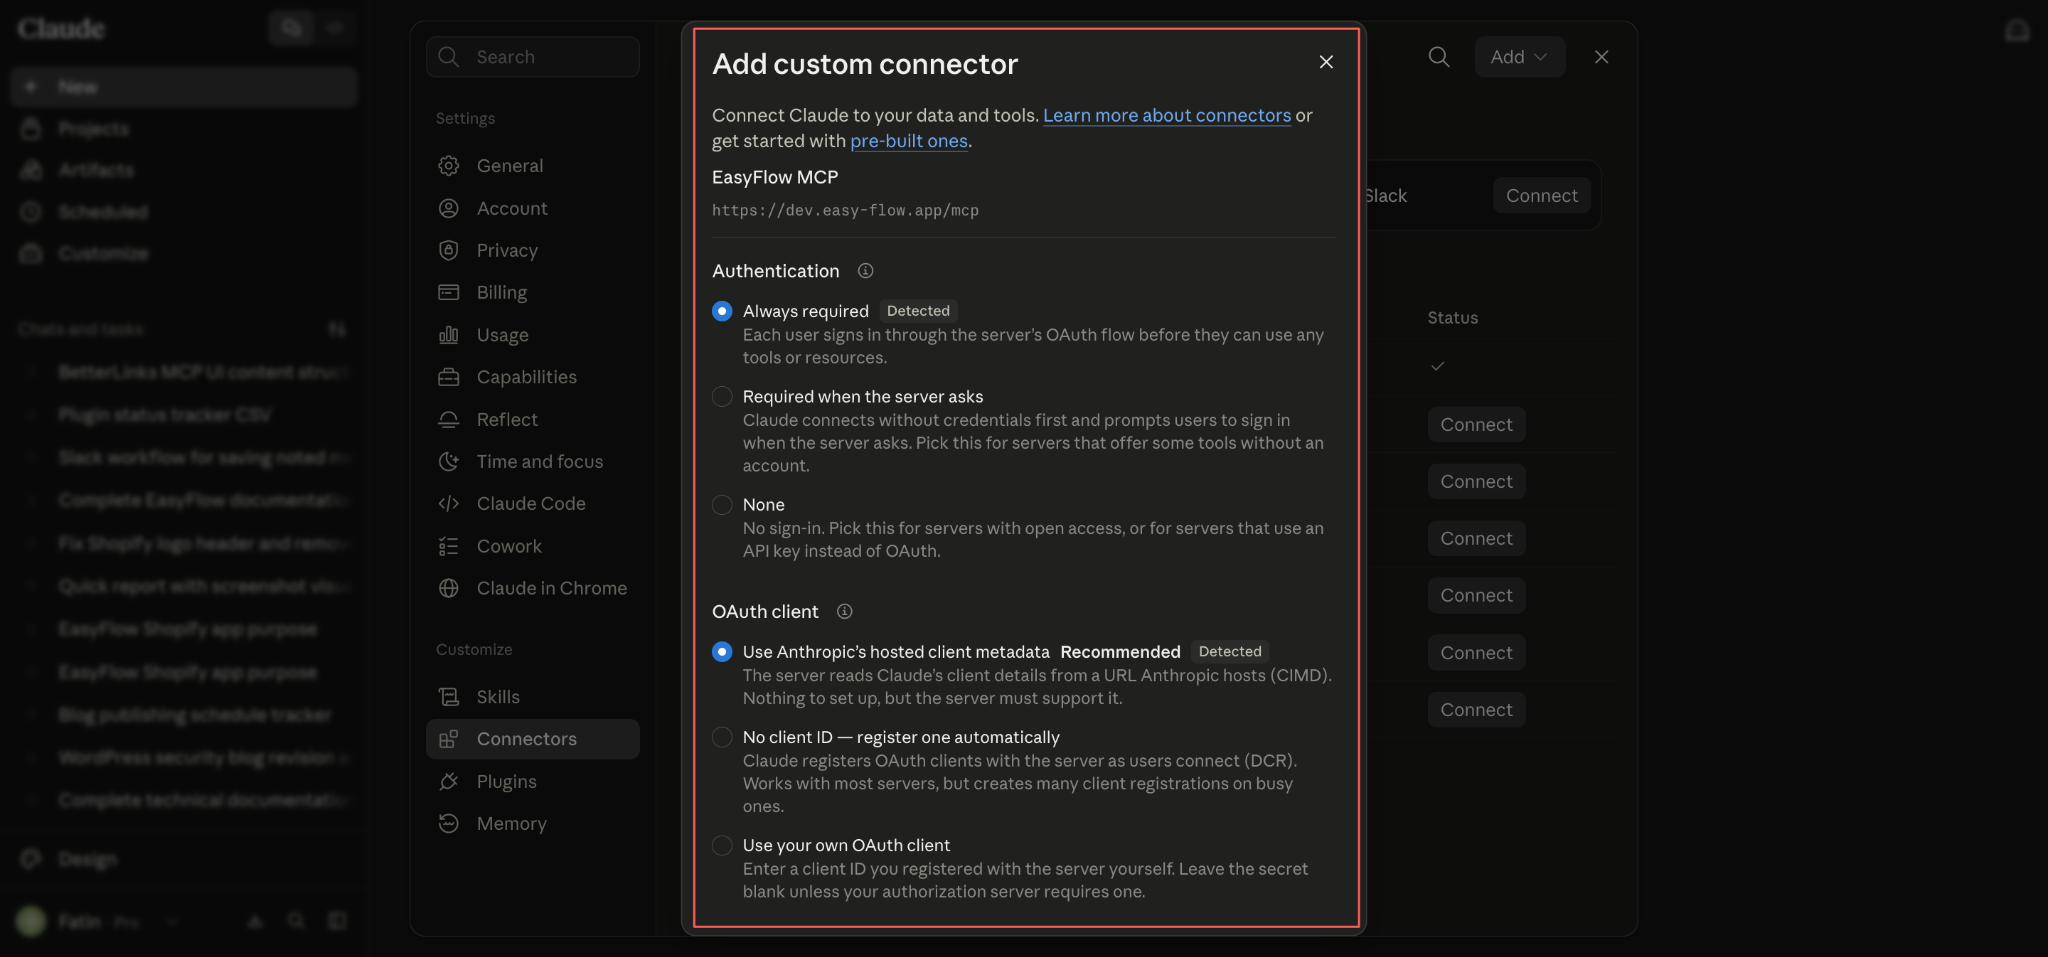
Paste the MCP server URL that you’ve already copied from the EasyFlow page, then select Continue.
Claude then shows an approval screen listing the site you are connecting to and the access level being granted. Review it and select Add.
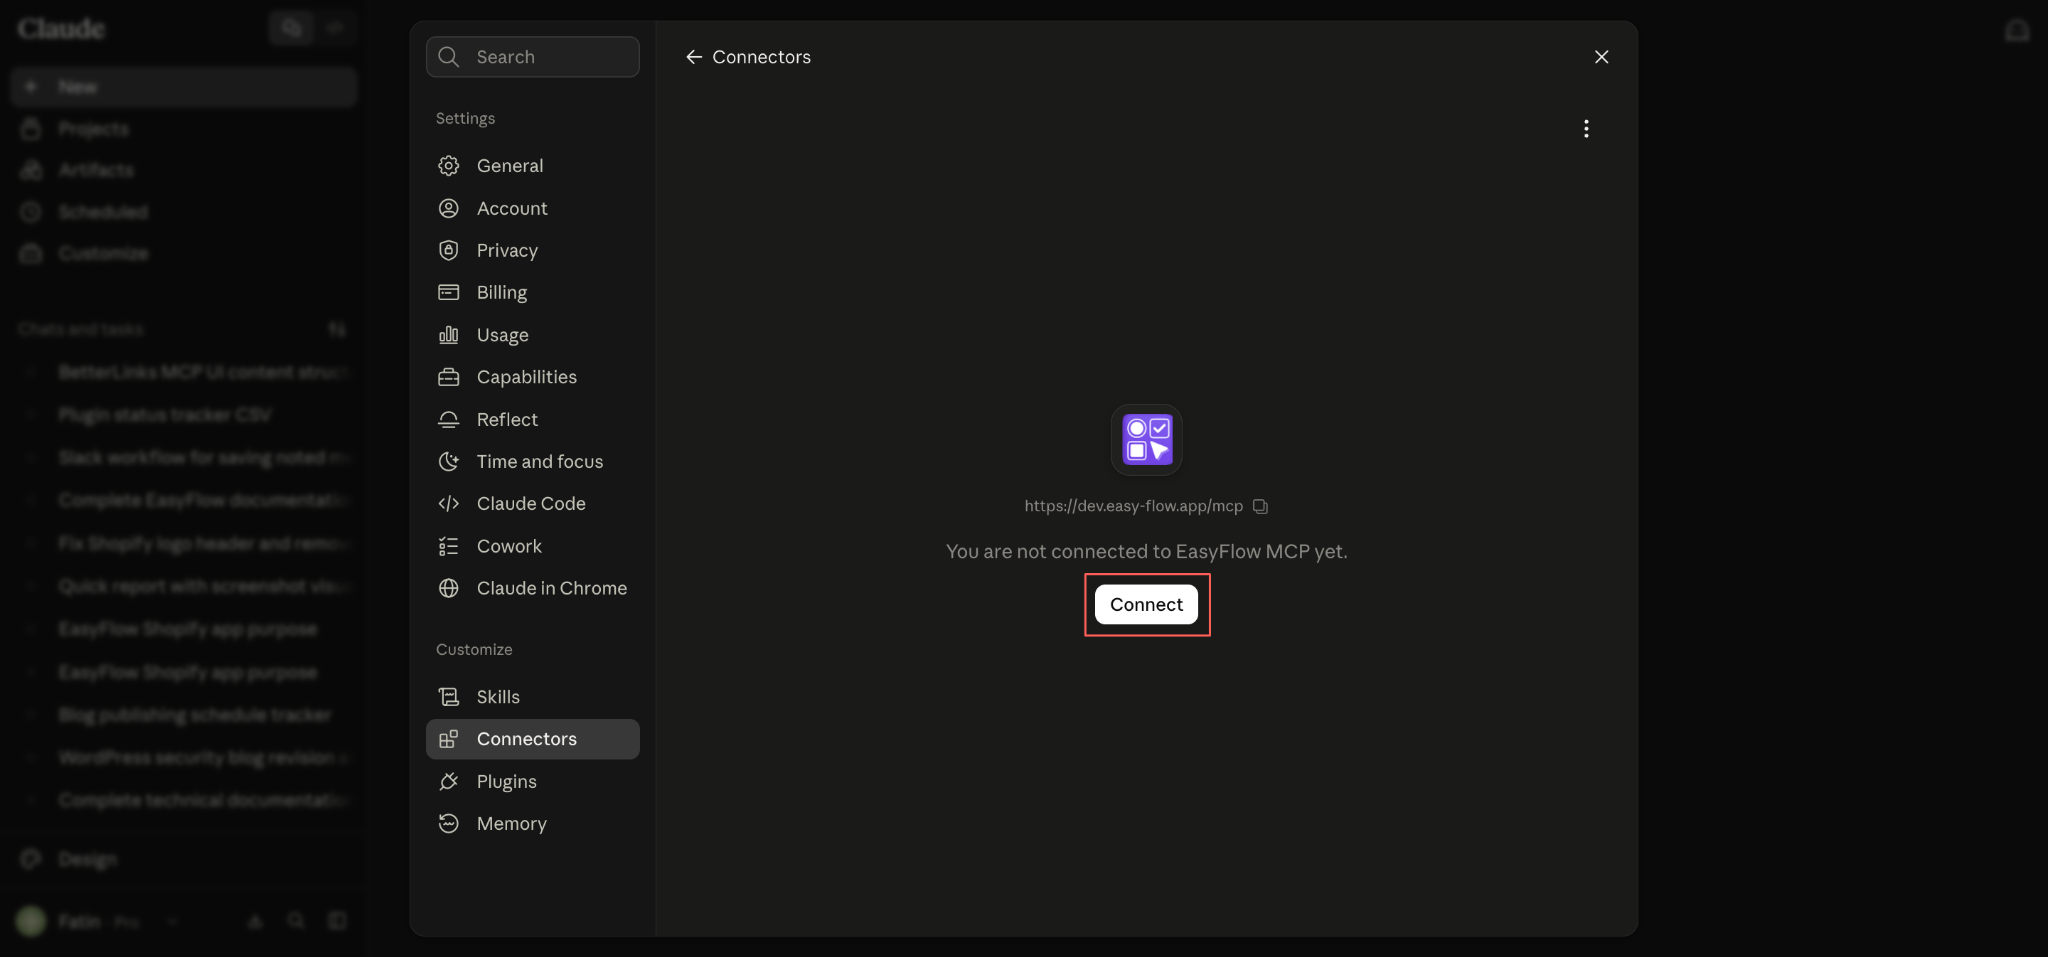
Once you have entered your credentials and selected your desired settings, simply tap Connect. This will establish the link between EasyFlow MCP and Claude, syncing your workflows and granting Claude access to execute your EasyFlow automated tasks.
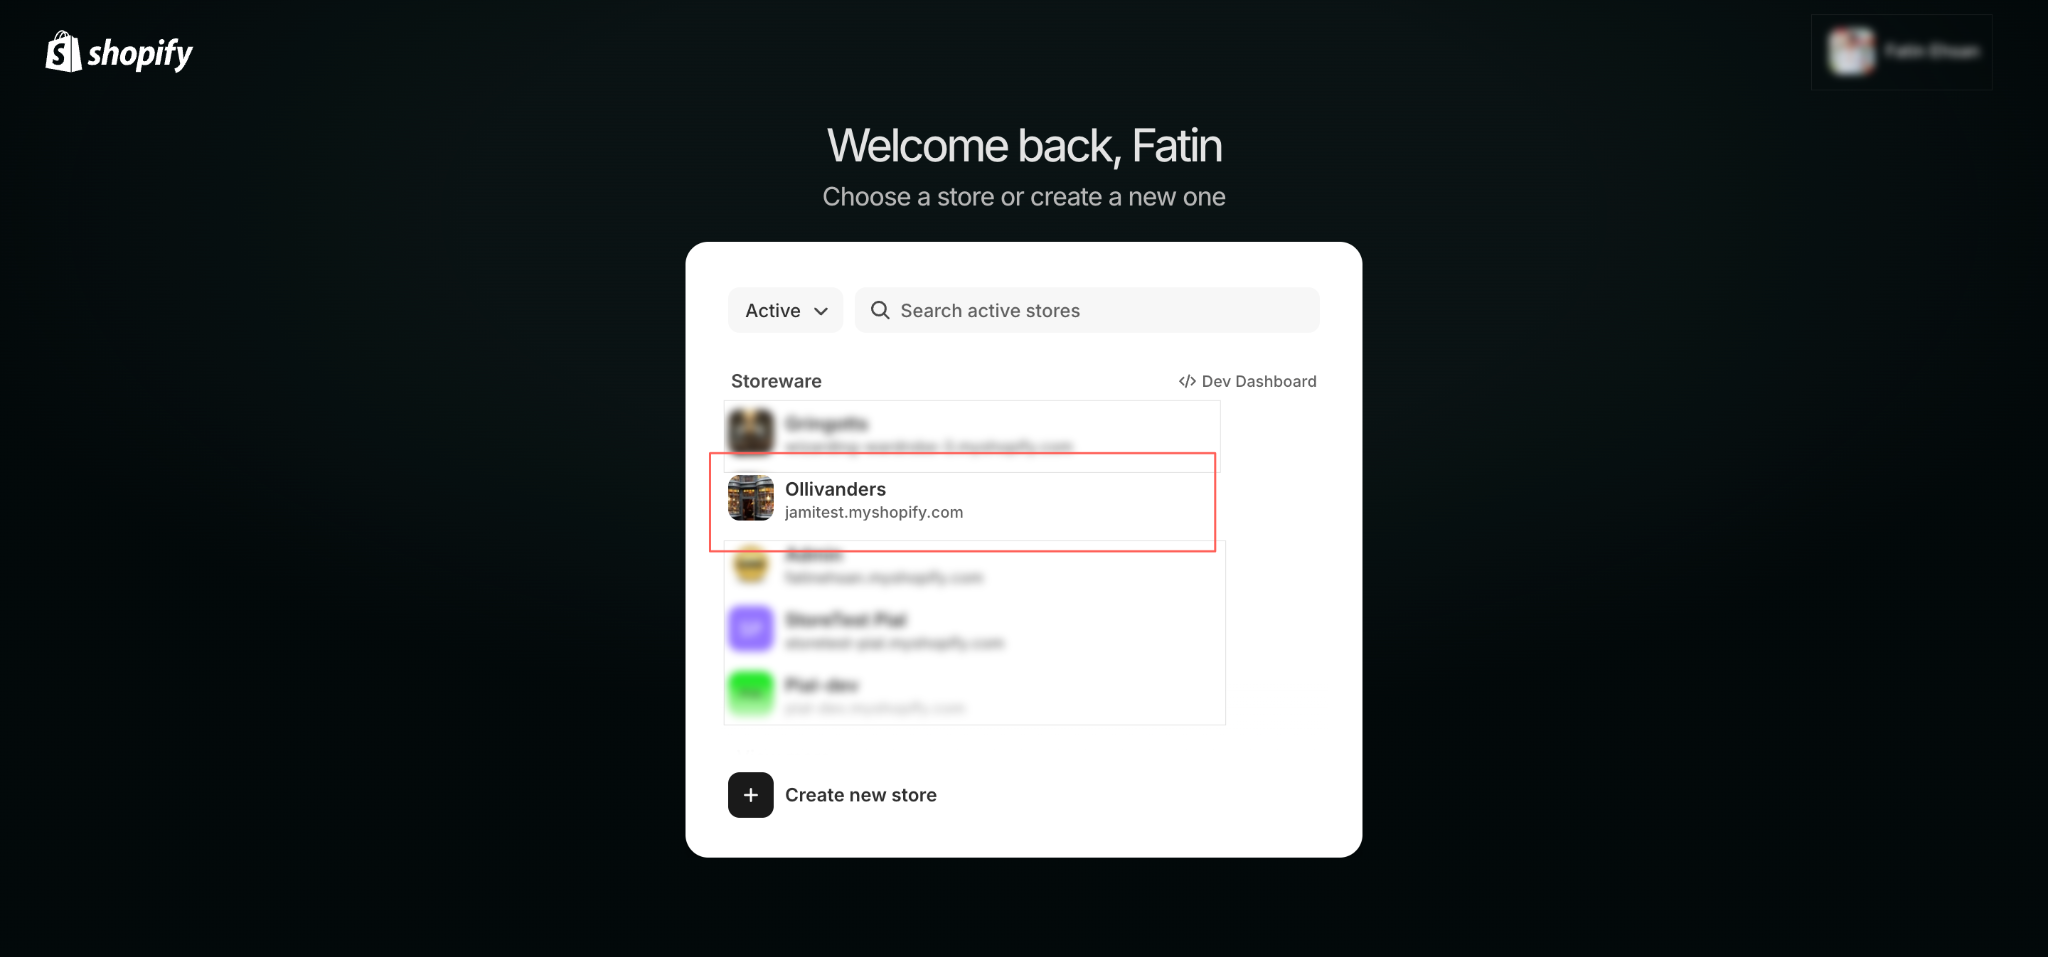
Next, choose the specific Shopify store you would like to connect to EasyFlow MCP.
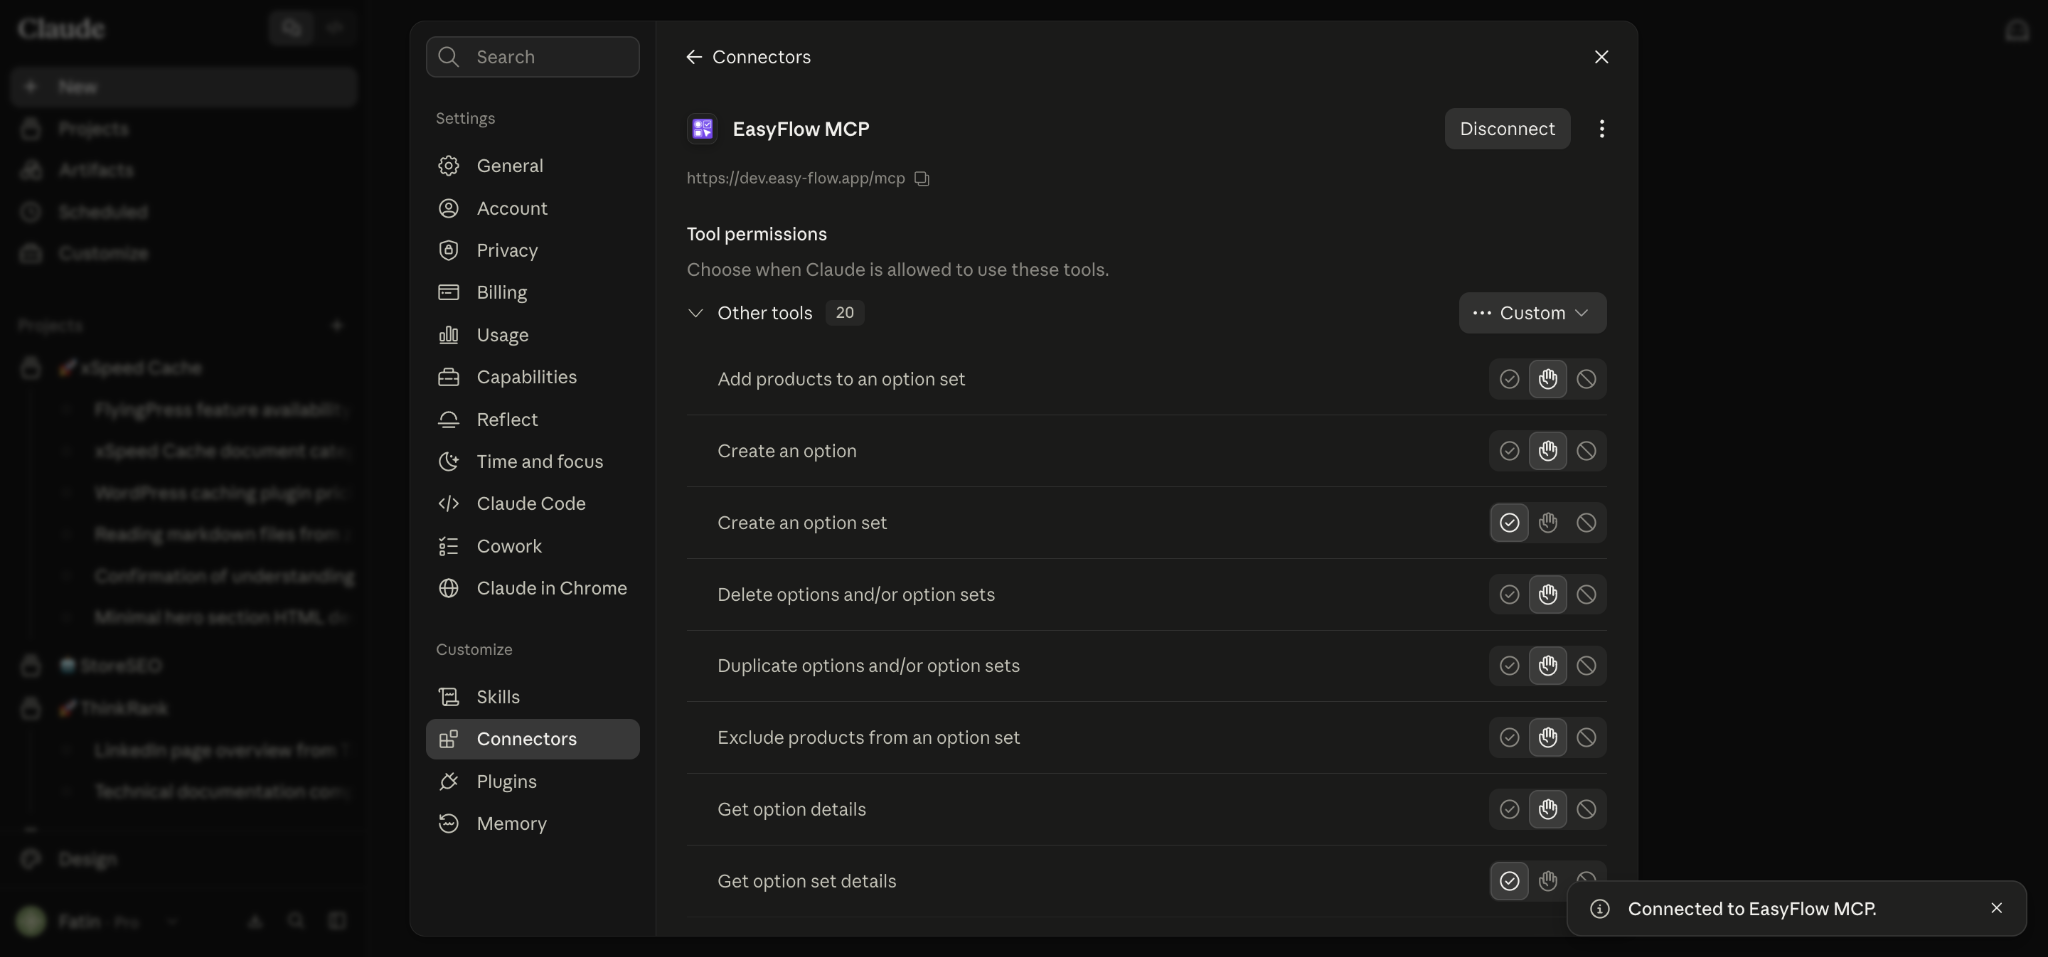
Your EasyFlow MCP is now successfully connected to Claude, enabling 20 read and write tools. You can now seamlessly manage your Shopify product customizations directly with EasyFlow MCP support.
Step 02: Customize Product Options with EasyFlow MCP in Claude #
Once the connection is live, you can build product options, option sets, add-on pricing and conditional rules by describing what you want in plain language.
Ask Claude About Your Store & Approve the Tool Call #
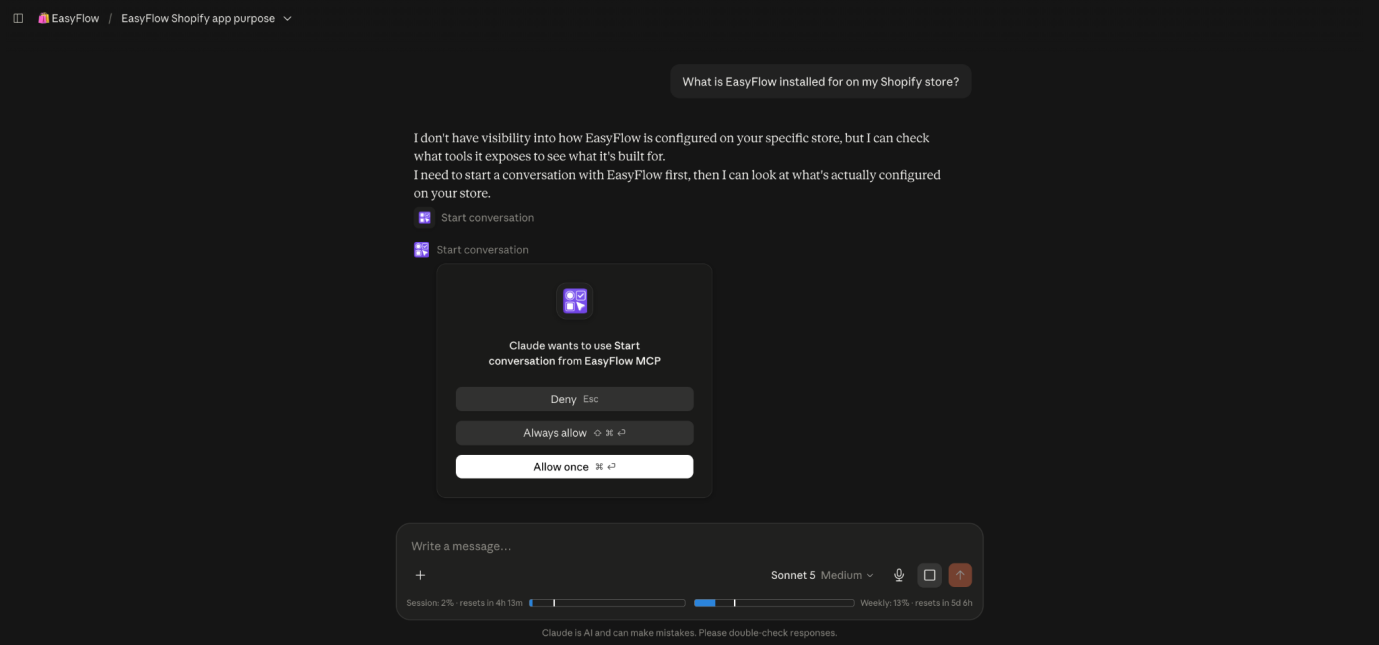
Open Claude and start a new conversation. Ask a simple opening question so Claude reaches into EasyFlow for the first time.
Claude explains that it needs to start a conversation with EasyFlow before it can look at your store, then requests permission to run its first tool. A card appears reading “Claude wants to use “Start conversation from EasyFlow MCP”, with three buttons.
- Allow once runs the tool a single time. Claude asks again on the next call.
- Always allow that specific tool to run without prompting in future.
- Deny blocks the call.
Select Allow once to get started. You can switch a tool to “Always allow” later once you are comfortable with what it does.
Find the Product You Want to Customize #
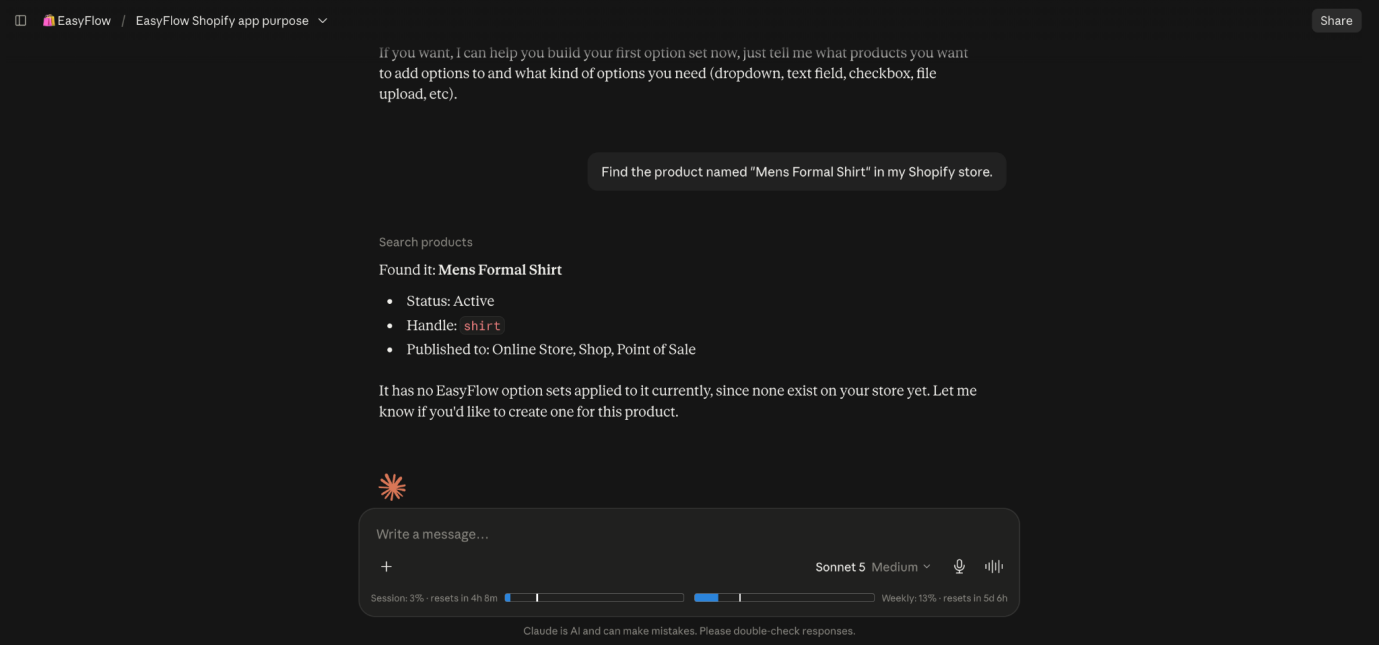
Name the product you want to work on so Claude can locate it before making changes:
‘Find the product named “Mens Formal Shirt” in my Shopify store.’
Claude runs Search products and returns the match with its status, handle and sales channels. It also confirms that no EasyFlow option sets are applied to the product yet, which is exactly what you want to see before creating something new.
Tell Claude What Kind of Option You Need #
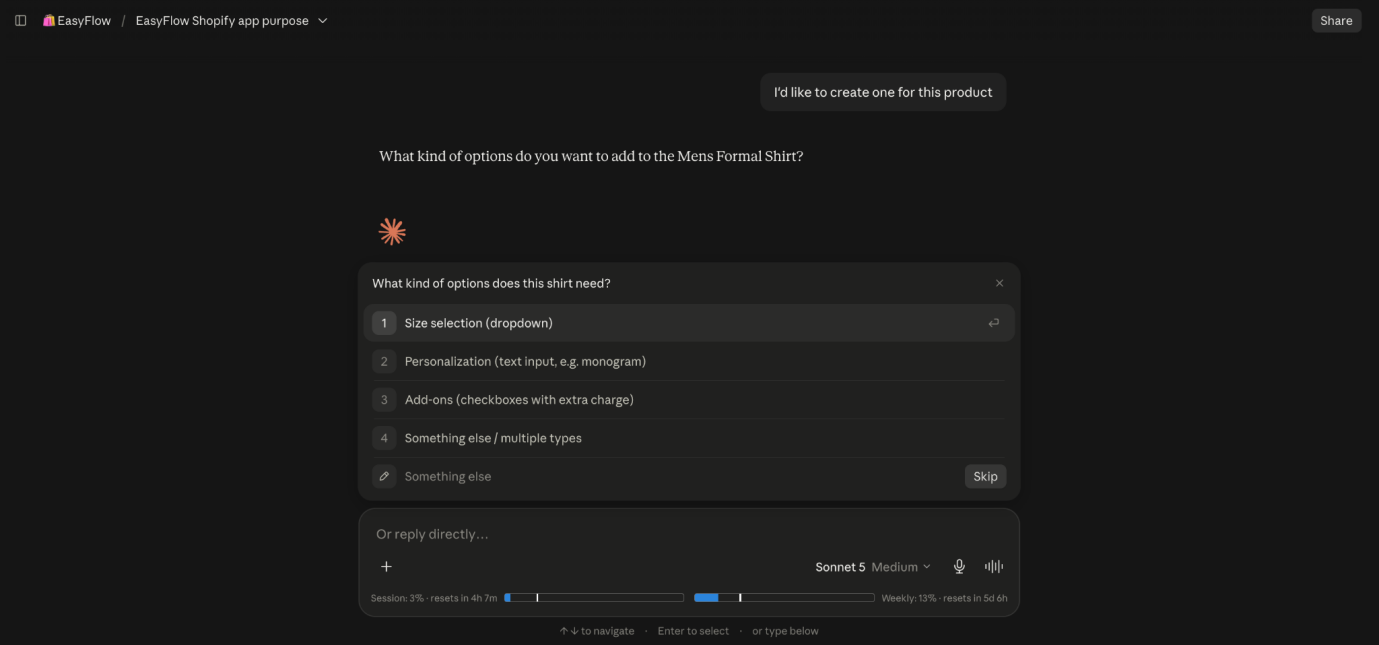
Accept Claude’s offer to build an option set for the product:
‘I’d like to create one for this product’
Claude asks what kind of options the shirt needs and presents a short menu you can pick from, covering Size selection (dropdown), Personalization (text input), Add-ons (checkboxes with extra charge) and Something else / multiple types.
Use the arrow keys to move through the list and press ‘Enter’ to select, or type your own answer in the box below. This example uses Add-ons (checkboxes with extra charge).
Confirm the Price & Let Claude Build It #
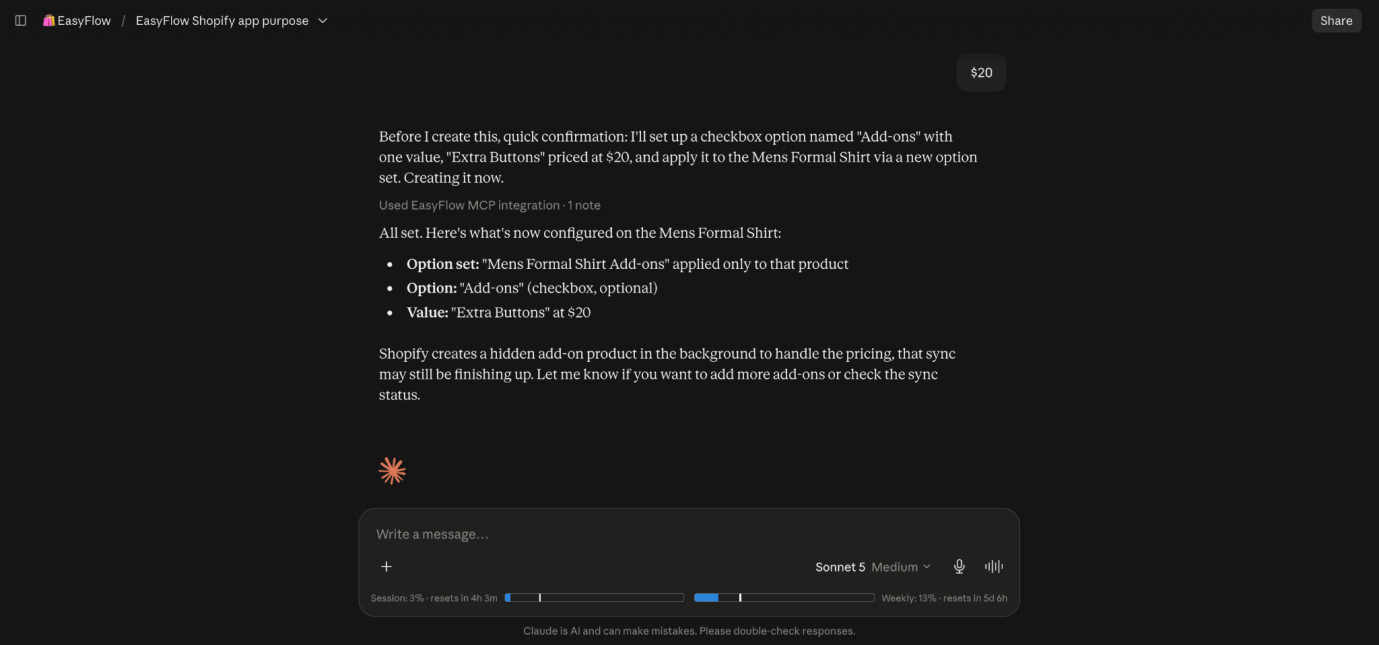
Claude asks follow-up questions to pin down the details, such as what the add-on is called and what it should cost. Answering with something as short as $20 is enough.
Before writing anything, Claude states exactly what it is about to create so you can catch a mistake first. In this example, it confirms a checkbox option named Add-ons, with a single value called Extra Buttons priced at $20, applied to the Mens Formal Shirt through a new option set.
Once it finishes, Claude summarises what now exists on the product:
- Option set: ‘Mens Formal Shirt Add-ons’ applied only to that product
- Option: ‘Add-ons’ (checkbox, optional)
- Value: ‘Extra Buttons’ at $20
Note: Claude confirms details before any write action and asks again before anything that would delete data. Deletions cannot be undone, so read those confirmations carefully.
Final Outcome #
Open your Shopify admin and go to Apps, then EasyFlow to verify. The Add-ons option is there as a checkbox, with the value Extra Buttons and an add-on price of $20.00 already filled in.
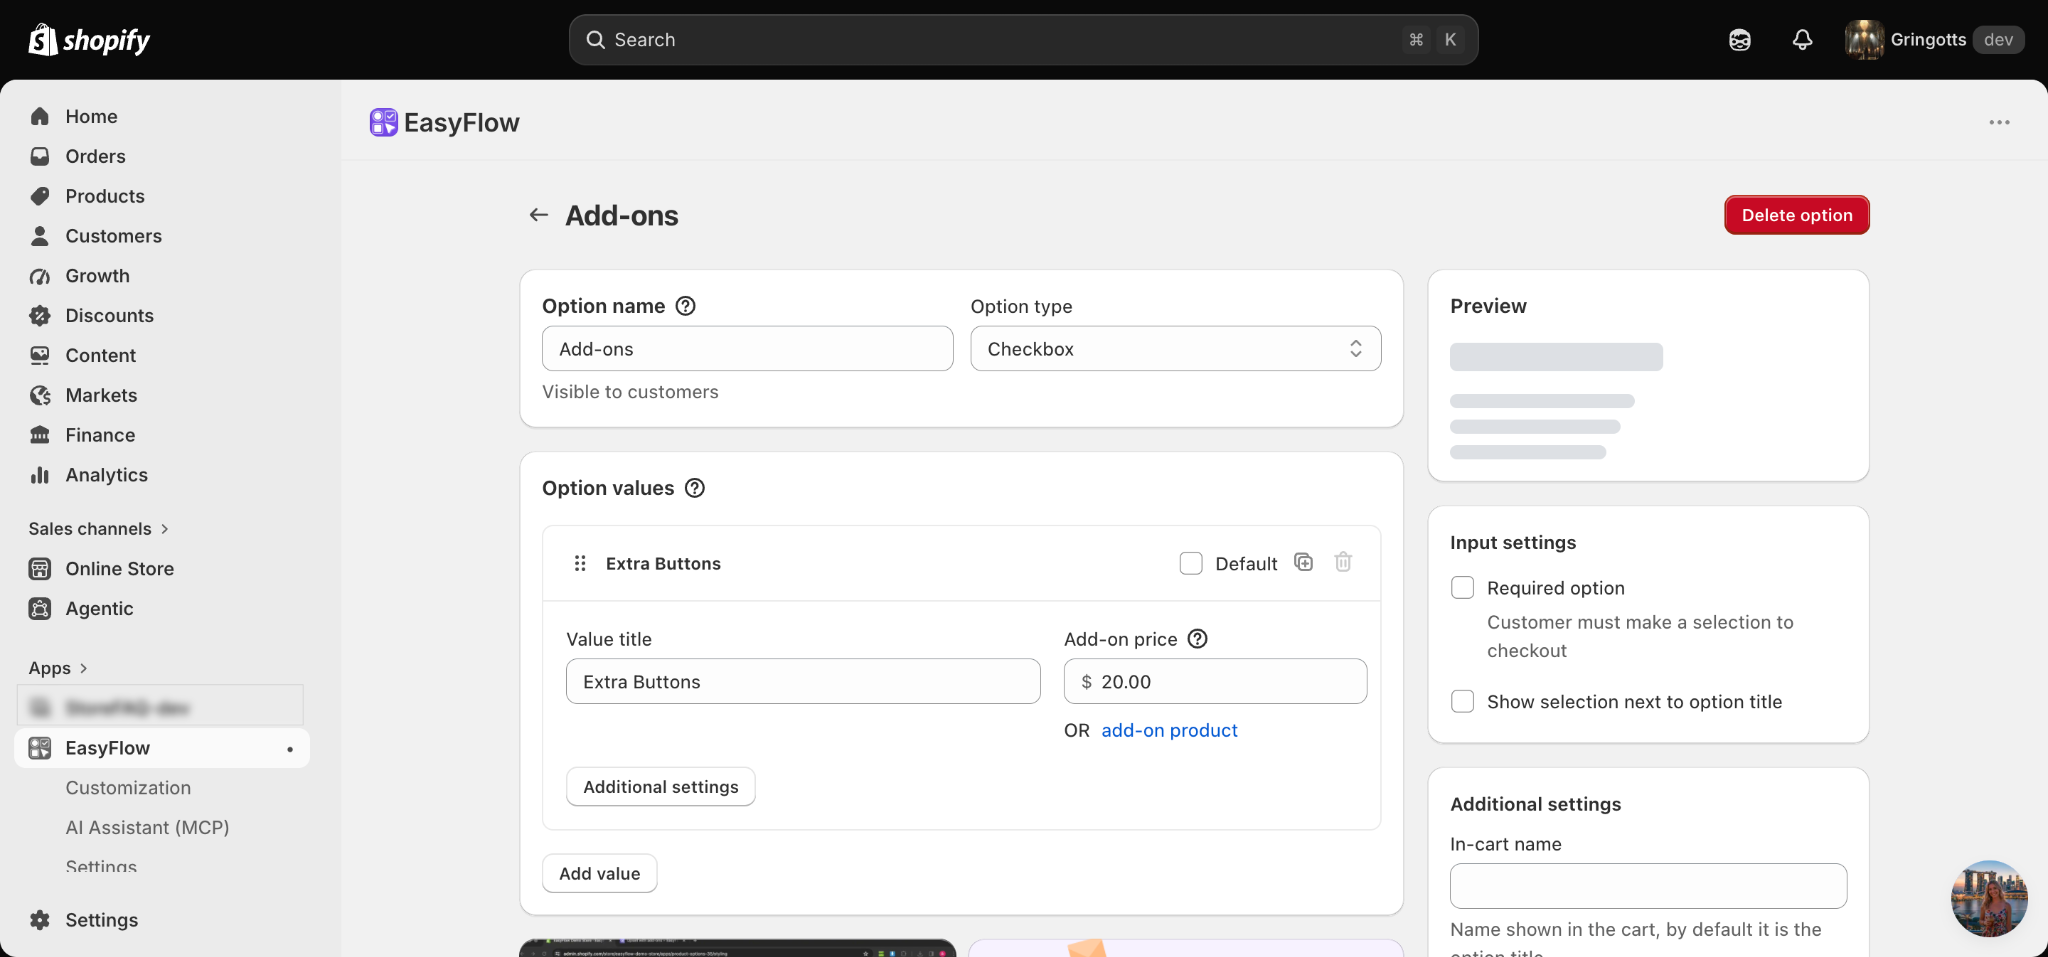
Shopify creates a hidden add-on product in the background to handle the pricing. You can see it live on the storefront, priced at $20.00 and ready to be added to a cart.
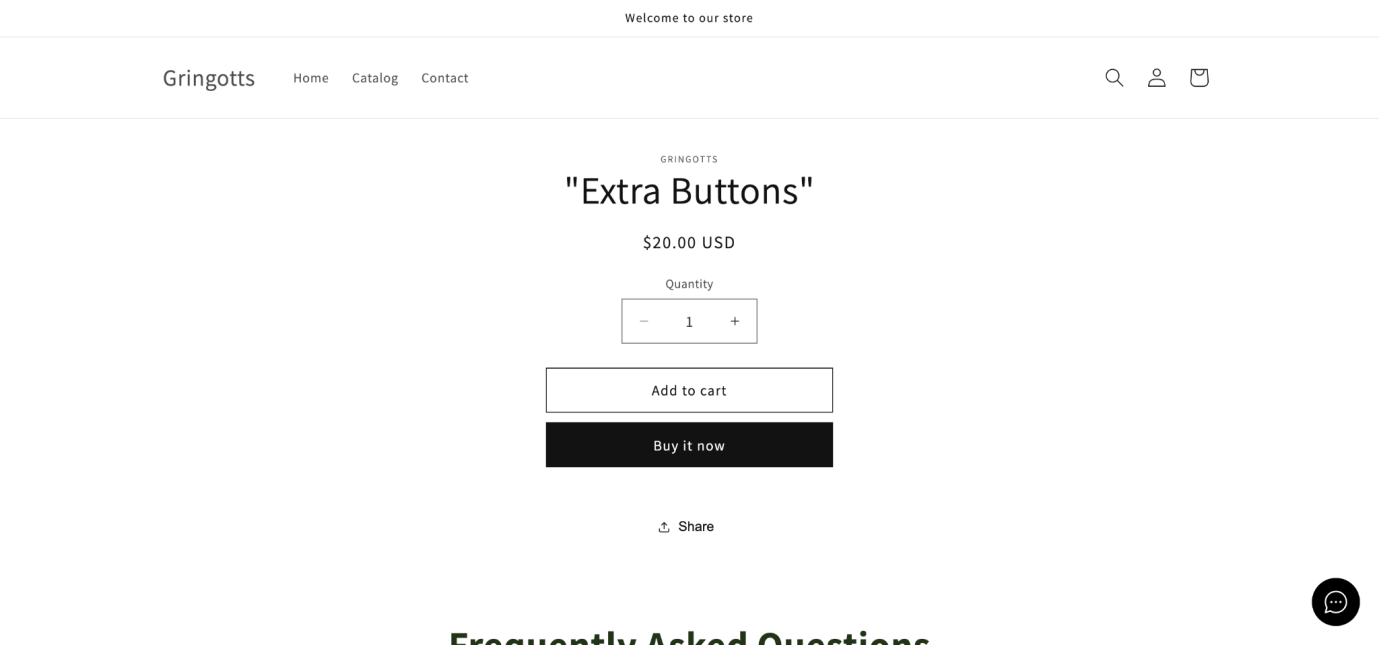
This is how easily you can customize product options with EasyFlow MCP and Claude. From creating a single paid add-on to building a full set of conditional fields, the work happens through a plain conversation while EasyFlow stays the source of truth for your store.
If you get stuck at any step, feel free to reach out to our customer support team. We are always happy to help.


