

EasyFlow connects to Claude Code through MCP (Model Context Protocol), the open standard that lets AI assistants work directly with the tools you already use. Once the connector is added and authorized, you can search products, build options, create option sets and set conditional rules without leaving your terminal.
This guide covers the full Claude Code path from start to finish. It adds the EasyFlow MCP server with a single command, walks through the one-time authorization step and finishes by using the connection to look up a product in a live Shopify store.
Step 1: Copy the Claude Code Command from EasyFlow #
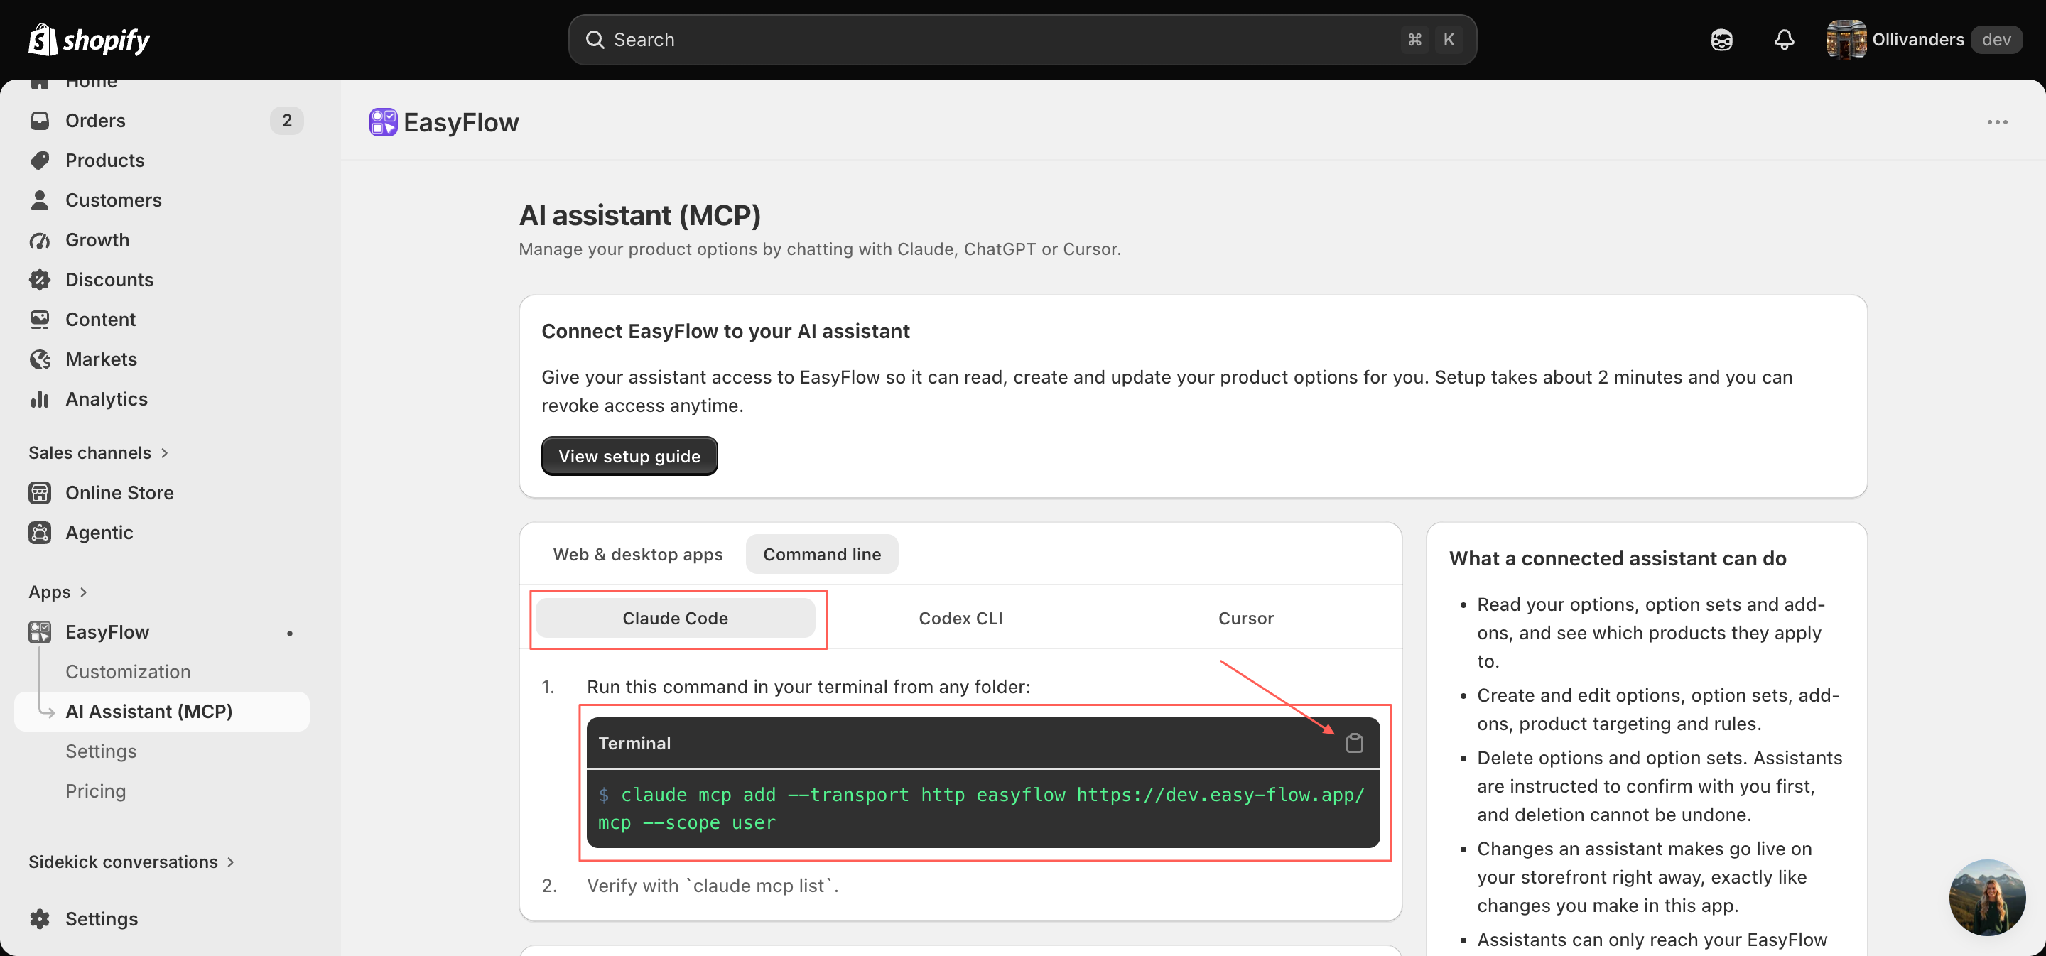
In your Shopify admin, go to Apps →EasyFlow, then select AI Assistant (MCP) in the left sidebar. On that page, switch to the Command line tab and make sure the Claude Code sub-tab is selected.
EasyFlow generates the full command for you, so you don’t need to write any configuration of your own. Select the copy icon on the right side of the Terminal block to put the command on your clipboard.
Step 2: Run the Command in Claude Code #
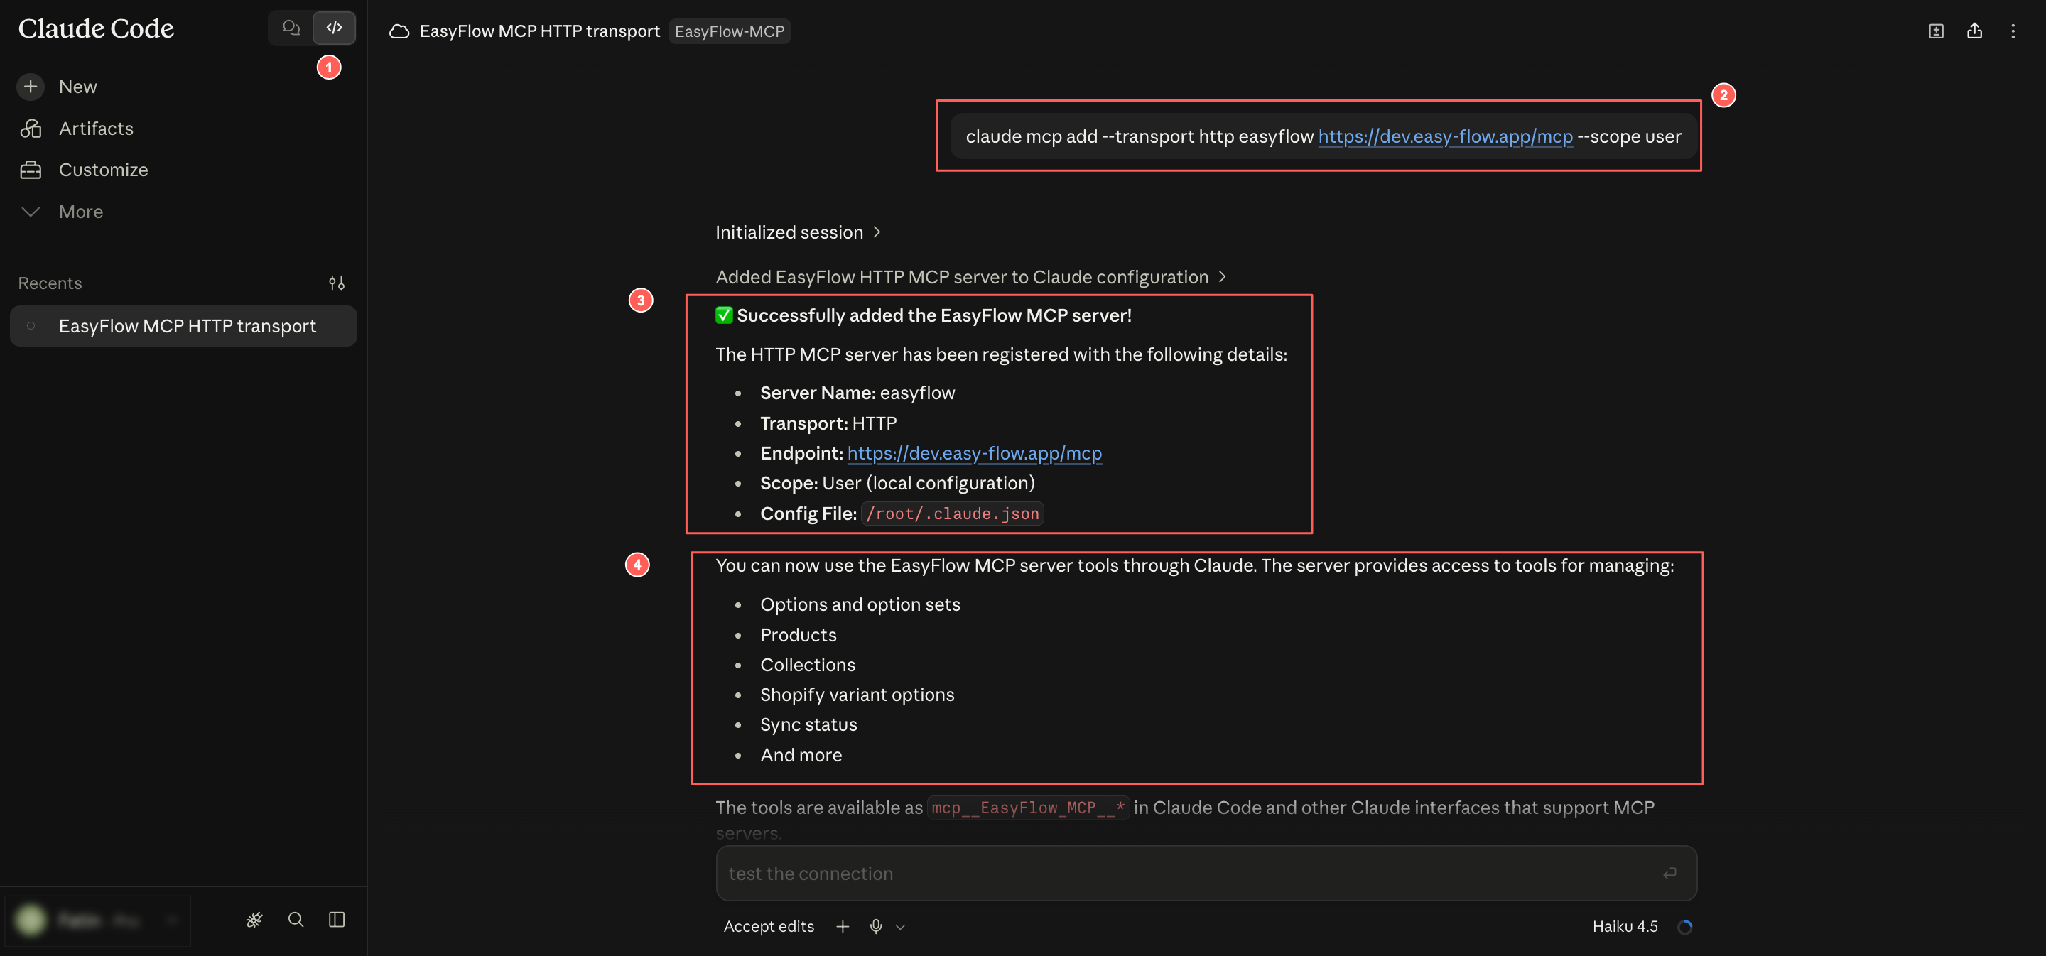
Open Claude Code and start a new session by selecting New in the left sidebar. Paste the command into the prompt and press Enter.
| claude mcp add –transport http easyflow https://dev.easy-flow.app/mcp –scope user |
The –scope user flag registers EasyFlow at the user level, which makes it available in every project on this computer. Use project scope instead if you only want it inside one repository.
Step 3: Confirm the Server Was Registered #
Claude Code initializes the session, adds the server to your configuration and reports Successfully added the EasyFlow MCP server. It then prints the registration details so you can verify everything landed correctly.
- Server Name: easyflow
- Transport: HTTP
- Endpoint: https://dev.easy-flow.app/mcp
- Scope: User (local configuration)
- Config File: /root/.claude.json
Below that, Claude Code lists the areas the server gives access to, covering options and option sets, products, collections, Shopify variant options and sync status. The tools appear as mcp__EasyFlow_MCP__* in Claude Code and in any other Claude interface that supports MCP servers.
Adding the server is not the same as granting it access to your store. EasyFlow uses OAuth, so there is a one-time sign-in step before any tool will run.
Step 4: Ask Claude Code to List the EasyFlow Tools #
Ask a simple question to see what the connector exposes:
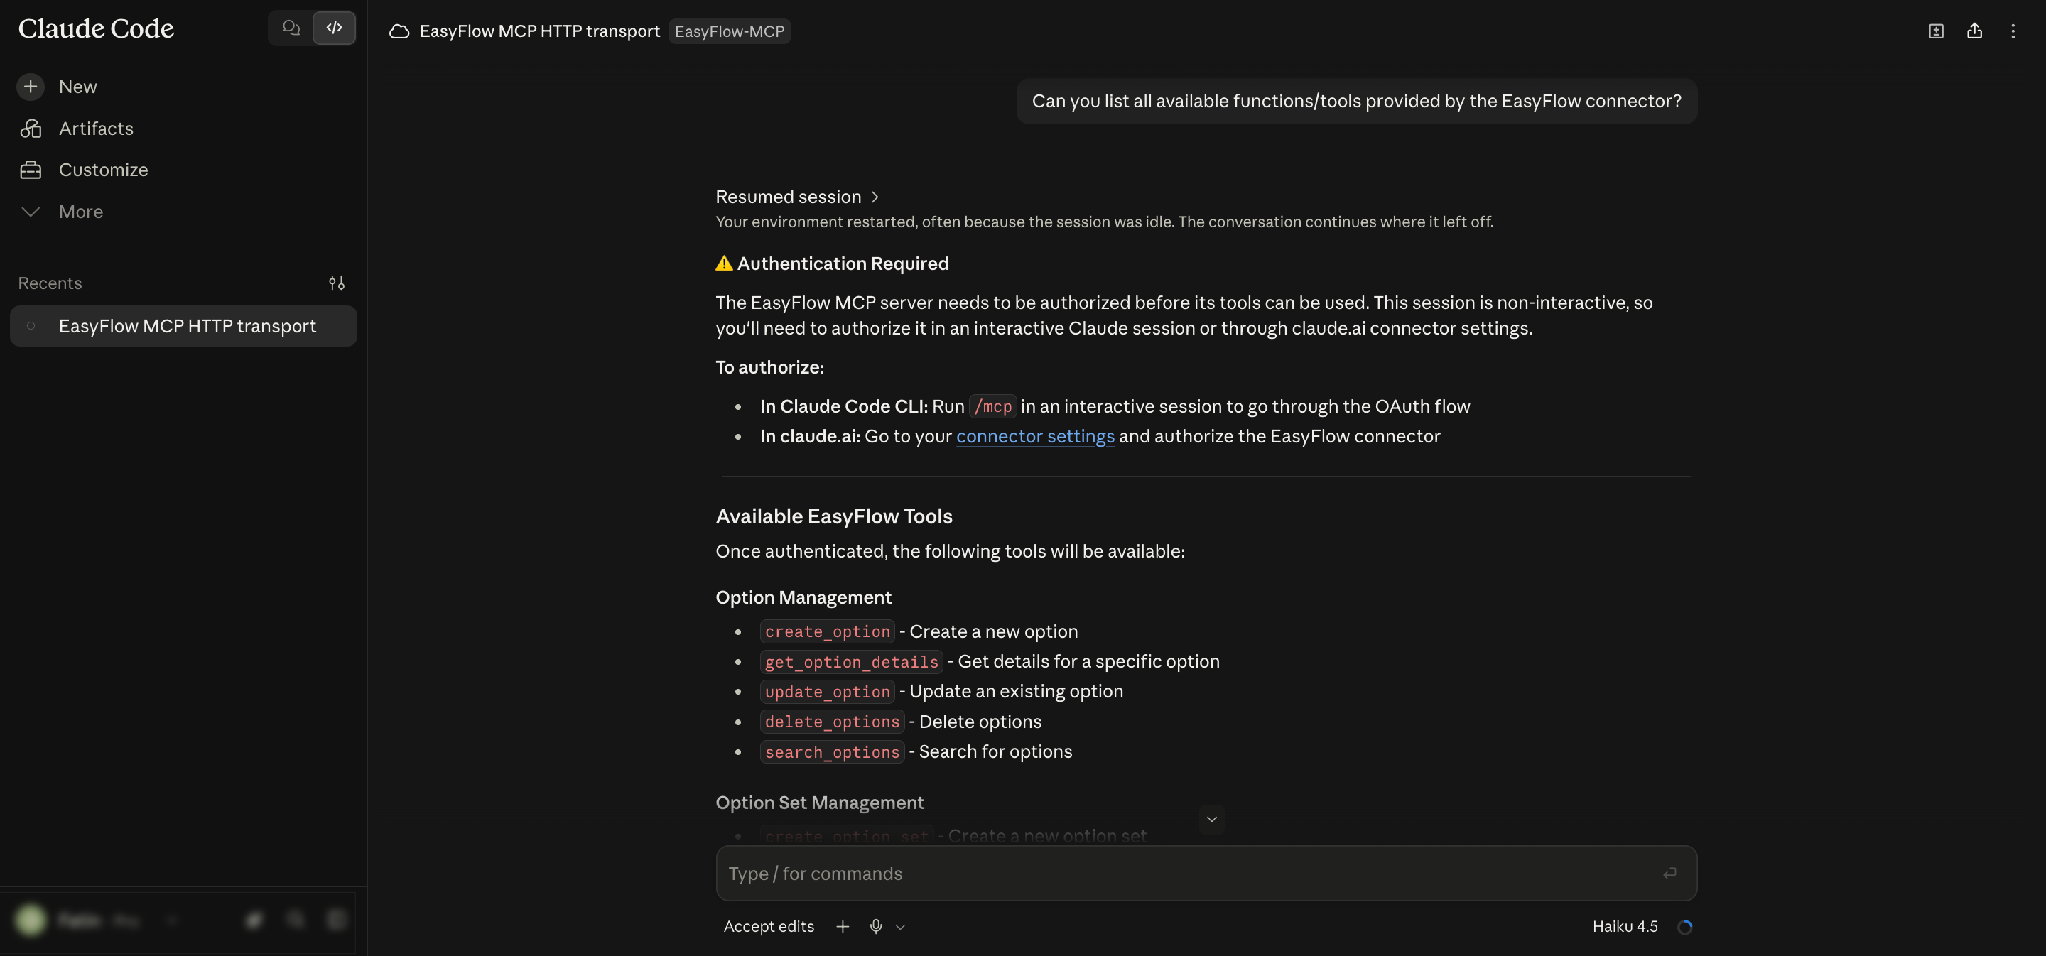
Can you list all available functions/tools provided by the EasyFlow connector?
Claude Code returns the full catalogue of EasyFlow tools grouped by purpose, starting with Option Management.
Step 5: Read the Authentication Required Notice #
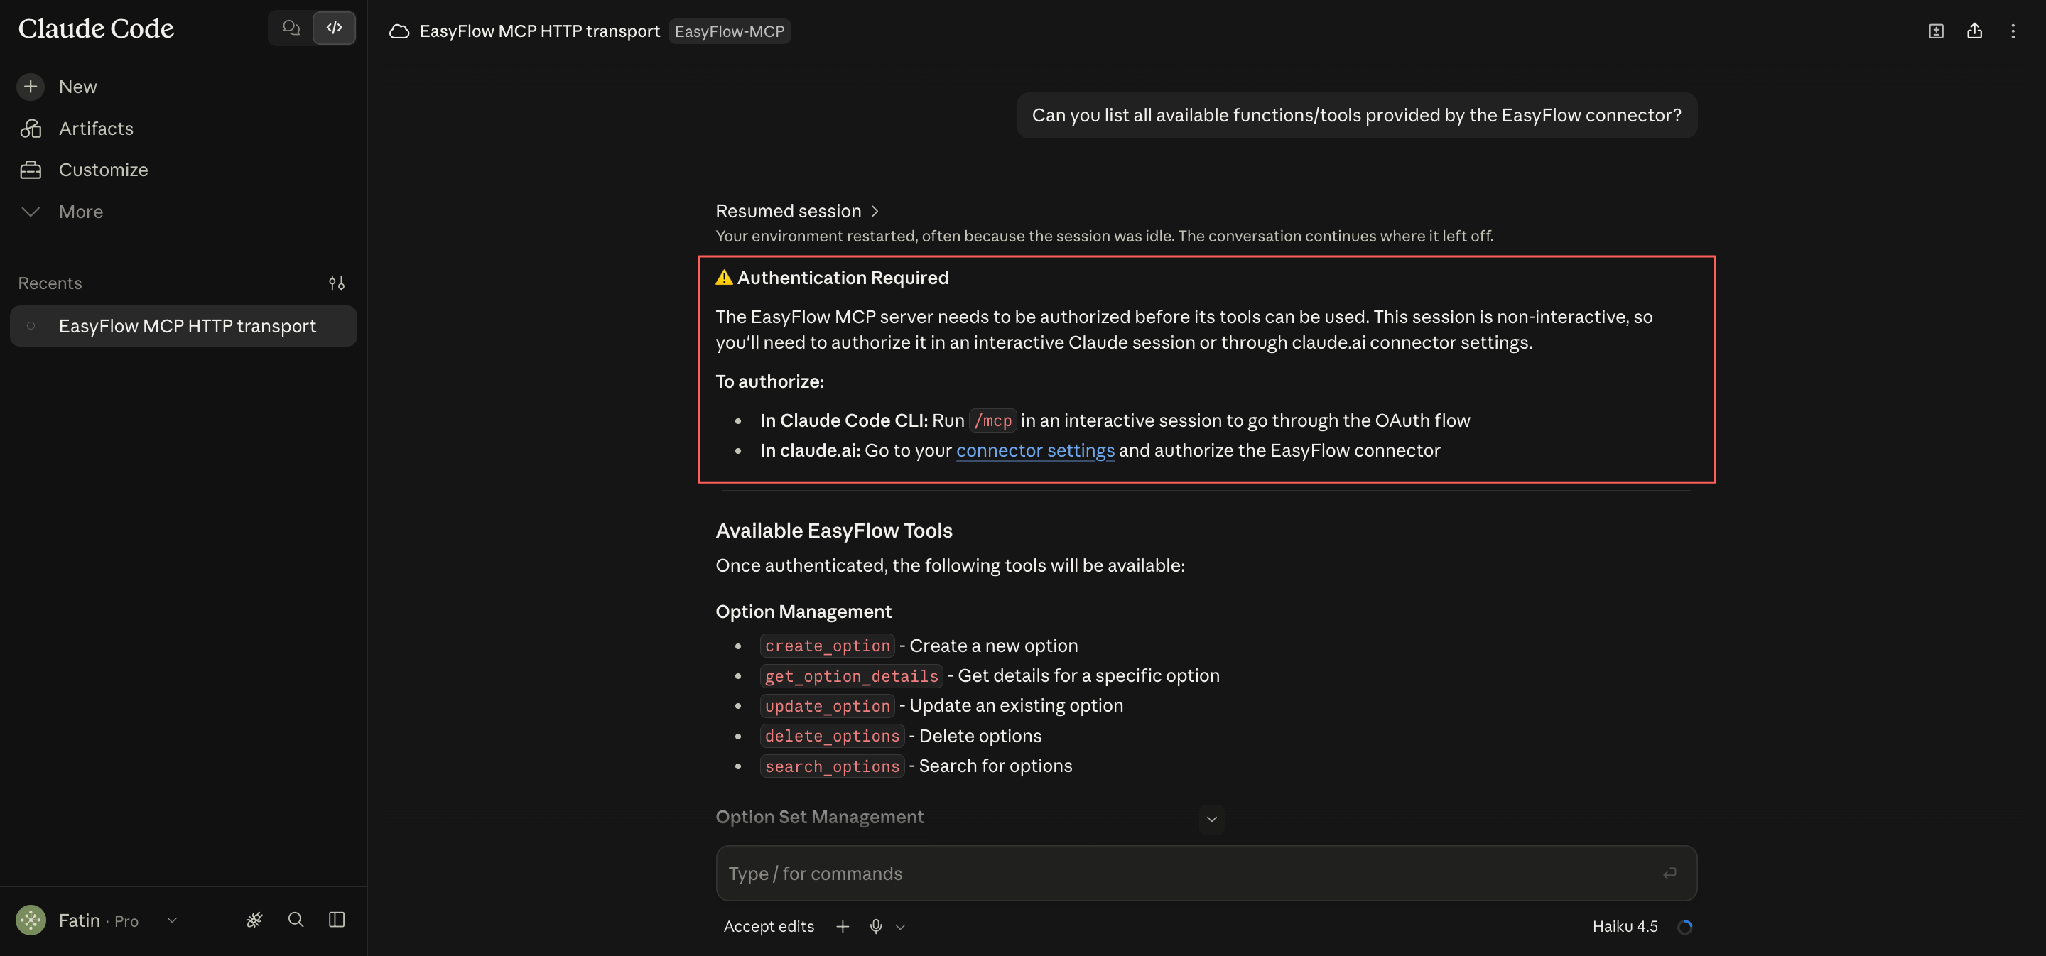
Above the tool list, Claude Code shows an Authentication Required warning. This means the server is registered but not yet authorized, so none of the tools can actually run against your store. The notice gives you two ways to fix it.
- In Claude Code CLI: run /mcp in an interactive session to go through the OAuth flow.
- In claude.ai: go to your connector settings and authorize the EasyFlow connector.
| Note: A non-interactive session cannot complete the OAuth handshake. If you are scripting Claude Code, authorize the connector once in an interactive session first, then the tools work in later runs. |
Step 6: Review the Full Tool List and Run /mcp #
Scroll down to see the rest of the catalogue. EasyFlow exposes tools across five more groups:
- Option Set Management: create, update, search and duplicate option sets
- Product & Collection Management: search products, search collections, add products to an option set, exclude products and read Shopify variant options
- Option Value Customization: set an add-on charge or an image for an option value
- Rules & Sync: set the rules on an option set and check sync status
- Conversation: start a conversation with the EasyFlow server
To authorize, type /mcp in the prompt at the bottom of the screen and press Enter.
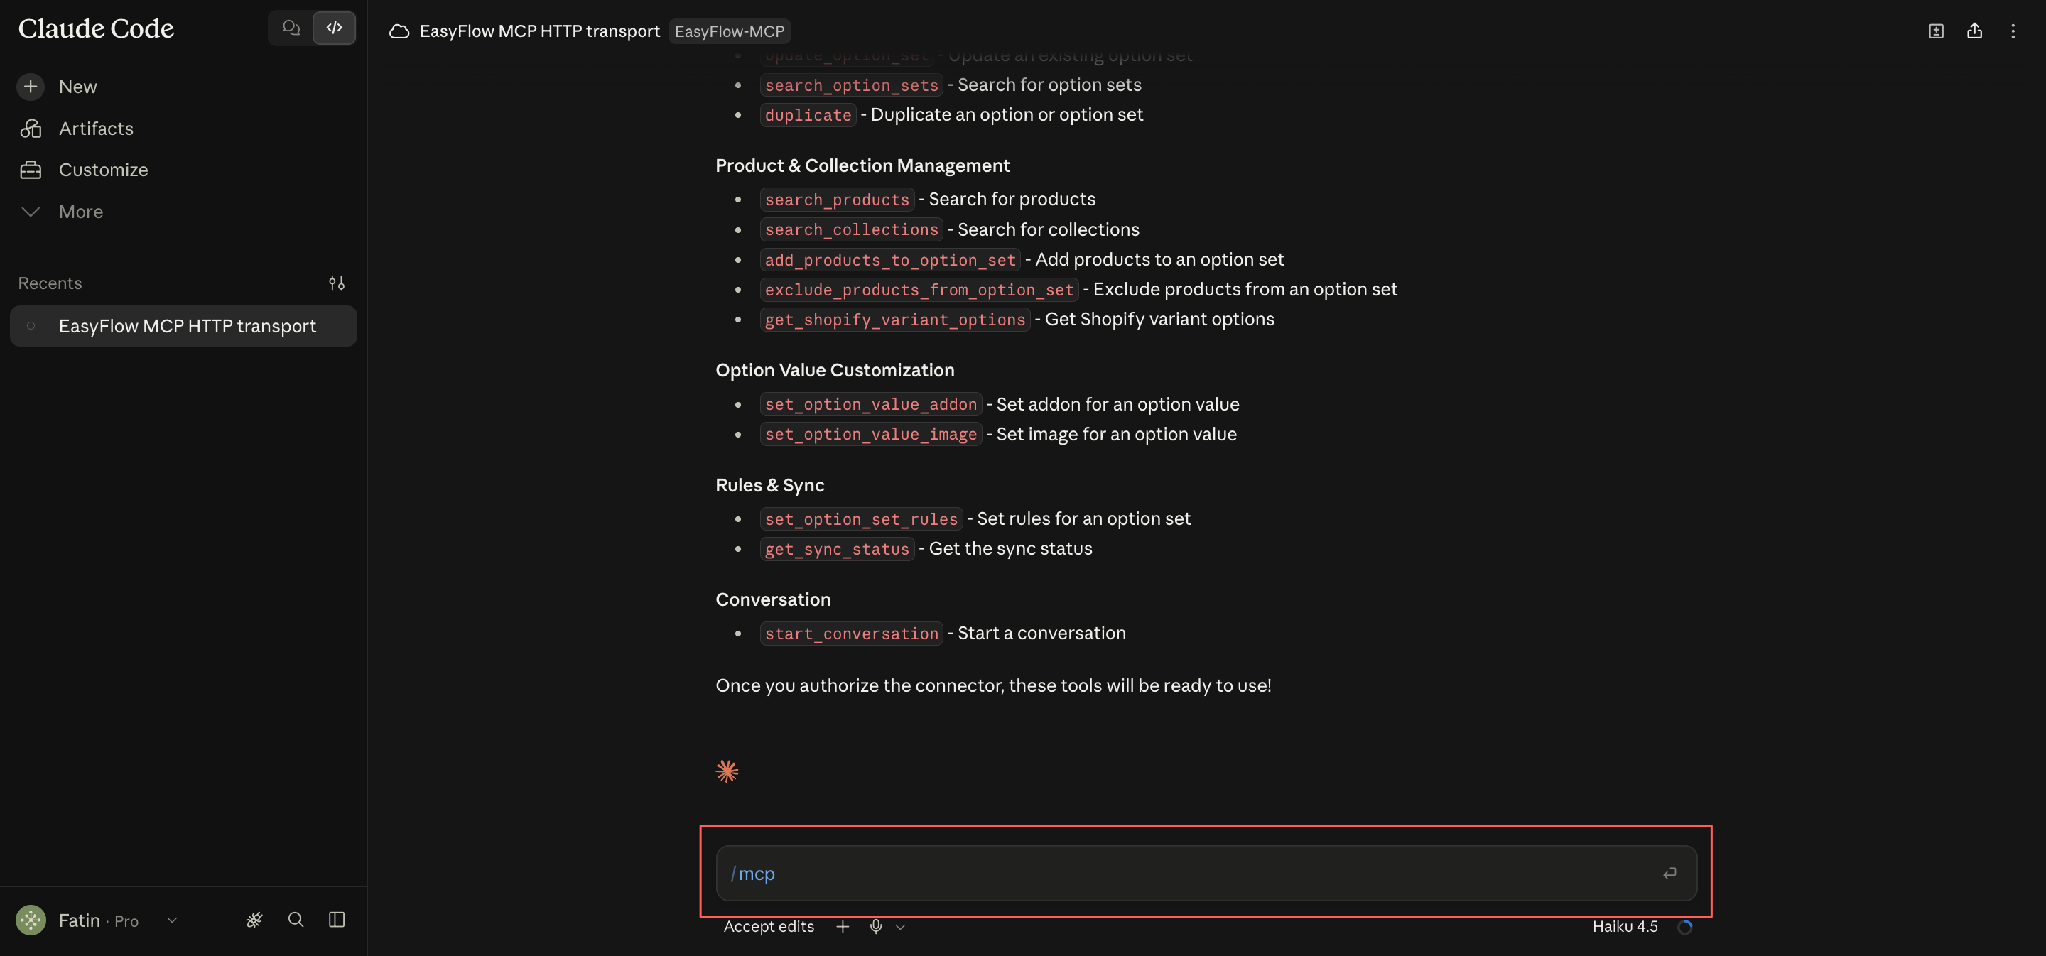
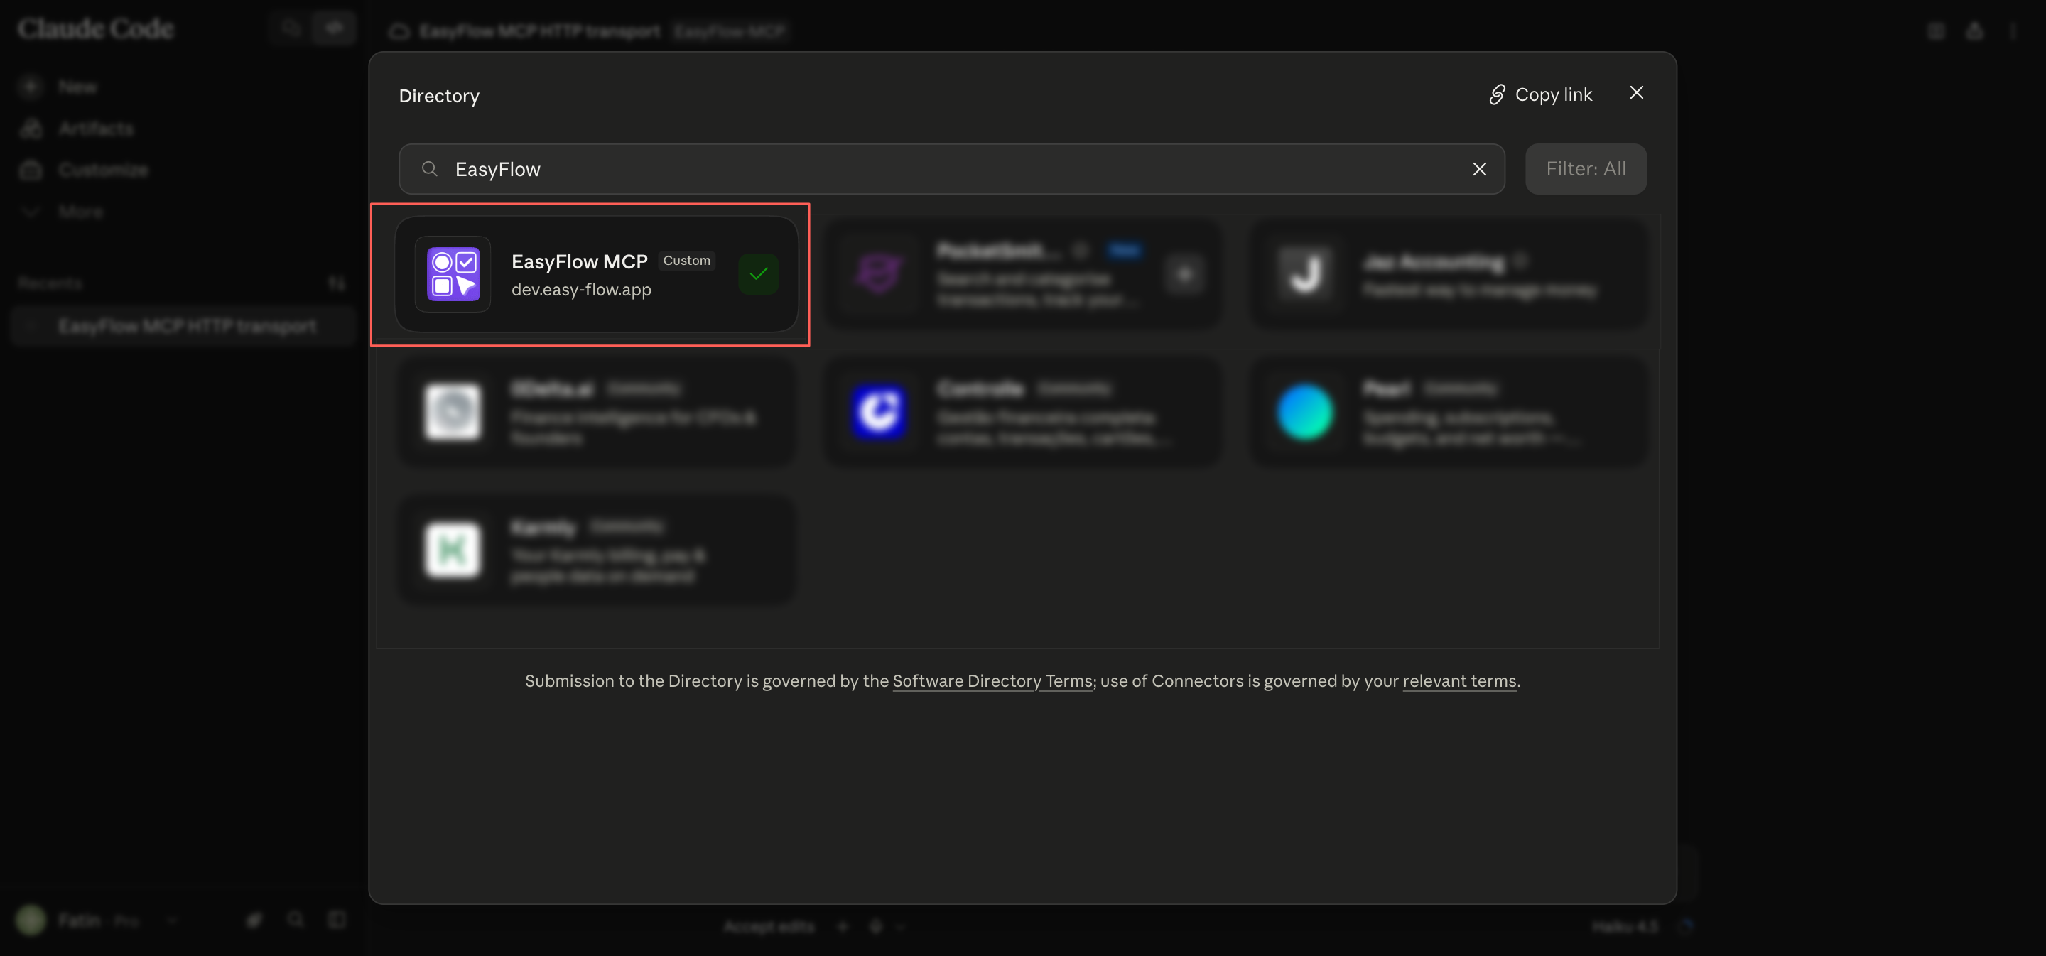
Step 7: Select EasyFlow MCP in the Directory #
The Directory panel opens. Type EasyFlow into the search field to filter the list, then select the EasyFlow MCP card. It is labelled Custom because it is your own server rather than a listed community connector.
Complete the sign-in when prompted. This is the step that grants the server access to your EasyFlow data.
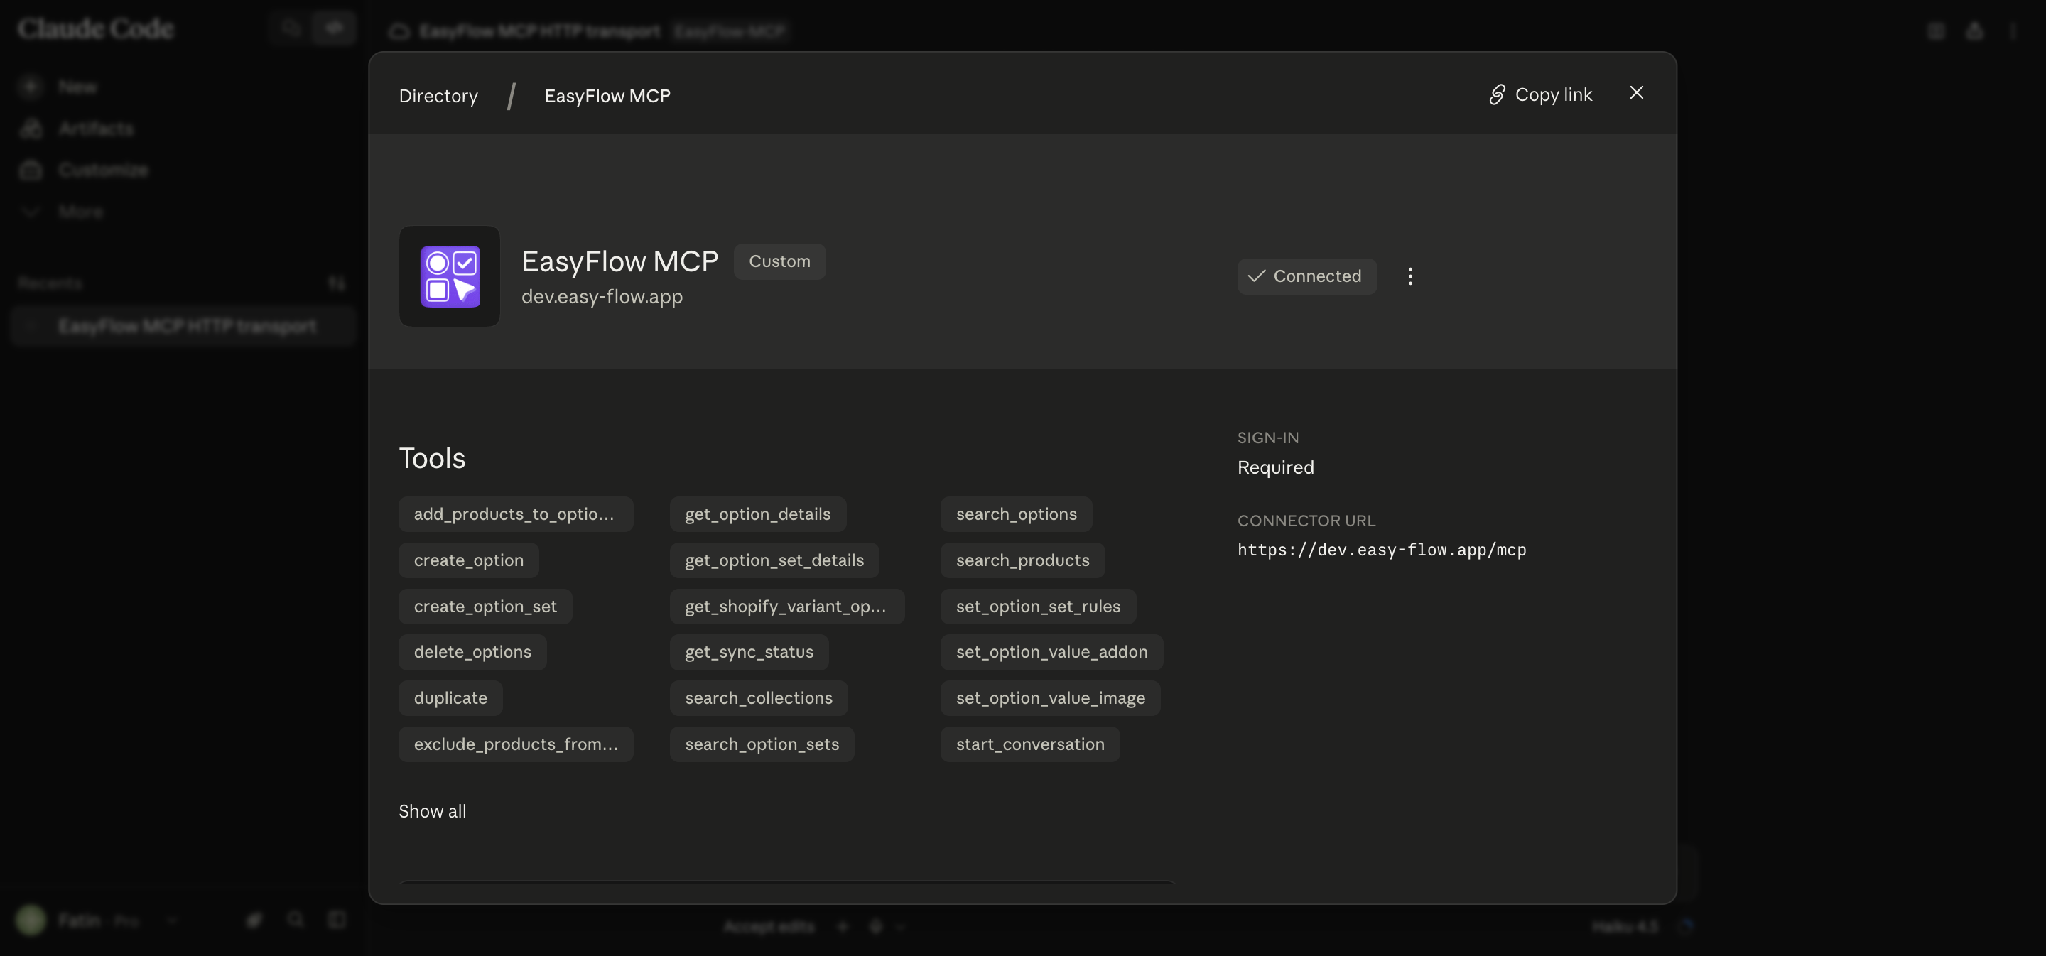
Step 8: Confirm the Connector Shows as Connected #
After signing in, the connector detail page opens and the status badge reads Connected. The Tools section now lists every available tool, and the right column confirms the sign-in requirement and the connector URL.
Select Show all if you want the complete list rather than the first rows. Close the panel with the X in the top right corner when you are done.
With the connector authorized, Claude Code can work against your live store. Start with a read-only lookup to confirm everything is wired up before making changes.
Step 9: Ask Claude Code to Find a Product #
Start a fresh session by selecting New, then ask for a specific product:
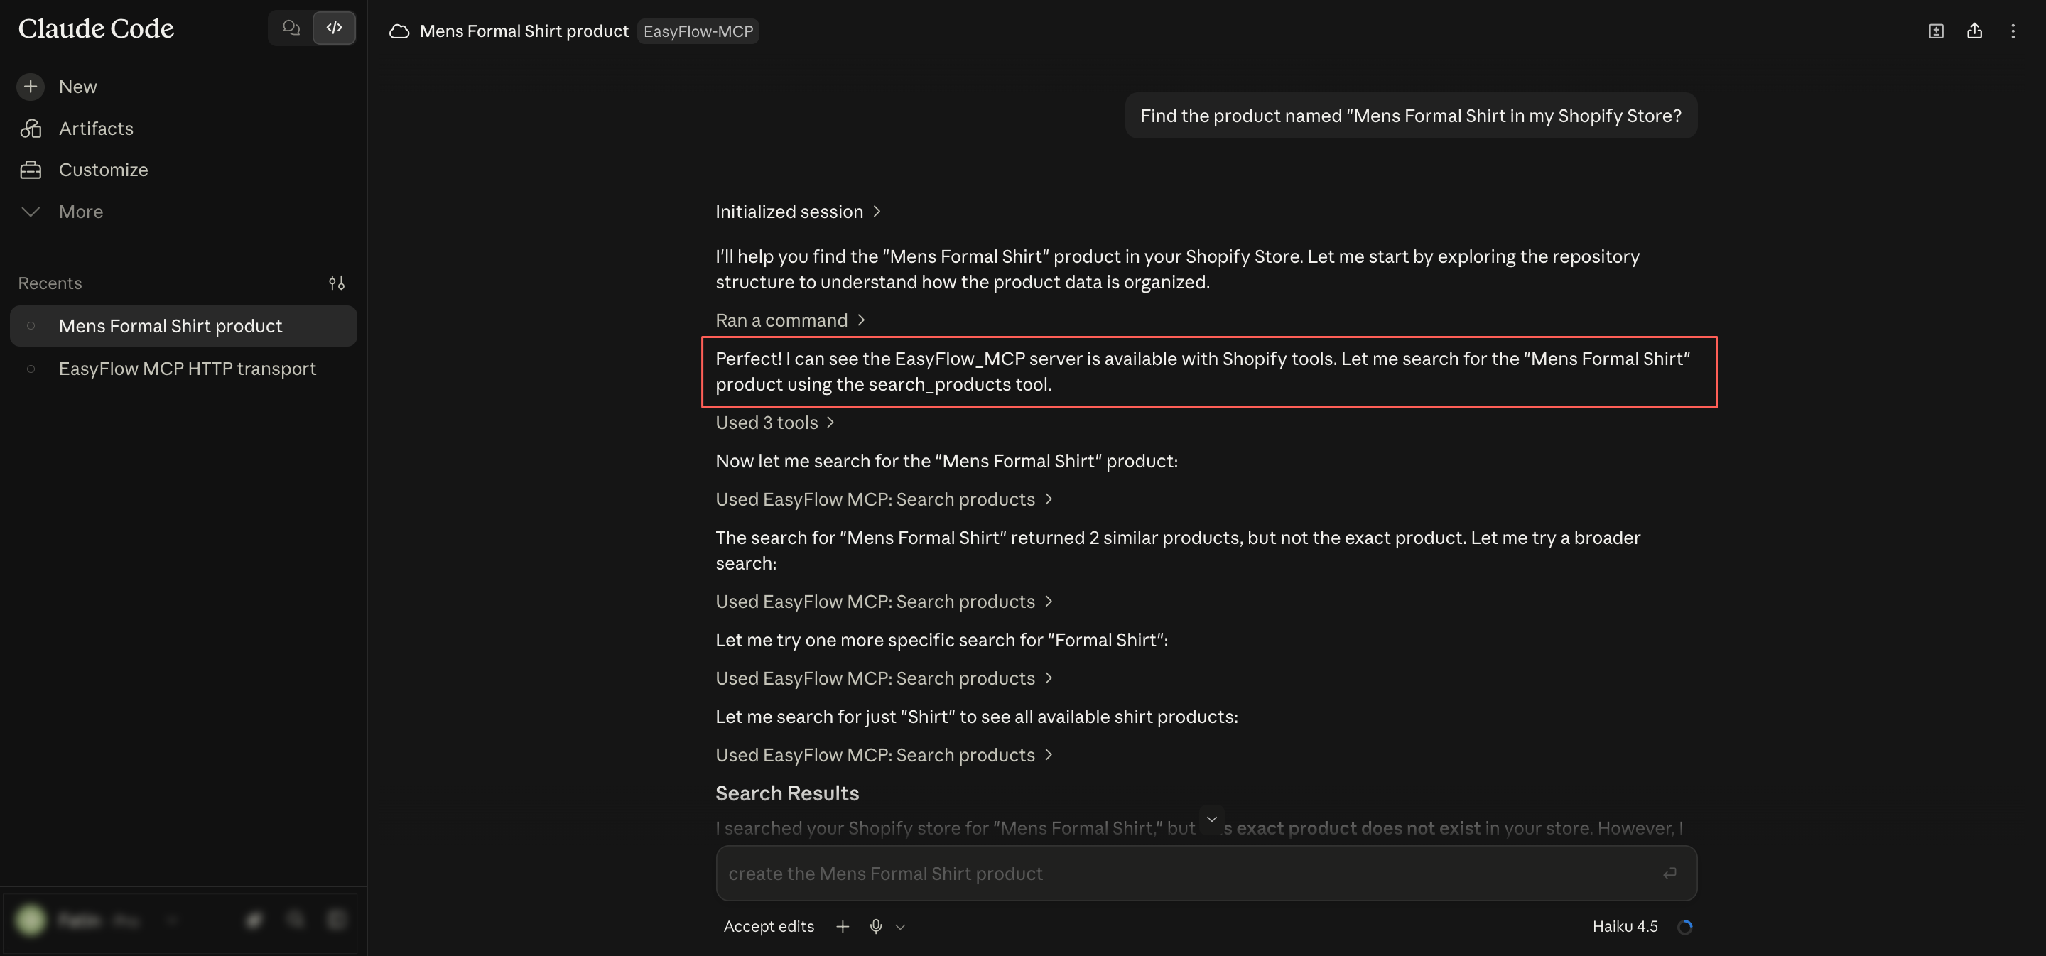
Find the product named “Mens Formal Shirt” in my Shopify Store?
Claude Code initializes the session, confirms the EasyFlow_MCP server is available with Shopify tools, then calls search_products to look for the product. When the first search does not return an exact match, it widens the query automatically and tries again with broader terms.
Step 10: Review the Search Results and Choose an Action #
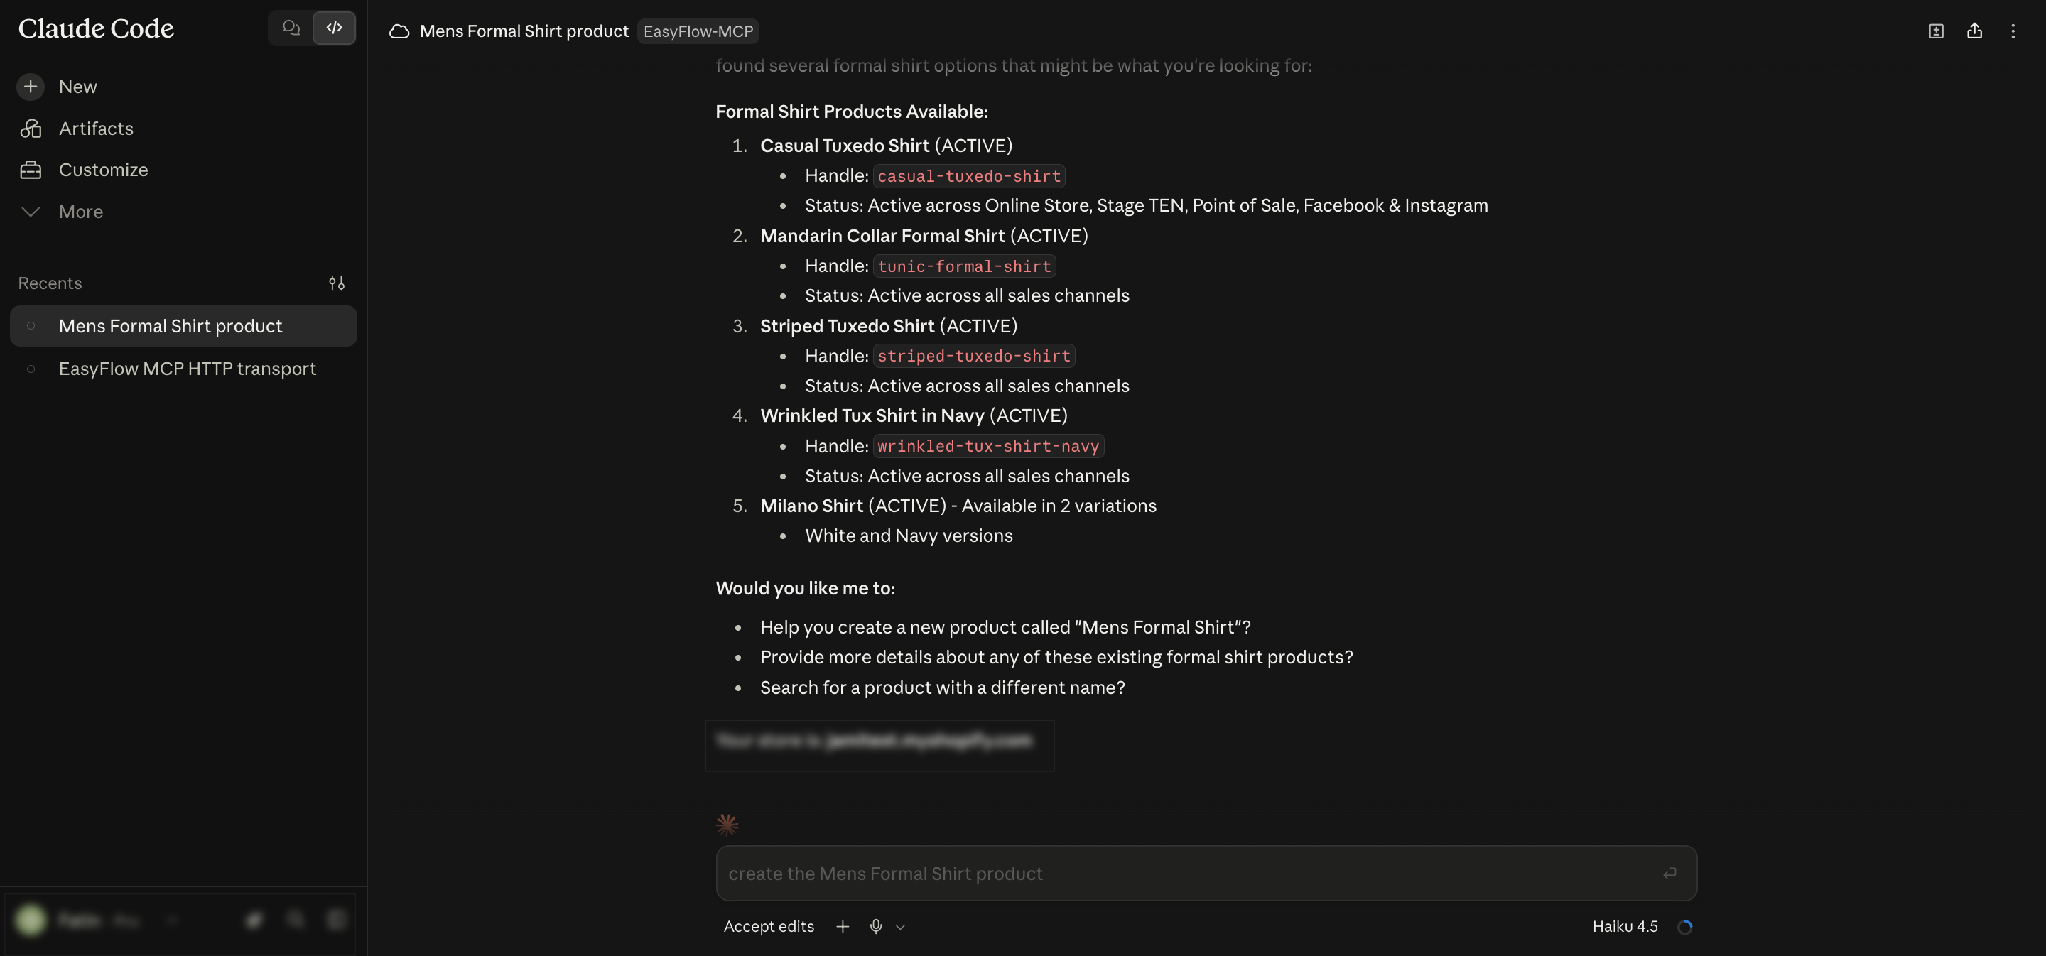
Claude Code reports honestly that no product named exactly Mens Formal Shirt exists in the store, then lists the formal shirt products that do exist, each with its handle and sales channel status.
1. Casual Tuxedo Shirt (ACTIVE), handle casual-tuxedo-shirt
2. Mandarin Collar Formal Shirt (ACTIVE), handle tunic-formal-shirt
3. Striped Tuxedo Shirt (ACTIVE), handle striped-tuxedo-shirt
4. Wrinkled Tux Shirt in Navy (ACTIVE), handle wrinkled-tux-shirt-navy
5. Milano Shirt (ACTIVE), available in White and Navy
It then offers three next actions: create a new product with that name, get more detail on any of the existing shirts or search again under a different name. Reply with whichever one you want and Claude Code continues from there.
| Why this matters: Claude Code reported that the product does not exist instead of inventing a match. When a lookup comes back empty, that is real information about your catalogue, so read it before assuming the connection failed. |
Final Outcome #
Open your storefront to confirm the results line up with what Claude Code reported. The Catalog page shows the same shirts it listed, including Casual Tuxedo Shirt, which appears in both the terminal output and the live store.
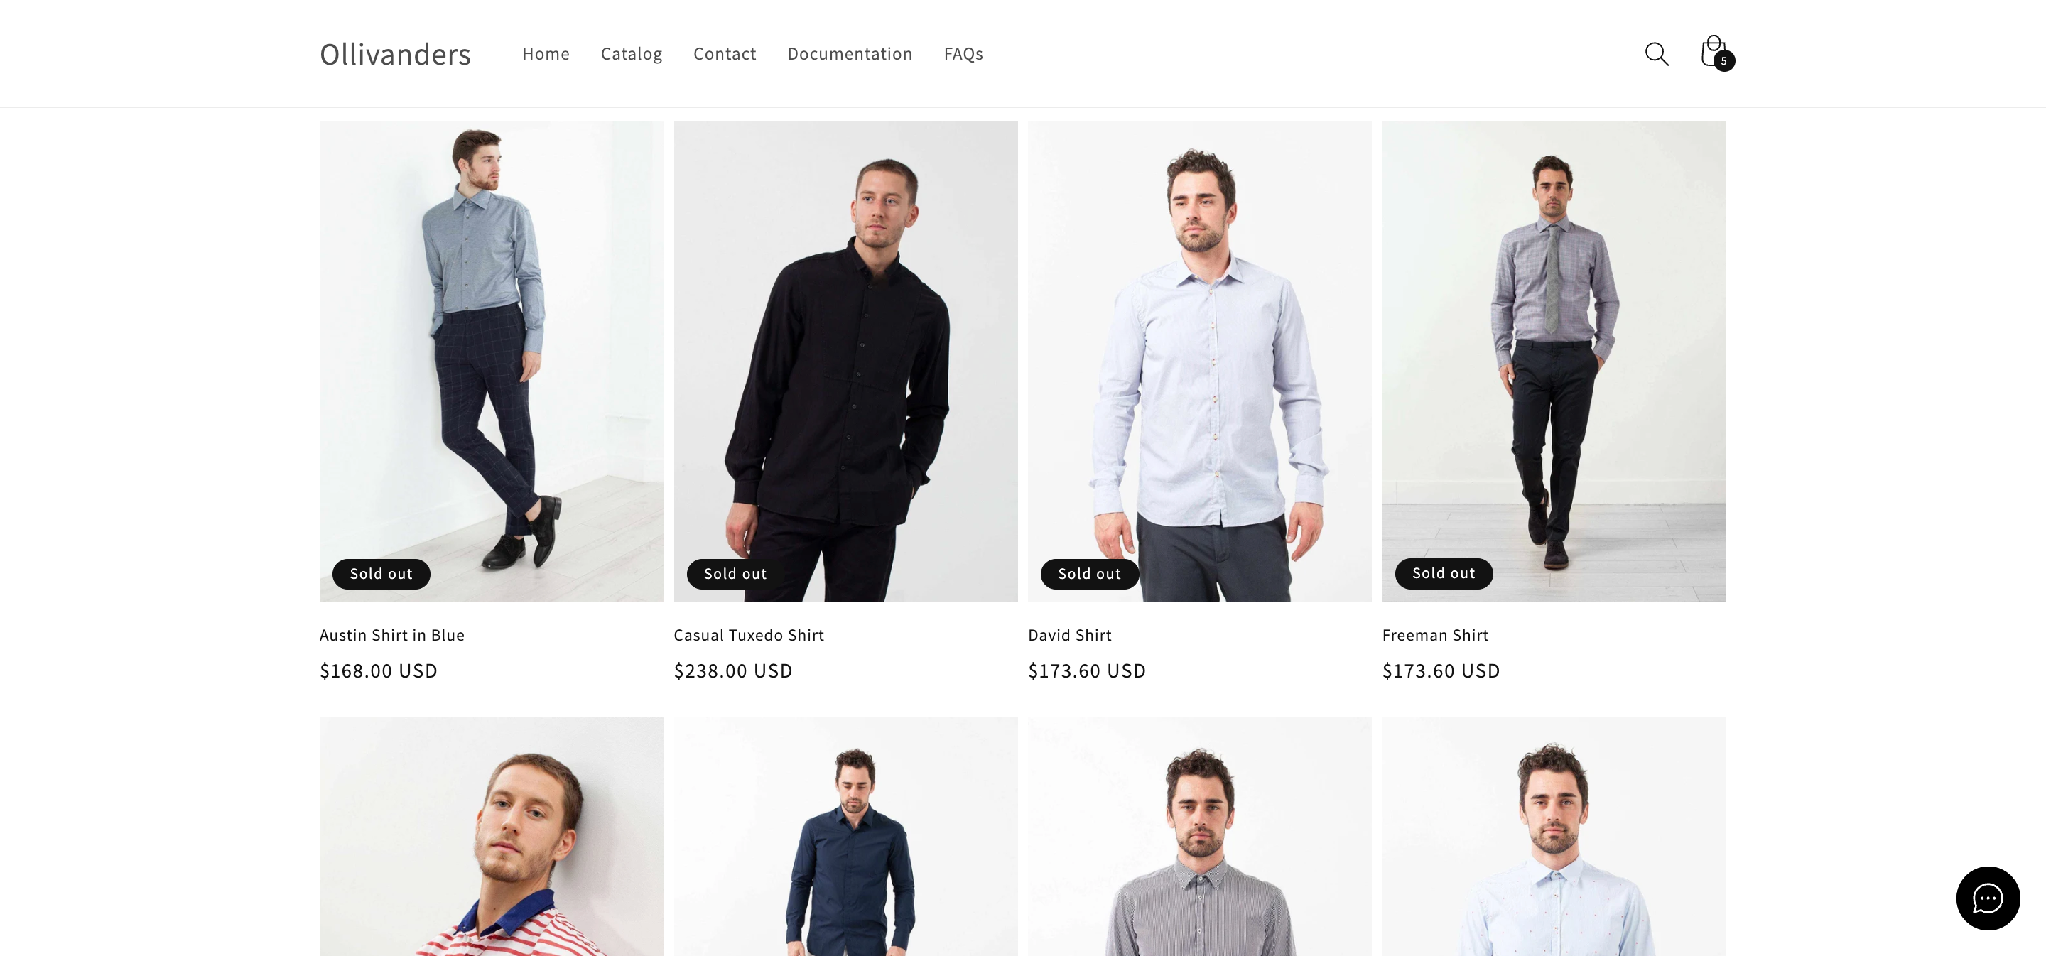
This is how easily you can customize Shopify product options with EasyFlow MCP and Claude Code. One command adds the server, one sign-in authorizes it and from there the whole EasyFlow toolset is available from your terminal.
If you get stuck at any step, feel free to reach out to our customer support team. We are always happy to help.


