

EasyFlow connects to Cursor through MCP (Model Context Protocol), the open standard that lets AI assistants work directly with the tools you already use. Once the server is added and authenticated, Cursor can search products, build options, create option sets and apply add-on pricing from a plain description, right inside your workspace.
You can connect EasyFlow MCP with cursor either a local workspace or a workspace linked to a GitHub repository. Both paths use the same MCP configuration described in this guide. This guide covers the full Cursor path from start to finish. It adds the EasyFlow server through a JSON configuration, walks through the one-time browser authentication and finishes by building a real size option on a live Shopify product.
Step 1: Copy the Cursor Configuration from EasyFlow #
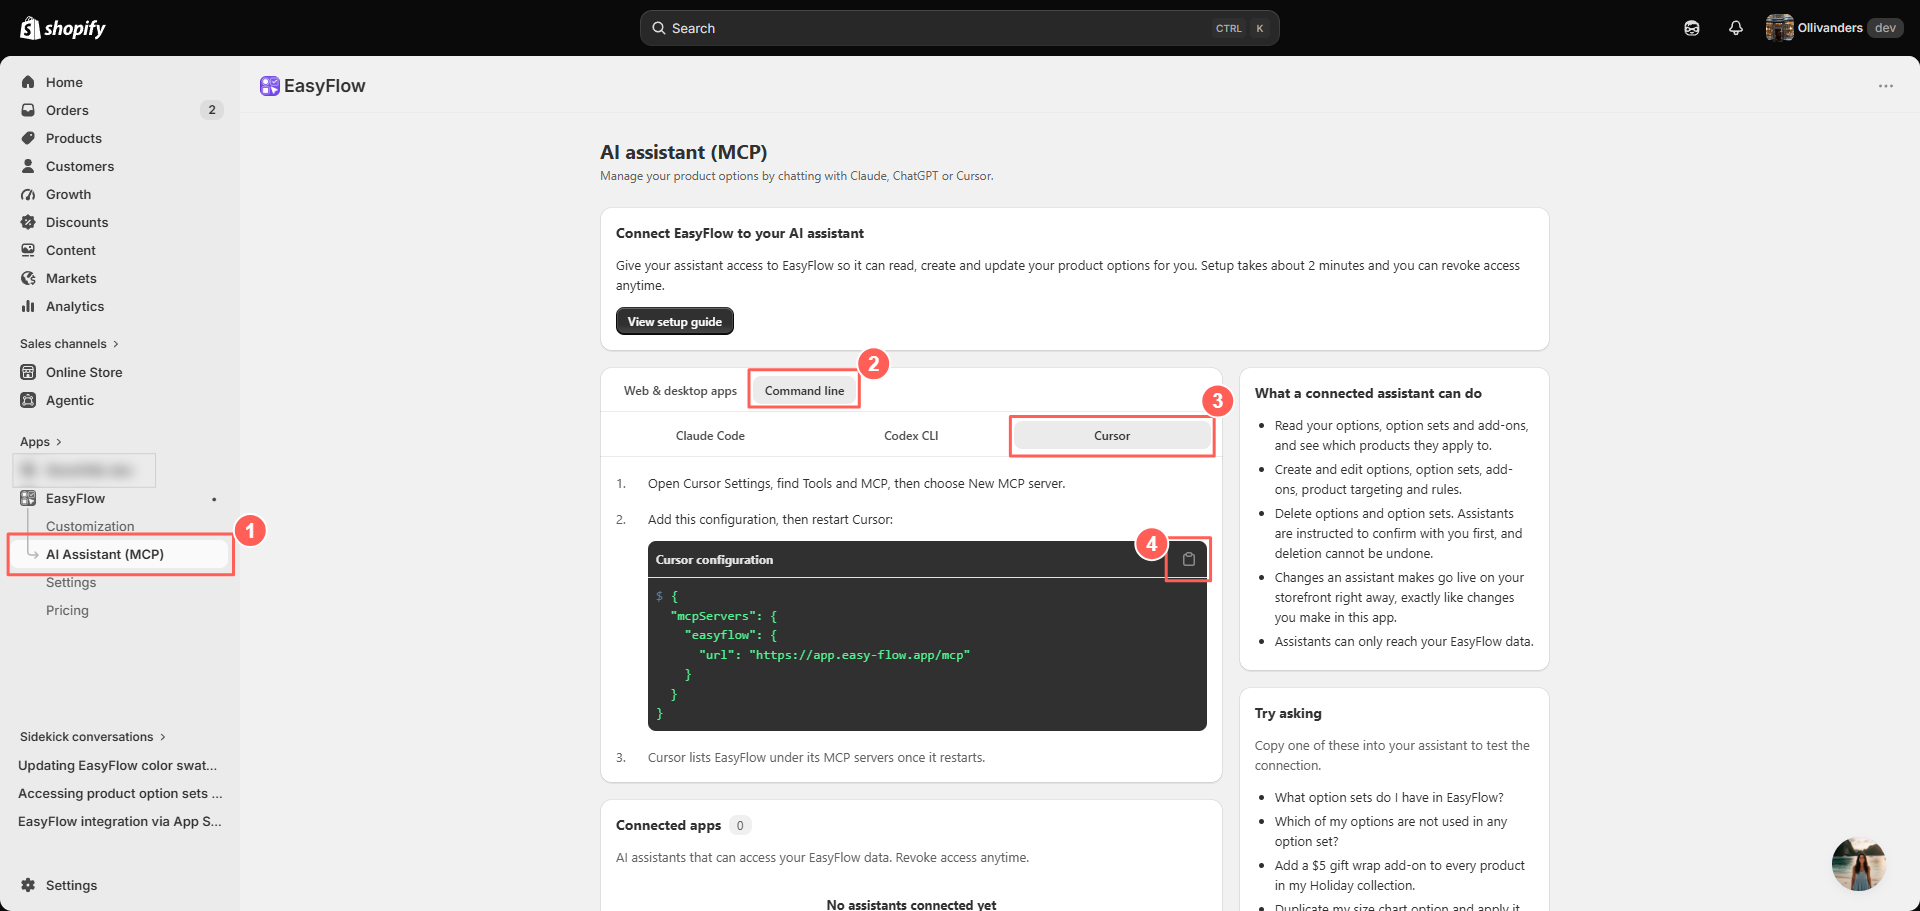
In your Shopify admin, go to Apps, then EasyFlow, then select AI Assistant (MCP) in the left sidebar. On that page, switch to the Command line tab and select the Cursor sub-tab.
EasyFlow shows the exact JSON to add, plus the three setup steps. Select the copy icon on the configuration block to put it on your clipboard.
Step 2: Open MCP Settings & Paste the Configuration #
In Cursor, select Customize in the left sidebar, then select the MCPs filter at the top of the panel. This view lists every MCP server available to the workspace, along with a shortcut to add a new one.
Select + New to create a custom server, then paste the configuration you copied in Step 1 into the mcp.json file that opens. It should match the structure shown on the EasyFlow page, with the server named easyflow and its URL pointing at your EasyFlow account. Save the file.
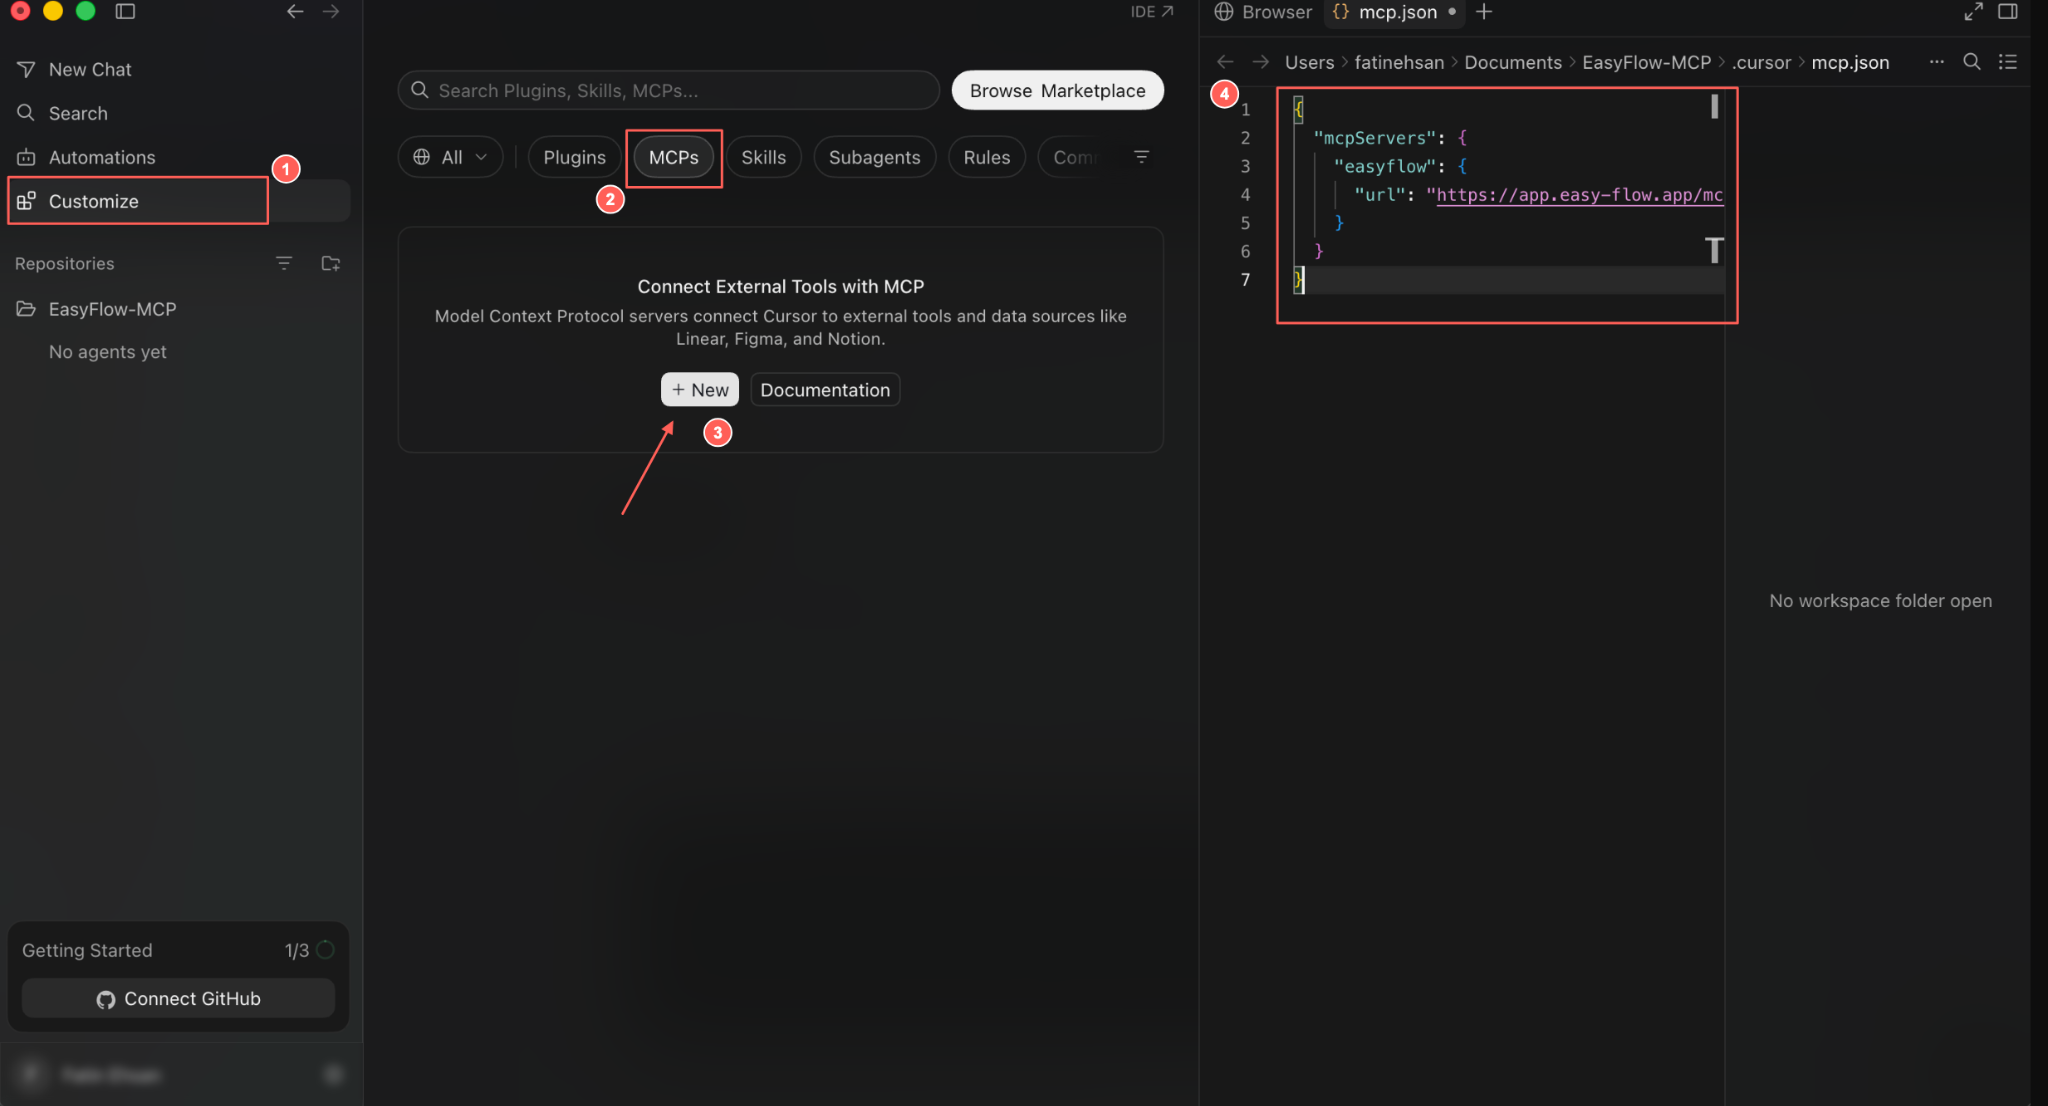
Note: Saving the configuration only registers the server. Cursor still needs to authenticate before any tool will run against your store, which is covered in the next part.
Step 3: Open the EasyFlow Entry Under Needs Attention #
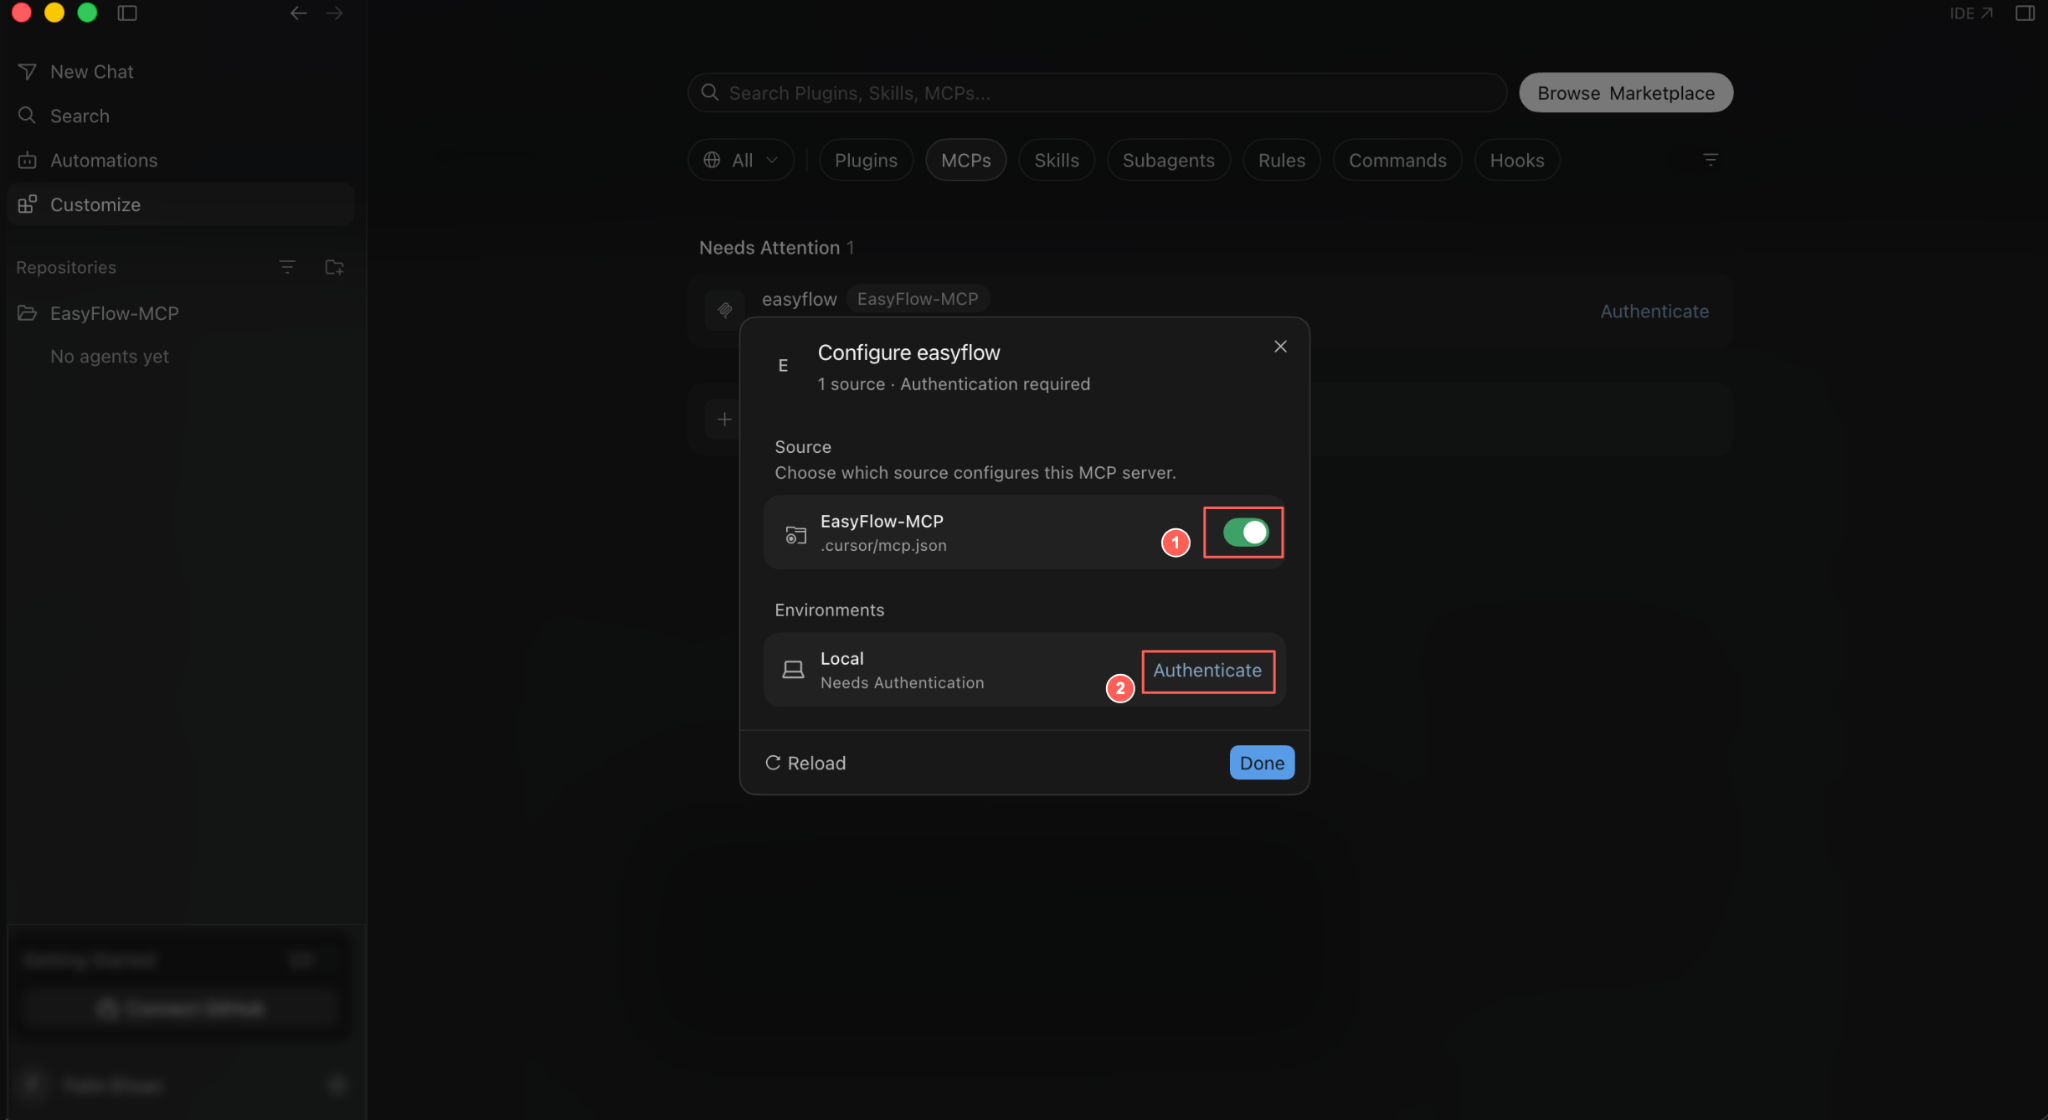
Back in the MCPs panel, the easyflow server appears under Needs Attention. Select it to open its configuration dialog, which lists the source file and the environments that still need authentication.
Step 4: Authenticate in the Browser #
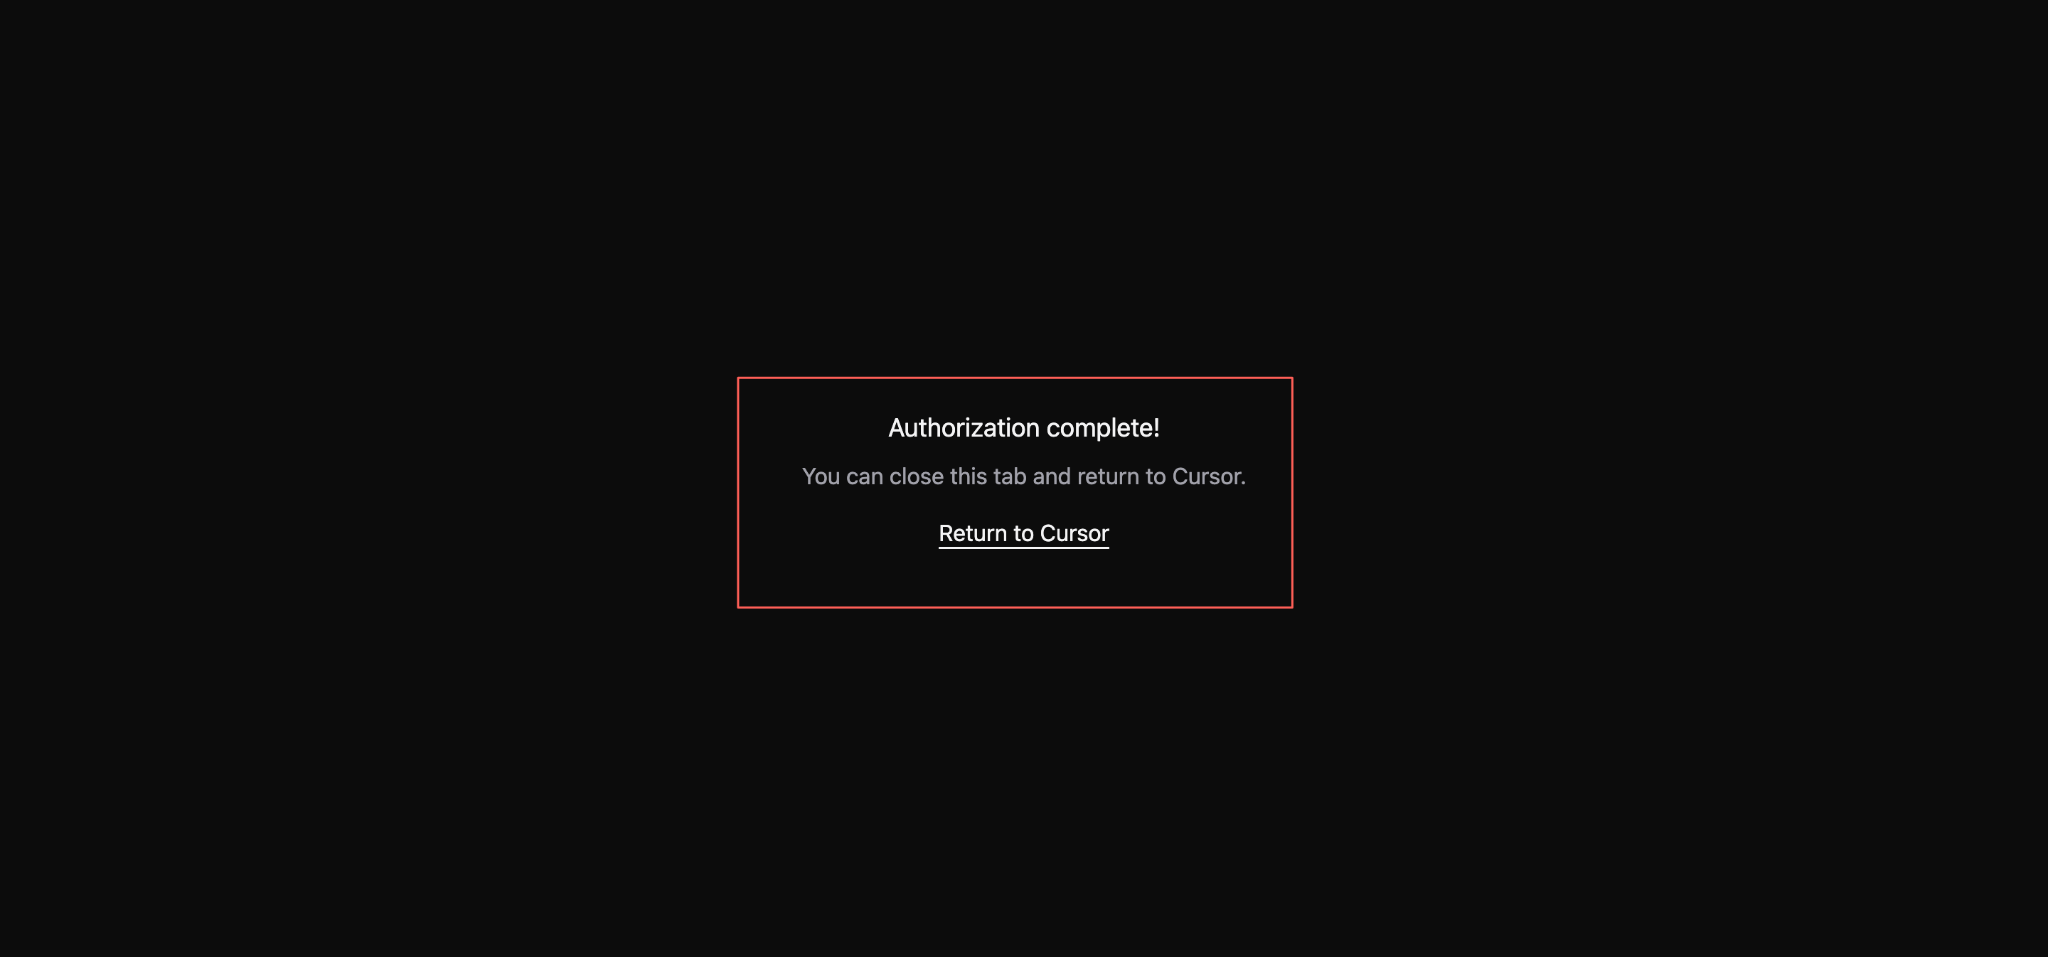
Select Authenticate next to Local. Cursor opens a browser tab to complete the sign-in with EasyFlow. Once you approve access, the tab confirms authorization is complete and offers a link back to Cursor.
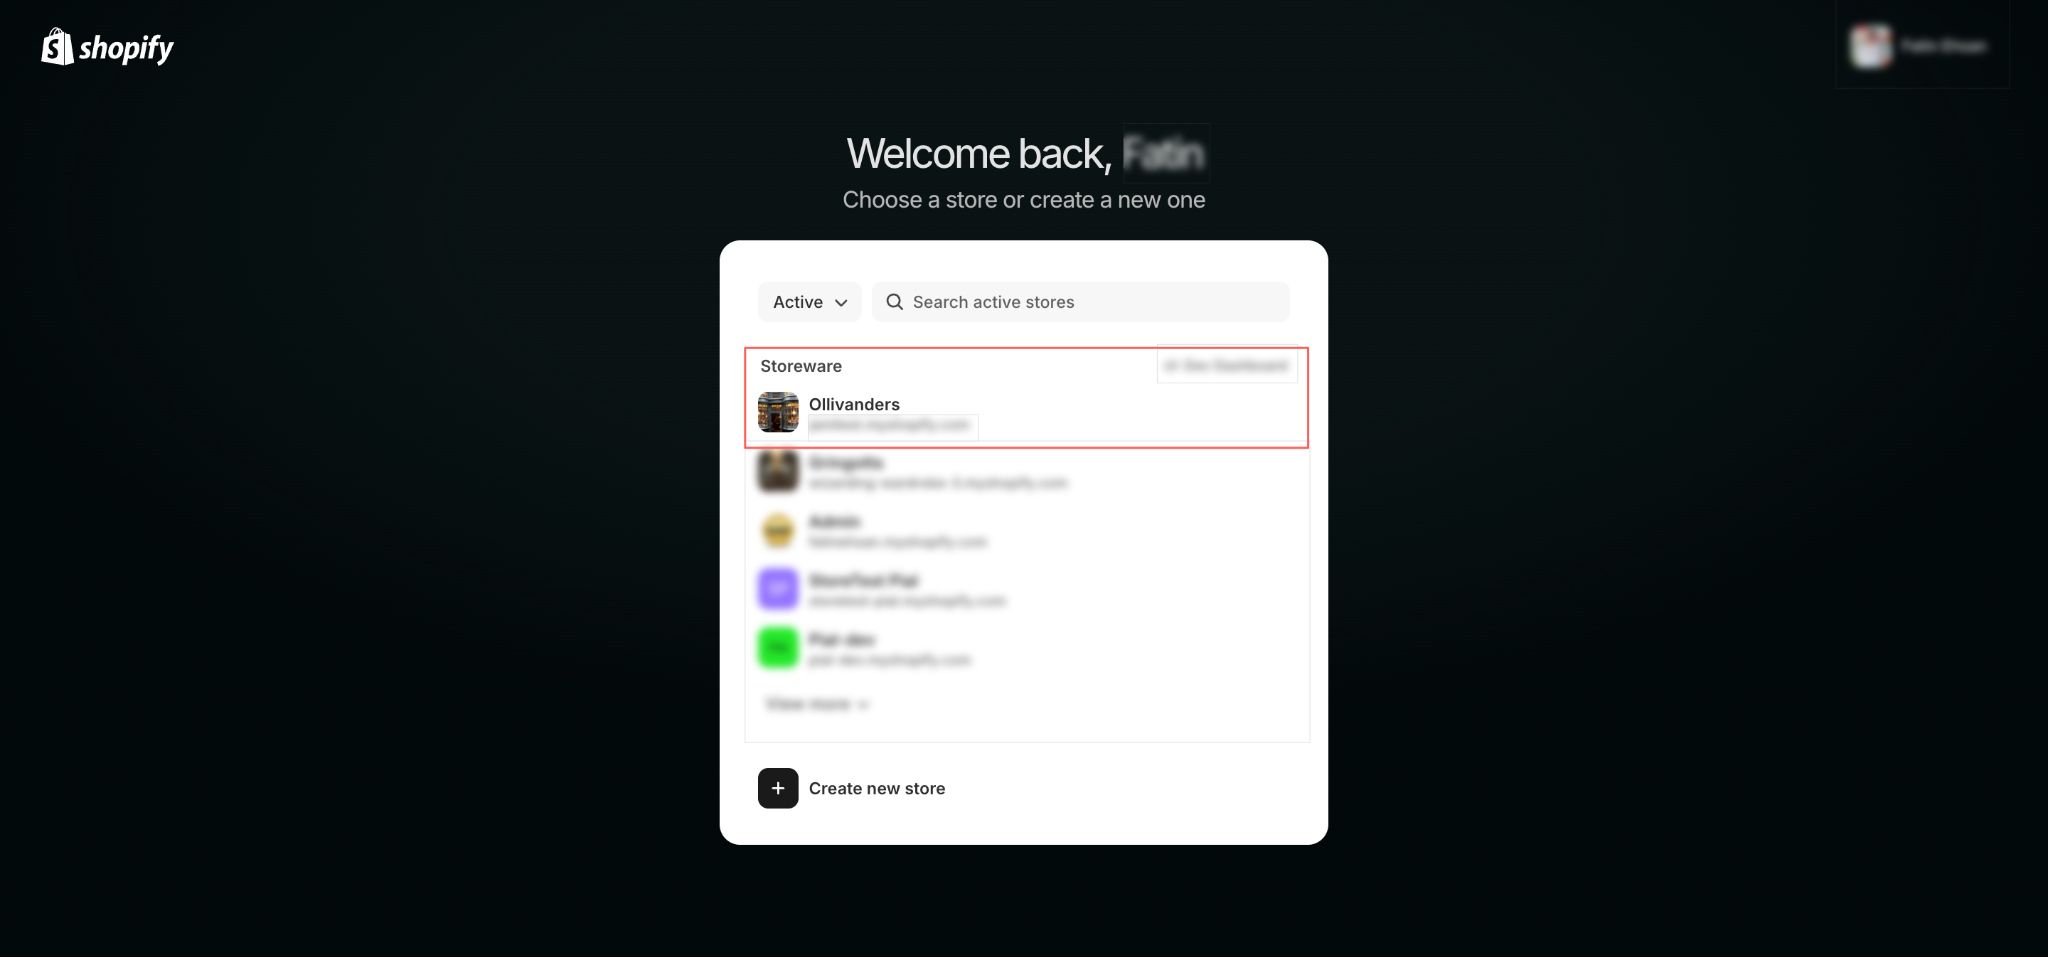
If Cursor is connected to more than one Shopify store, it may ask you to pick one before finishing. Choose the store you want this connection to manage, in this example Ollivanders.
Step 5: Review the Connected Source And Tools #
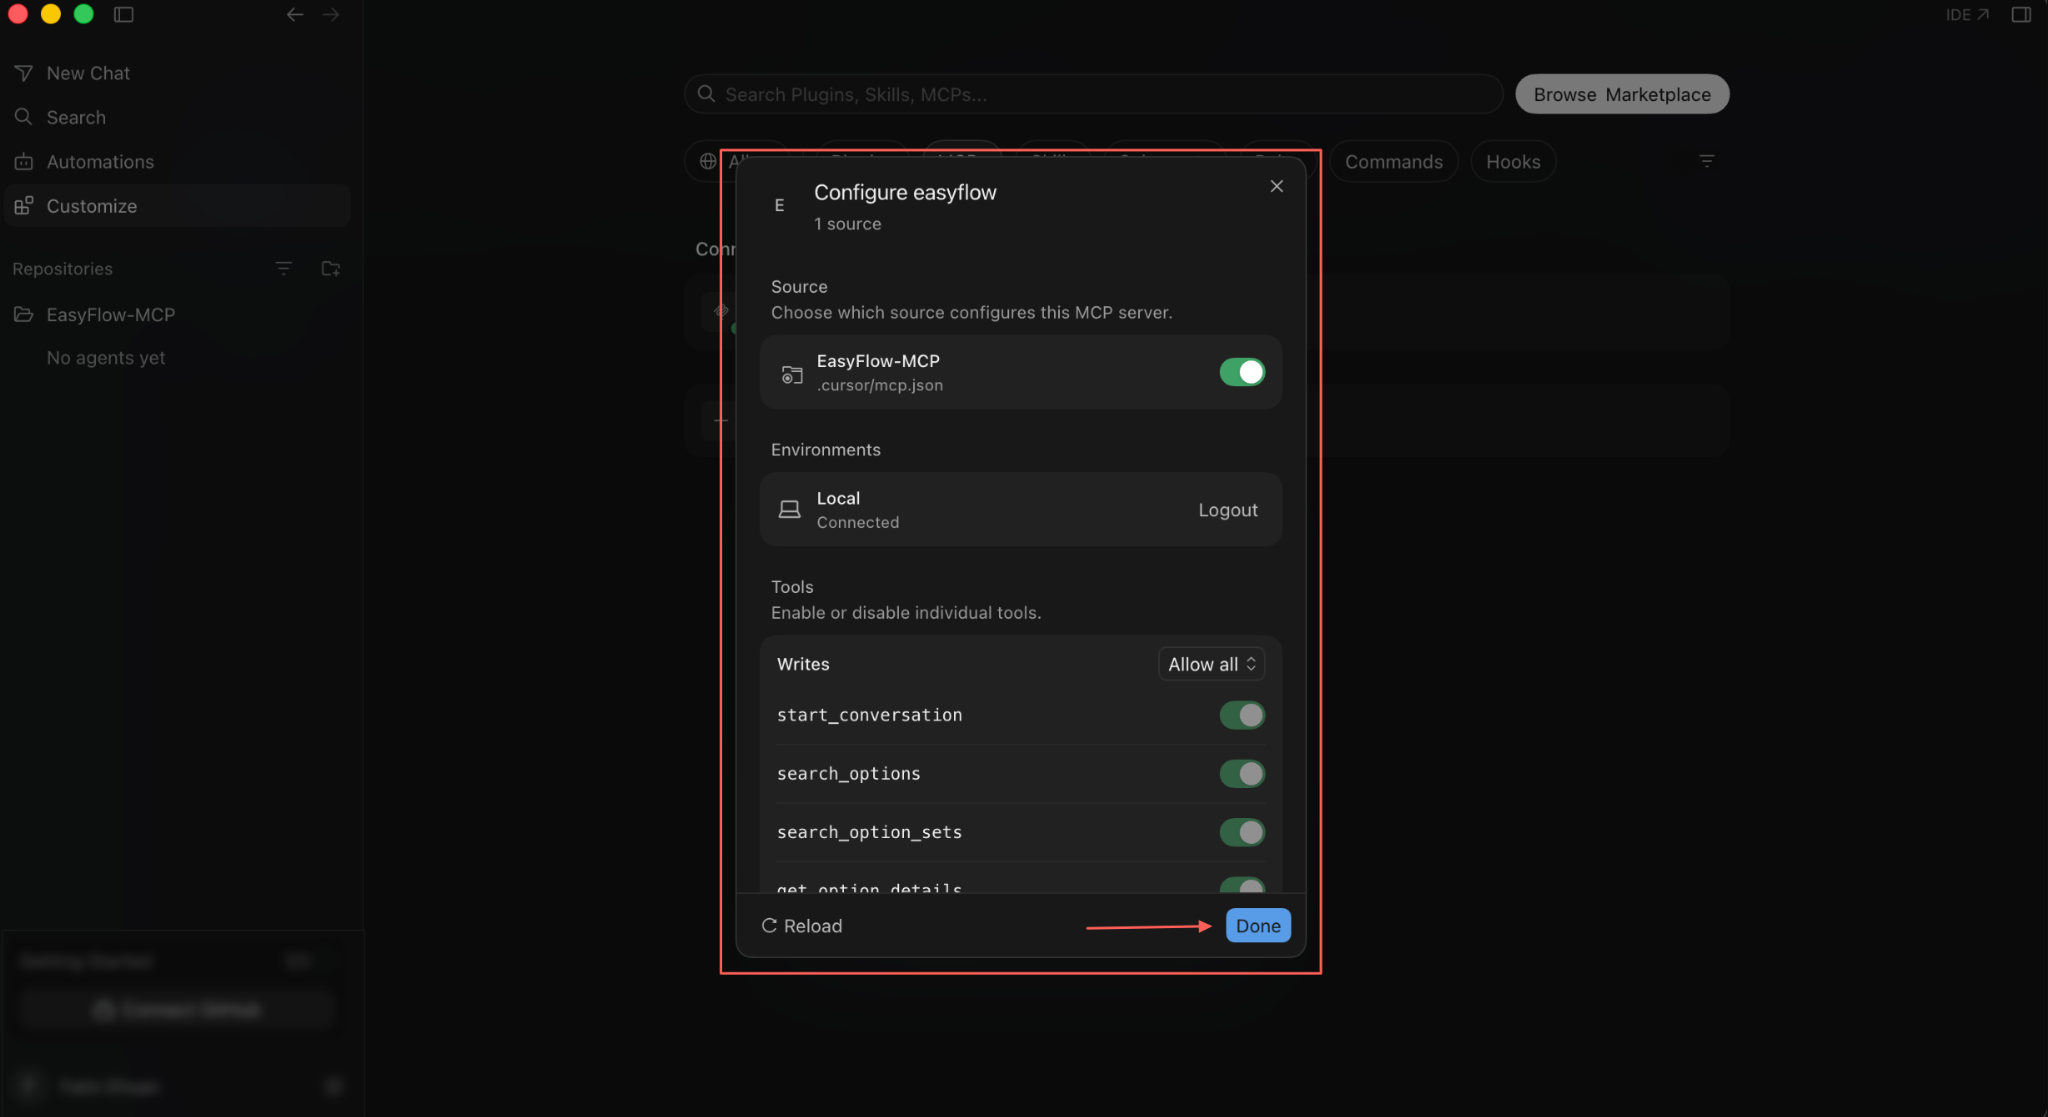
Back in Cursor, the Local environment now reads Connected instead of needing authentication. Below it, the Tools section lists every EasyFlow tool Cursor can call, grouped under headings such as Writes, with a toggle to enable or disable each one individually.
The Writes group defaults to Allow all. Turn off any tool you do not want Cursor to use, then select Done to close the dialog.
Step 6: Confirm EasyFlow Shows as Connected #
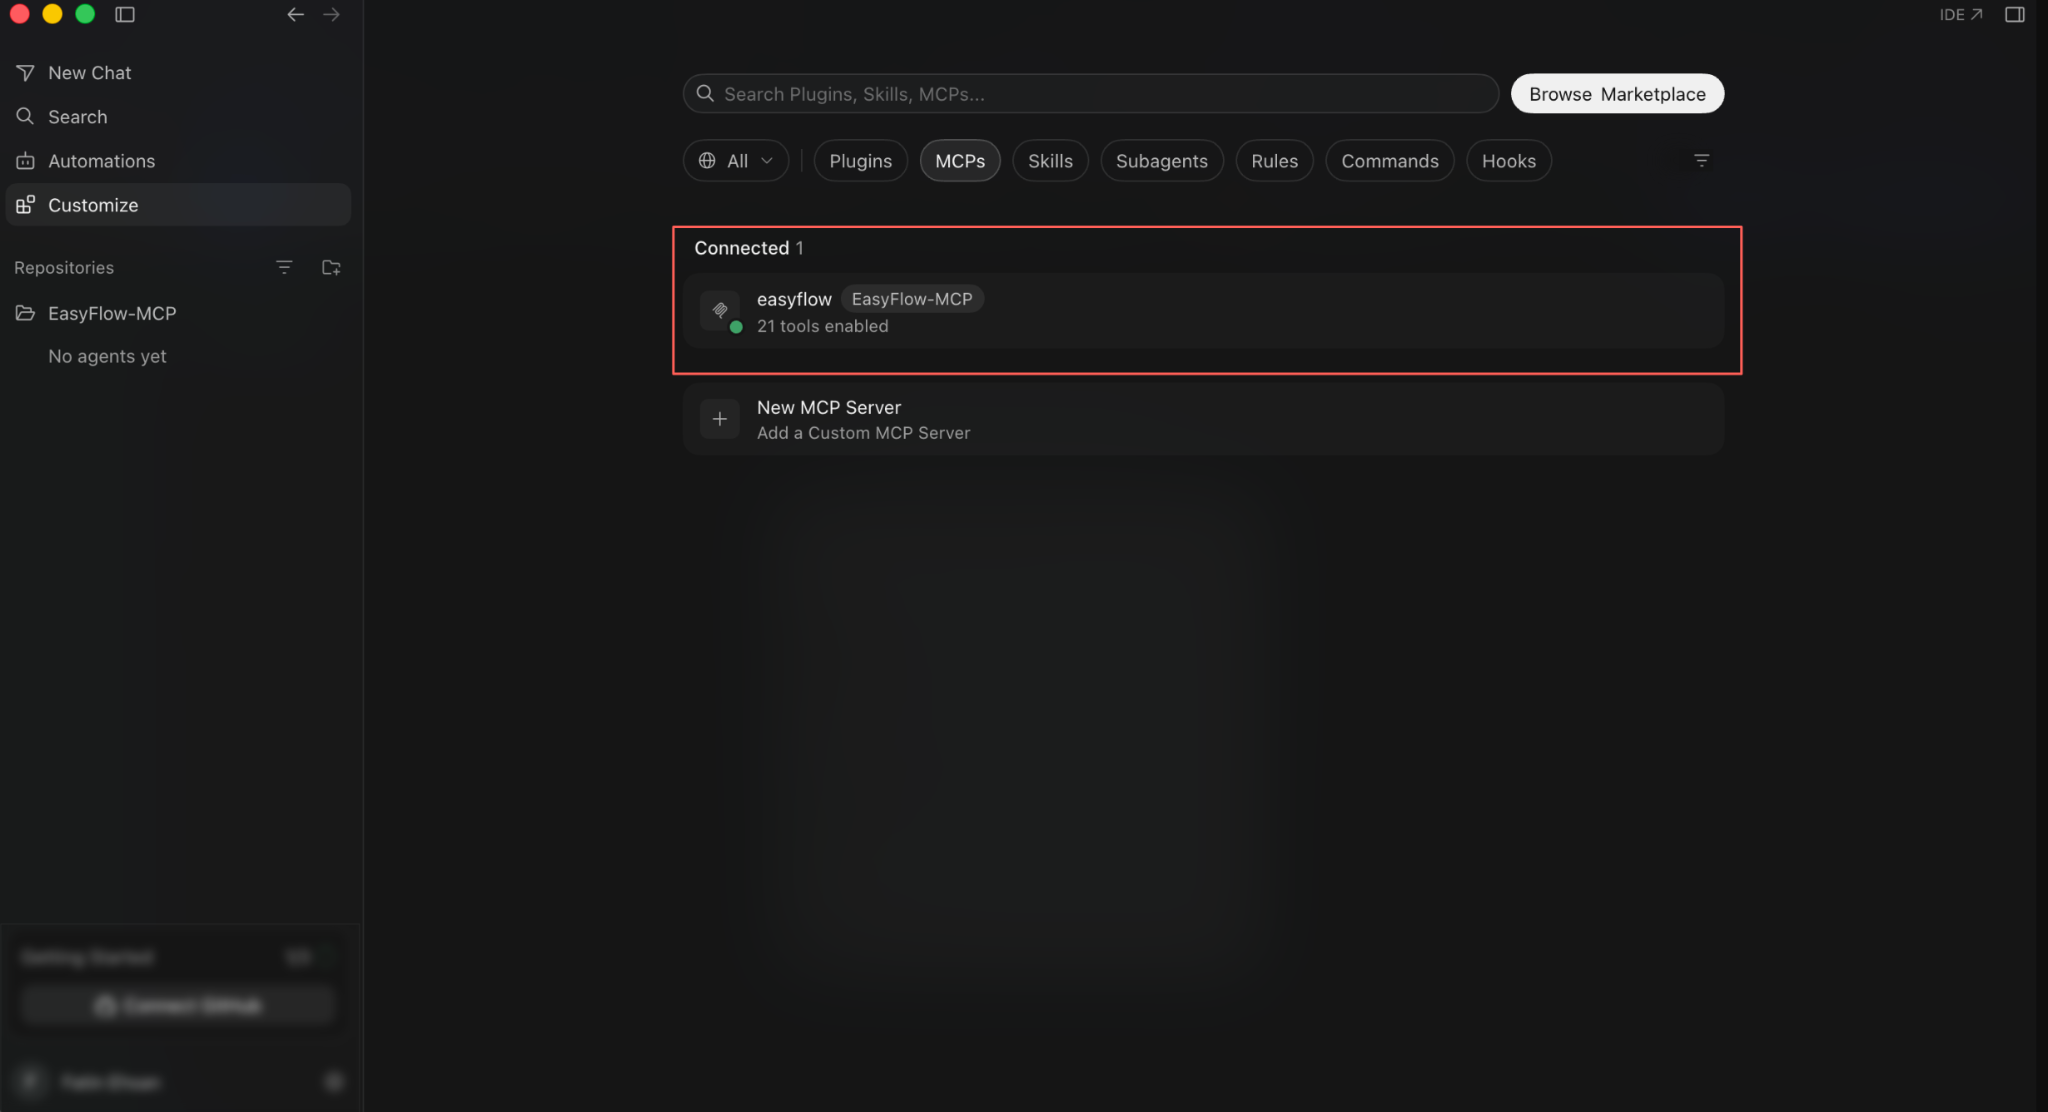
The MCPs panel now lists EasyFlow under Connected rather than Needs Attention, with a green status dot and a count of how many tools are enabled.
Step 7: Ask Cursor to Verify the Connection #
Open a chat in Cursor and ask a simple verification question:
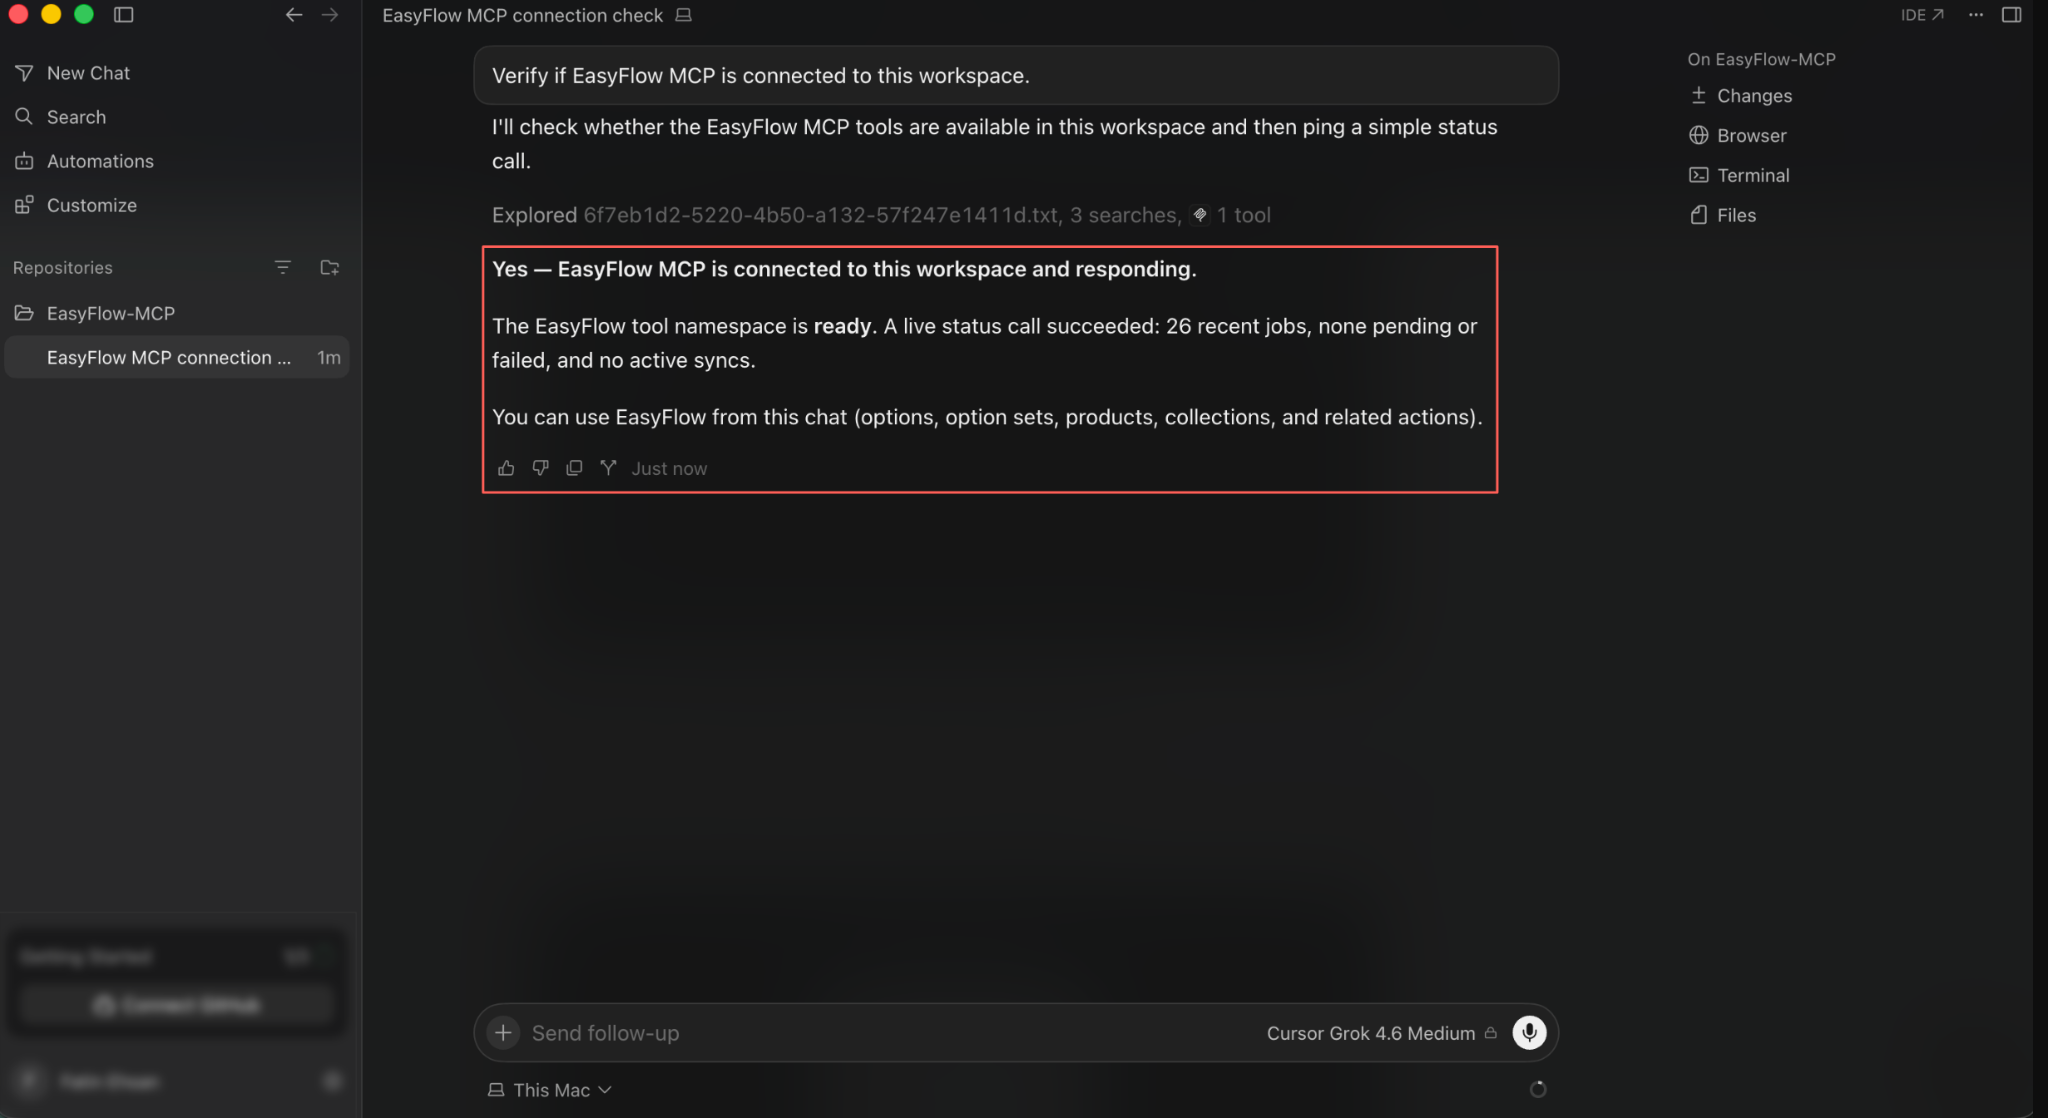
Verify if EasyFlow MCP is connected to this workspace.
Cursor checks the tool namespace, runs a live status call and confirms the connection is working. In this example it reports the EasyFlow tool namespace is ready and that a recent status call found a run of jobs with none pending or failed, meaning the workspace can use EasyFlow for options, option sets, products and collections.
Step 8: Build an Option Set from a Plain Description #
Ask for an option set on a specific product:
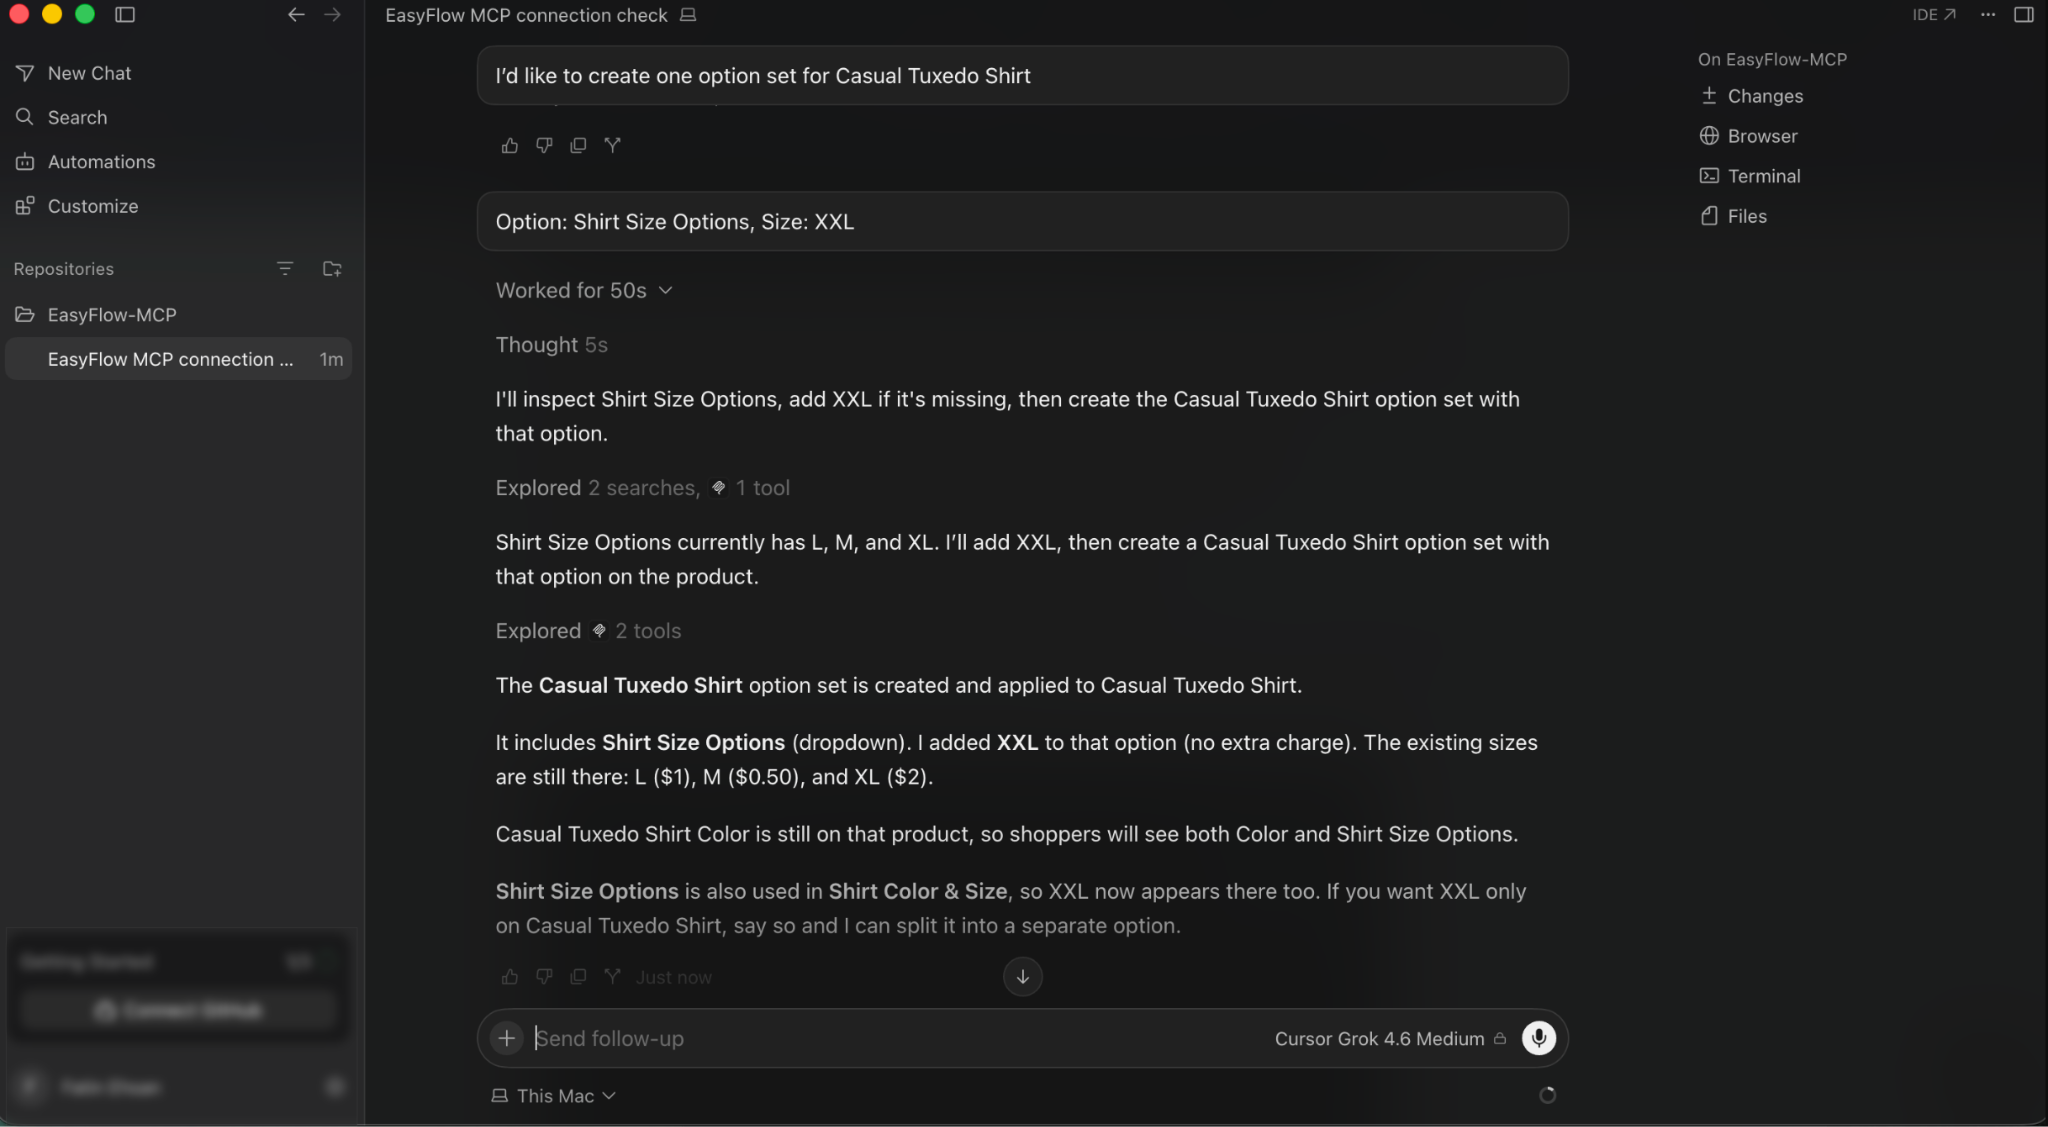
I’d like to create one option set for Casual Tuxedo Shirt
Cursor may ask a follow-up question about which values to include. Answering with something as short as Option: Shirt Size Options, Size: XXL is enough. Cursor inspects the existing Shirt Size Options option, finds it already has L, M and XL, then adds XXL and creates the new option set on the product.
It confirms the result in detail: the Casual Tuxedo Shirt option set is created and applied, XXL is added at no extra charge alongside the existing priced sizes, and because Shirt Size Options is shared with another product, Cursor flags that the new size now appears there too, offering to split it into a separate option if that overlap is not wanted.
Final Outcome #
Open EasyFlow in your Shopify admin if you want to see the same result in the interface. The option set will show Shirt Size Options with four values, and the shared option will list both products it now applies to.
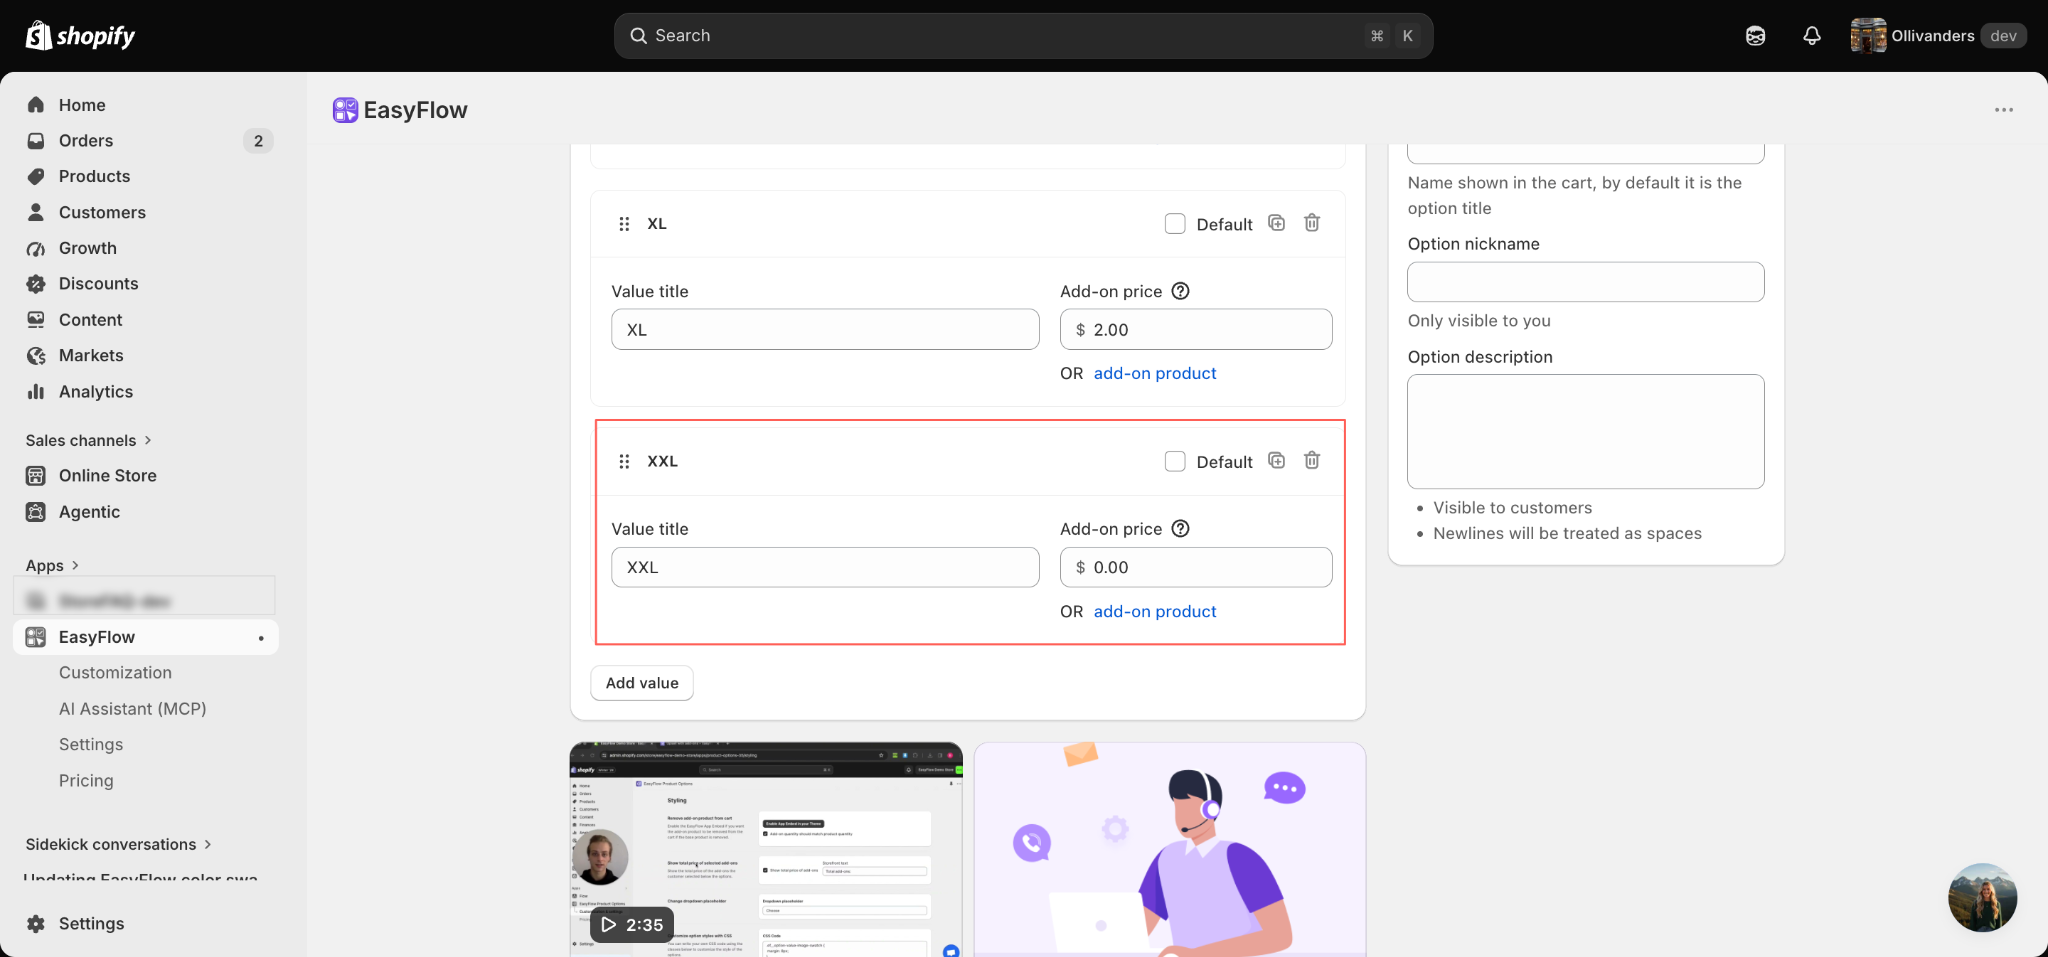
This is how easily you can customize Shopify product options with EasyFlow MCP and Cursor. One configuration adds the server, one sign-in authenticates it and from there the whole EasyFlow toolset is available inside your workspace.
If you get stuck at any step, feel free to reach out to our customer support team. We are always happy to help.


